File GSTR-1
This guide shows you how to prepare your GSTR-1 return in TrackBooks — reviewing the outward-supply data built automatically from your sales invoices, fixing any warnings, and exporting the file you upload to the GST portal.
What this is
GSTR-1 is the monthly (or quarterly) return where you report all your outward supplies — your sales — to the GST department. TrackBooks builds it for you directly from your posted sales invoices, so there's no re-keying. Your job is to review that it's correct and export it; the actual filing happens on the government GST portal using the file TrackBooks produces.
GSTR-1 organises your sales into standard sections. TrackBooks decides which section each invoice belongs to automatically:
| Section | What goes here |
|---|---|
| B2B | Sales to registered customers (those with a GSTIN) |
| B2CL | Large inter-state sales to unregistered customers (above the B2CL threshold) |
| B2CS | Small B2C sales — intra-state (any amount) or small inter-state — aggregated, not invoice-wise |
| CDNR / CDNUR | Credit & debit notes (to registered / unregistered customers) |
| EXP | Exports |
| HSN | An HSN/SAC-wise summary of everything |
| DOCS | The range of document numbers you issued |
Before you begin
- Role required: Admin or Accountant.
- Prerequisites: The sales invoices for the period must be posted — drafts and invoices still in review are not included. (See Create & post a sales invoice.)
- Settings/flags: If your company has multiple GSTIN registrations, each one files its own GSTR-1 — you pick which registration to file at the top of the dashboard.
Step 1 — Choose the GSTIN and period
Go to Reports → GST Reports → GSTR-1 (or GST → GSTR-1). At the top, set:
- Branch / GSTIN — the registration you're filing for.
- Month and Year — the return period.
TrackBooks immediately loads every posted invoice for that GSTIN and period.
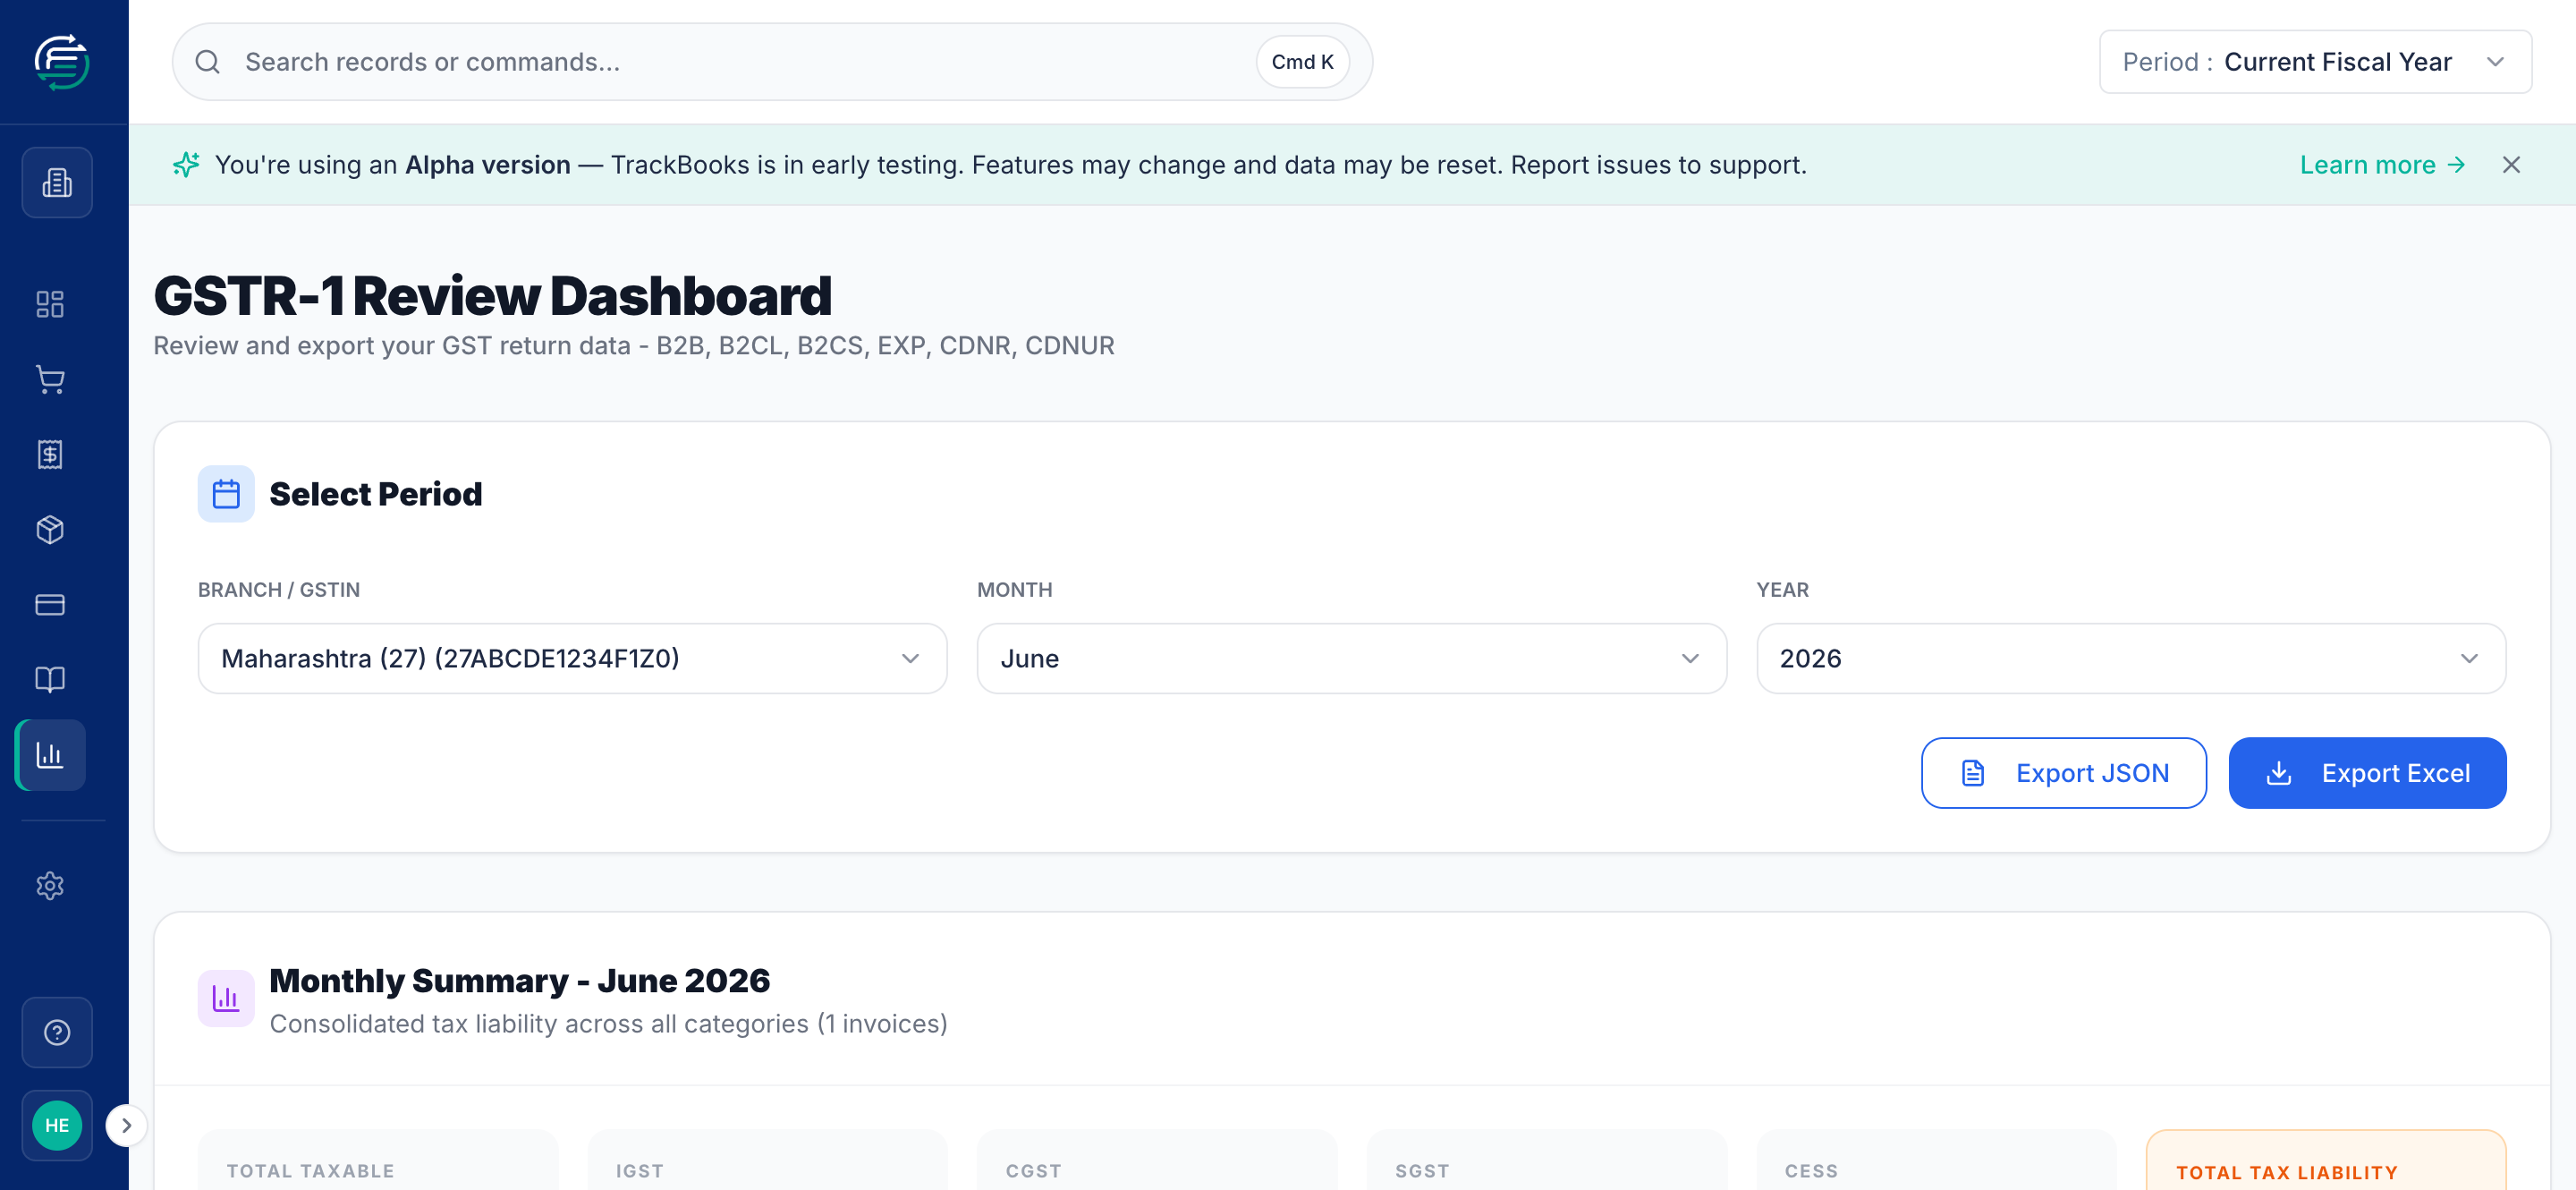
The Monthly Summary at the top is your headline tax liability for the period — total taxable value and the IGST / CGST / SGST / Cess split — consolidated across all sections. In the example above, one posted invoice produces ₹25,000 taxable and ₹4,500 total tax (CGST ₹2,250 + SGST ₹2,250).
Step 2 — Review each section
Work across the section tabs and check the figures. TrackBooks routes each invoice to the right section, so an empty tab simply means you had no supplies of that type.
B2CS (small B2C sales)
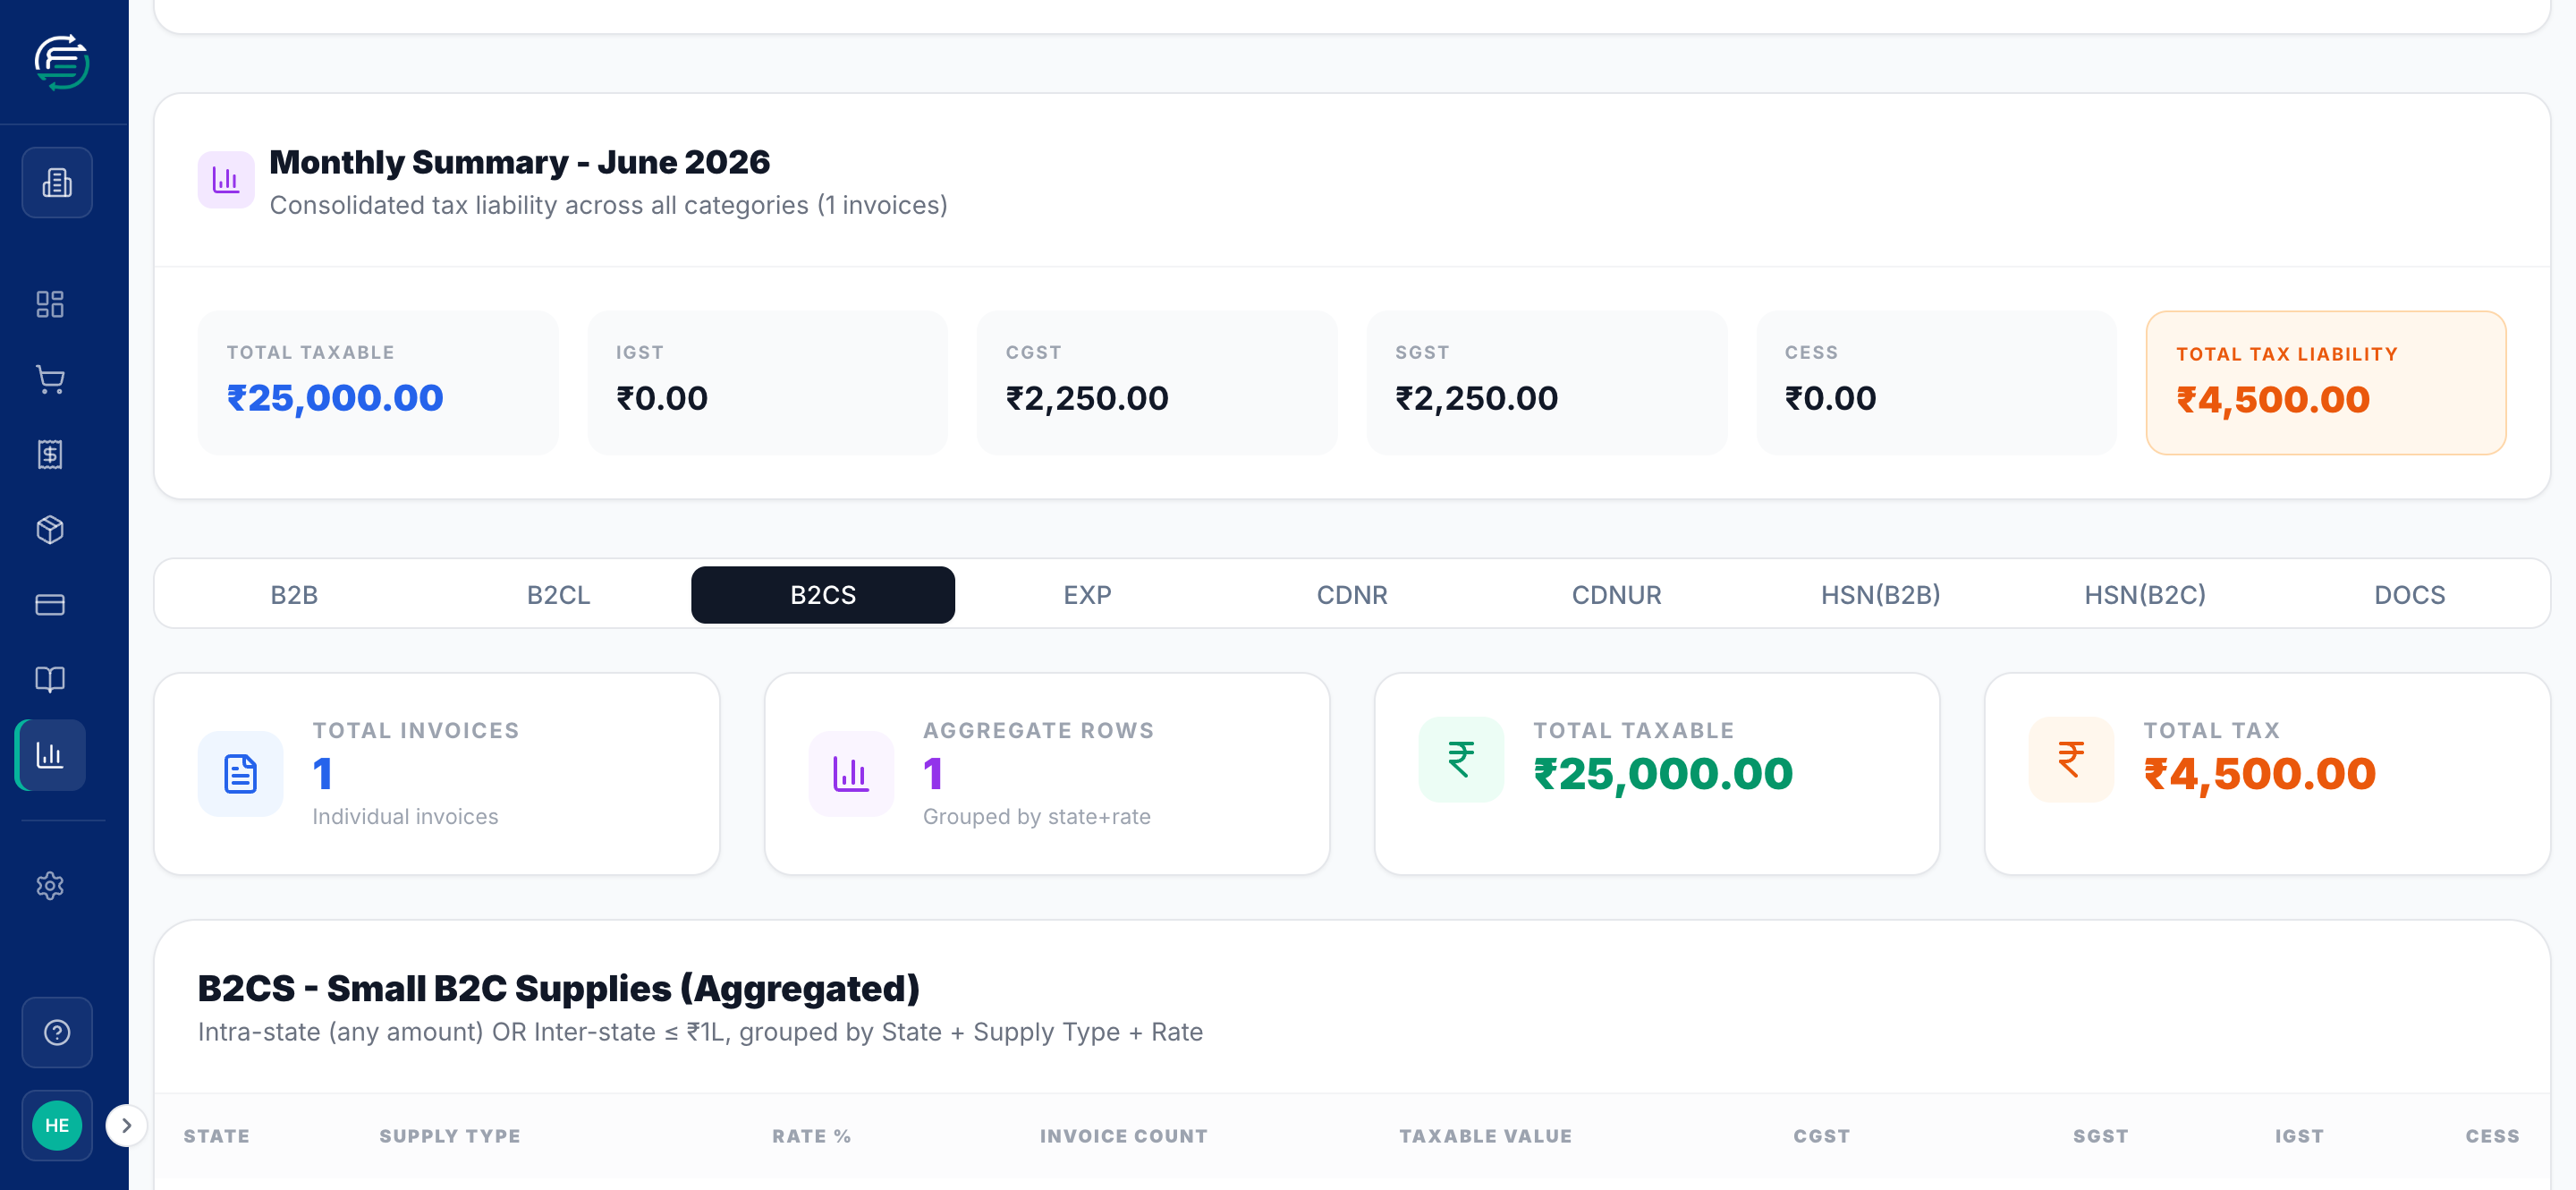
B2C sales are aggregated — grouped by State + Supply Type + GST Rate, rather than listed invoice-by-invoice (that's how the GST portal expects them). Here the sample sale appears as one row: State 27, Intra-State, 18%, ₹25,000 taxable, CGST ₹2,250 + SGST ₹2,250.
Why is my sale in B2CS and not B2B?
A sale lands in B2B only when the customer has a GSTIN. With no customer GSTIN it's a B2C sale: intra-state (or small inter-state) B2C goes to B2CS, while large inter-state B2C goes to B2CL.
HSN summary
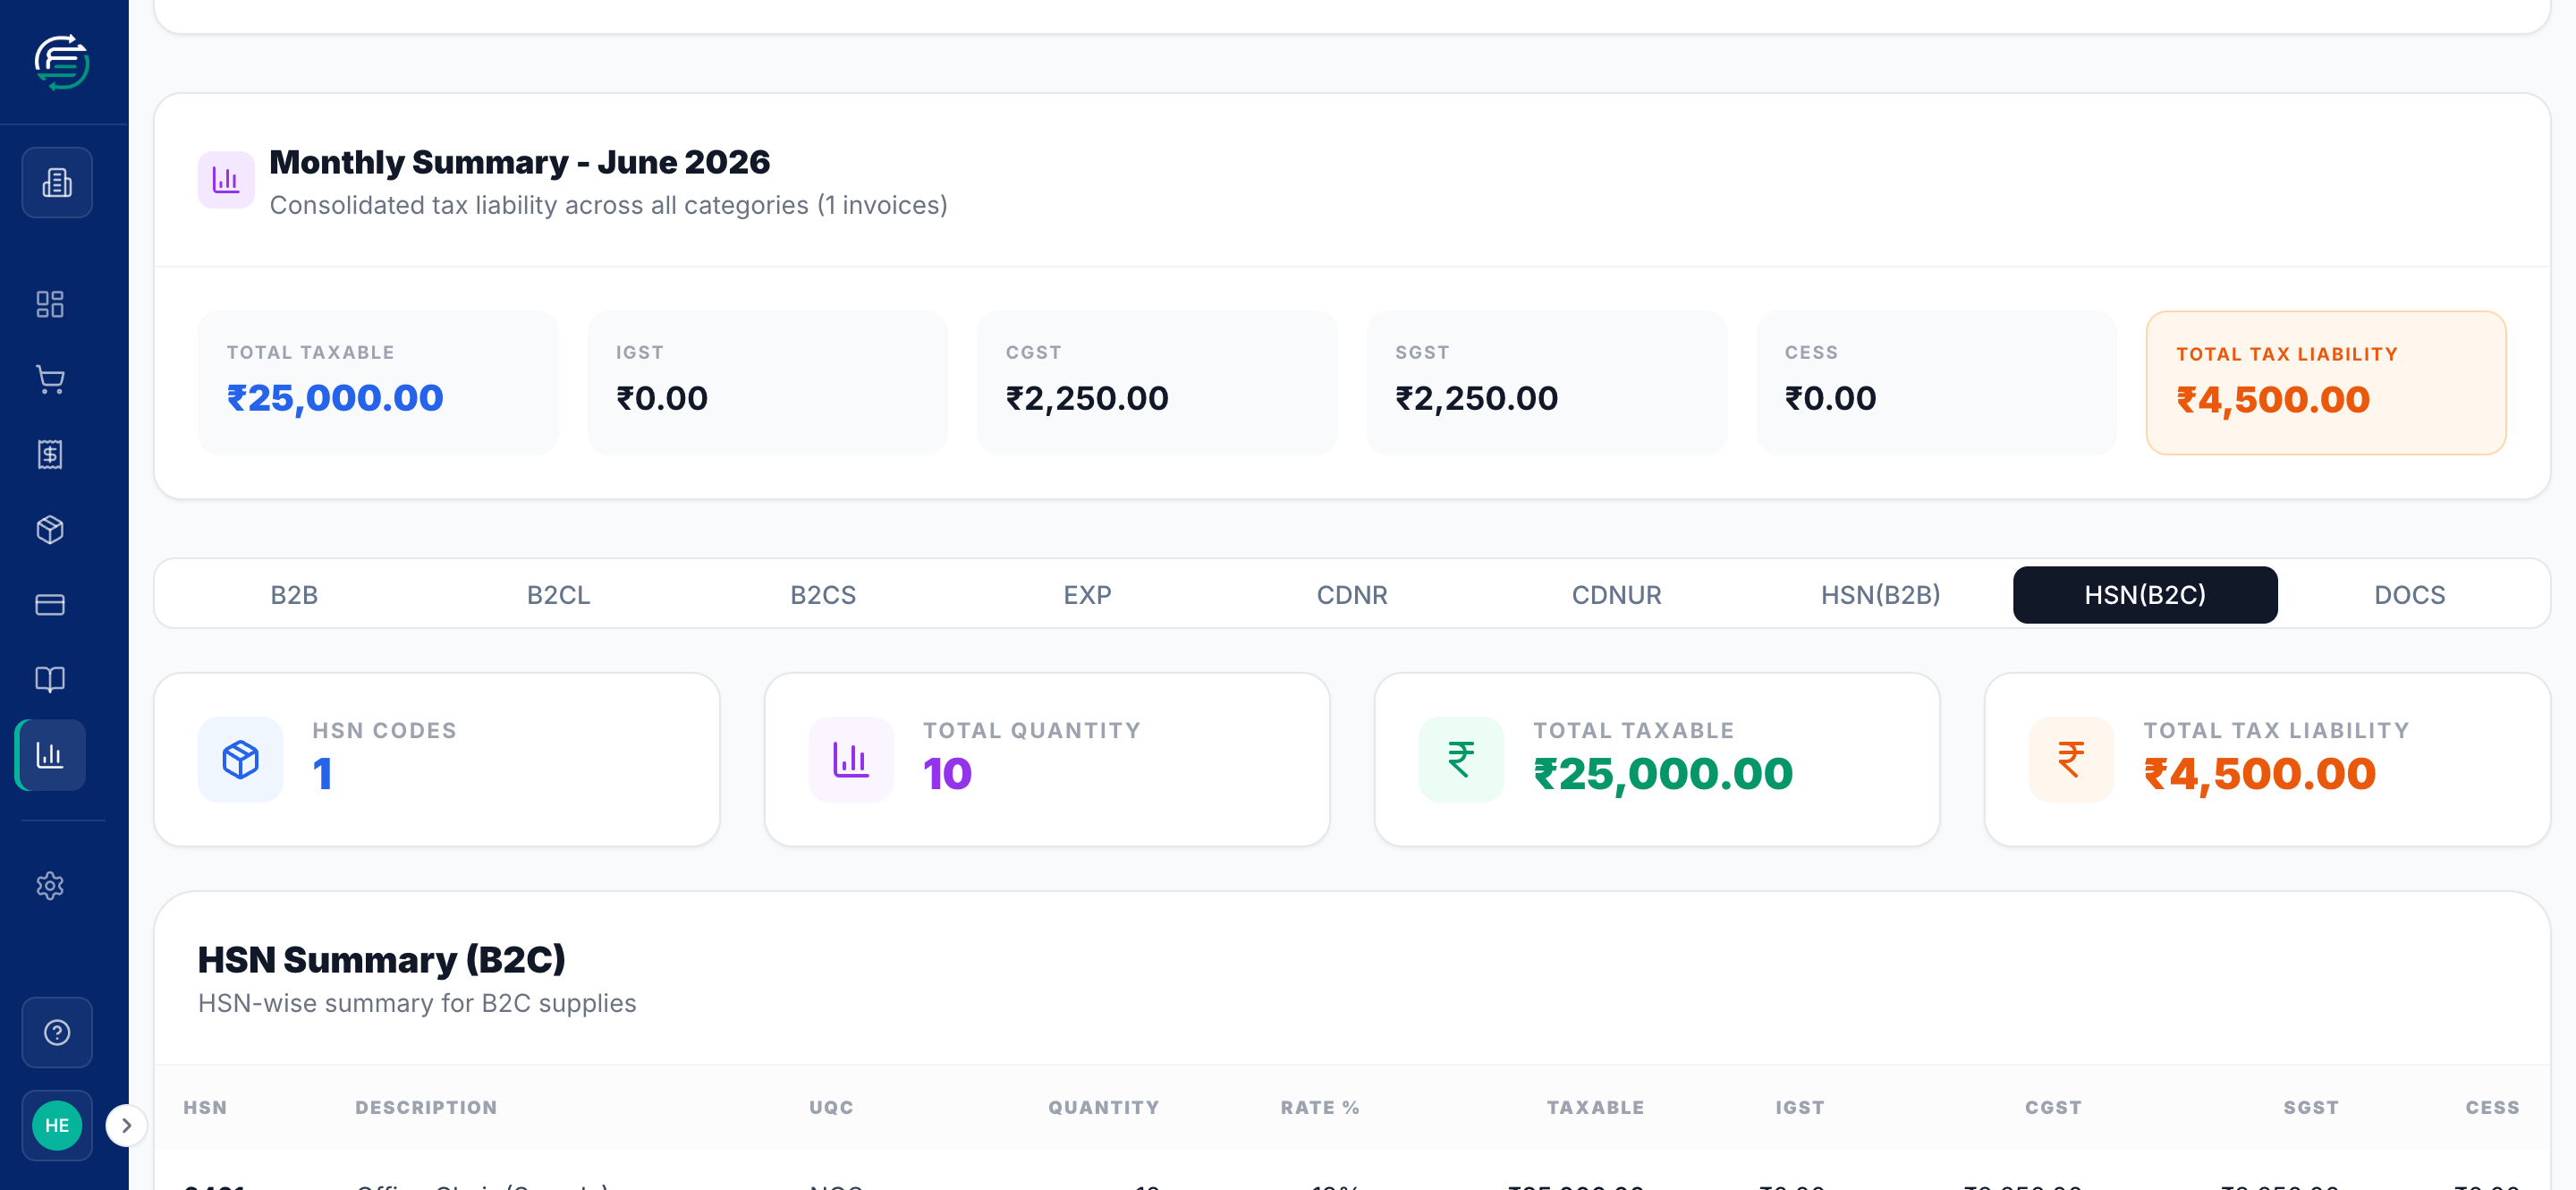
The HSN tab summarises all supplies by HSN/SAC code, quantity, rate, and tax — a mandatory part of the return. Make sure every line item has an HSN code, or it won't appear here.
Document summary (DOCS)
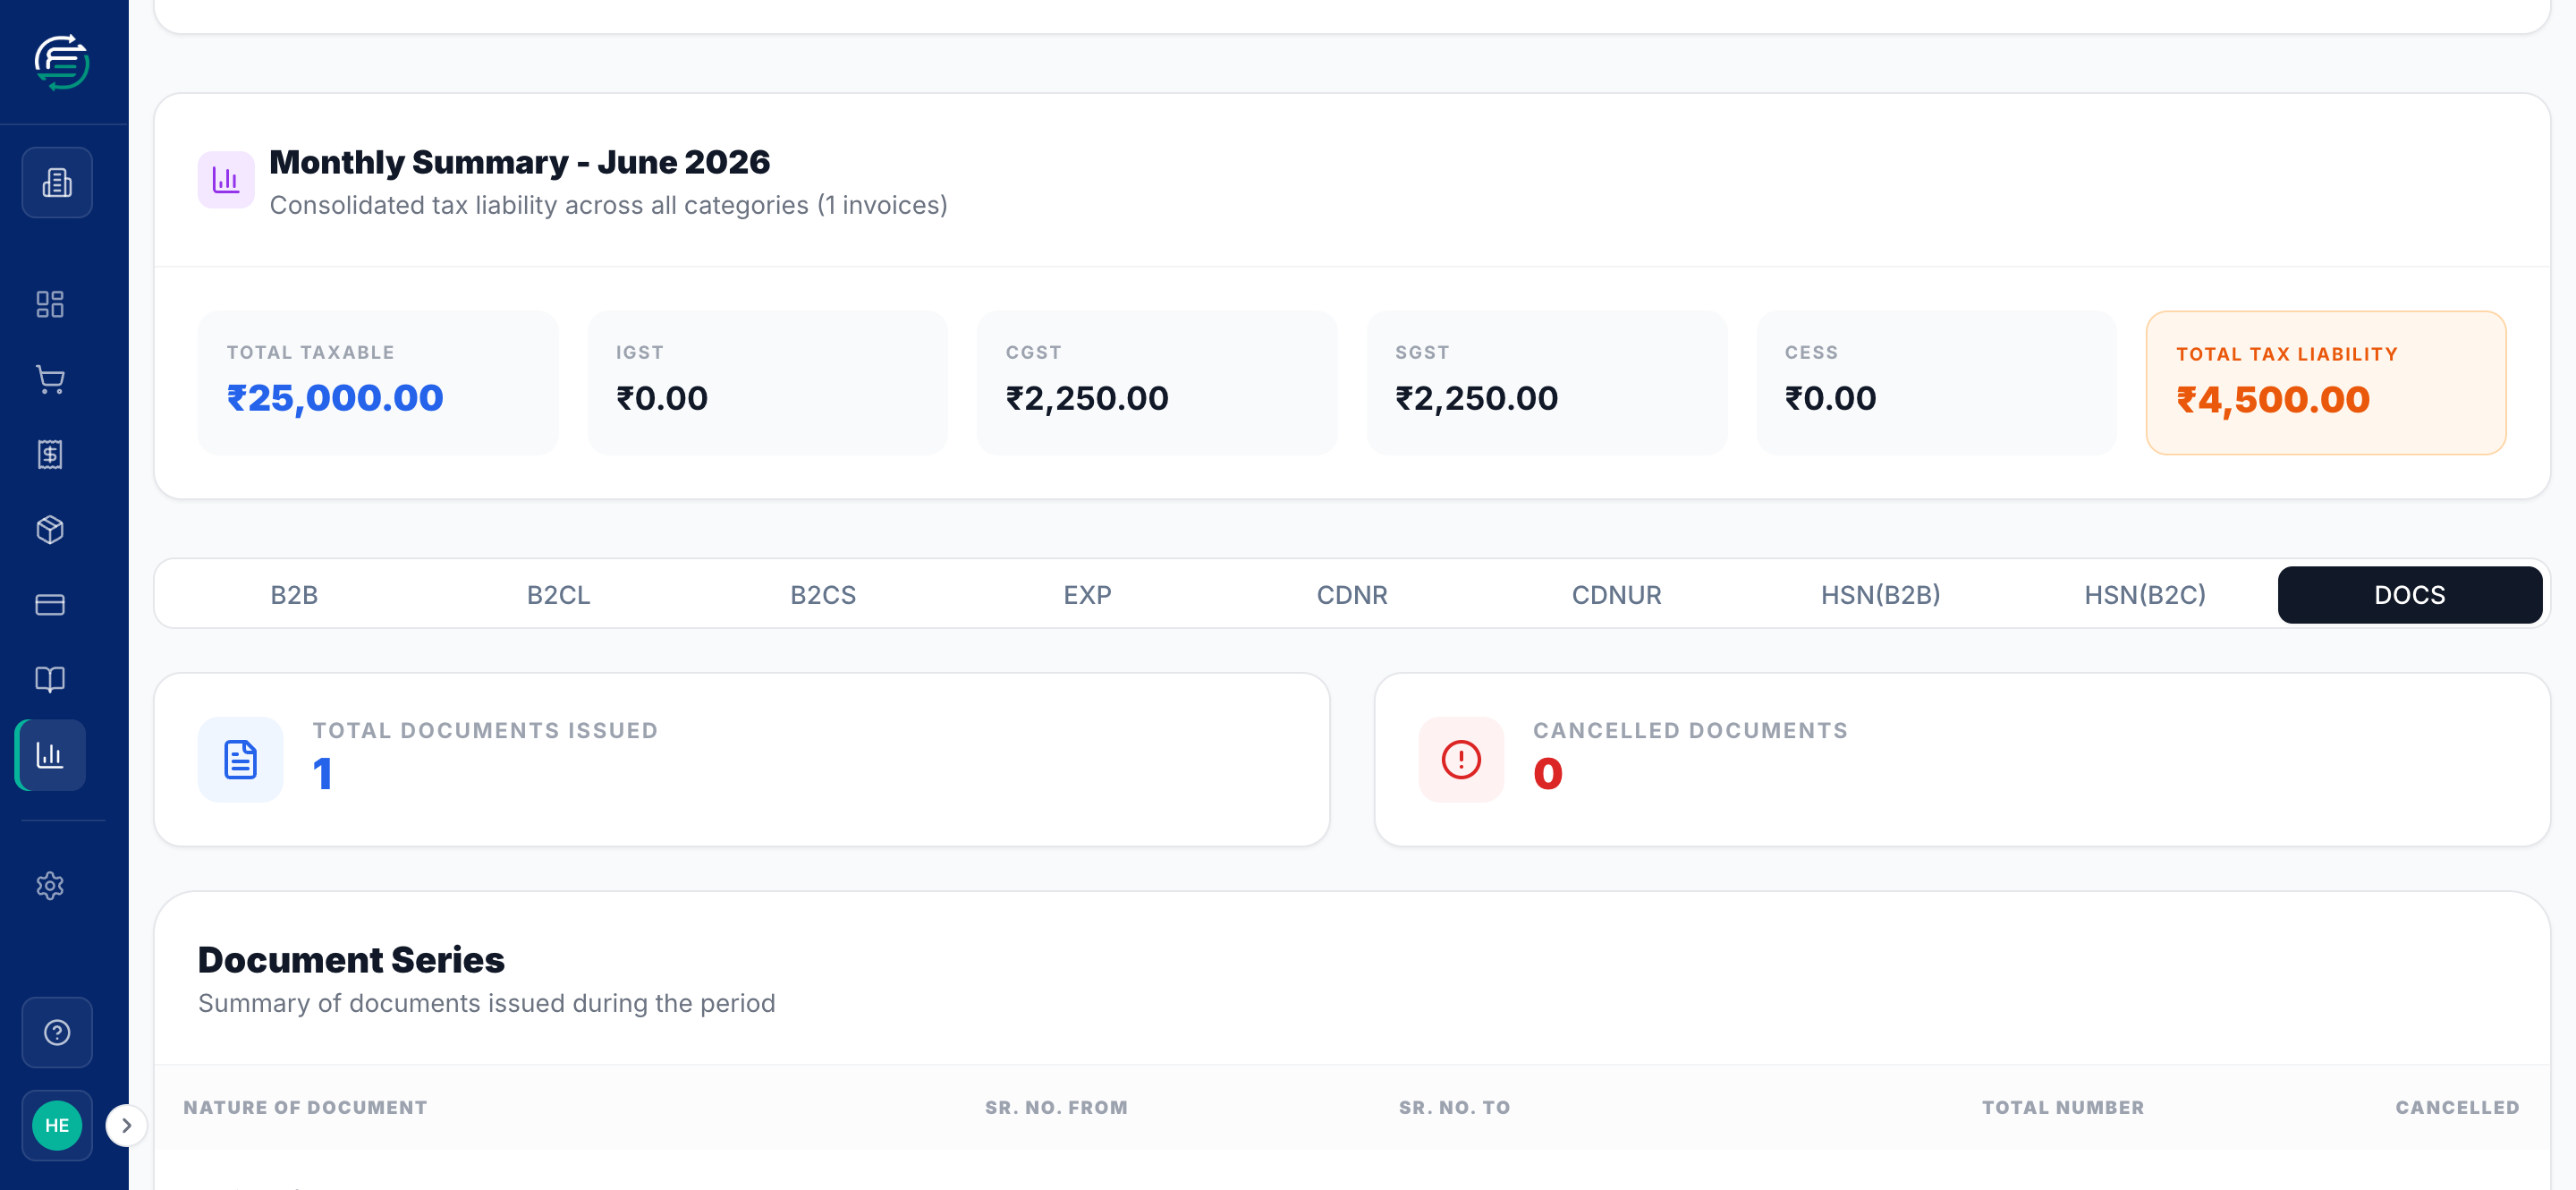
The DOCS tab lists the range of document numbers you issued in the period (from / to,
total, and how many were cancelled) — here, invoices INV-0001 to INV-0001.
Step 3 — Clear any warnings
Each section shows a Warnings count. Warnings flag things the GST portal may reject — a missing customer GSTIN on a B2B sale, a missing HSN code, or a CGST/SGST-vs-IGST mismatch for the supply type. Fix these on the underlying invoice (correct it and re-post if needed), then come back; the dashboard refreshes from the posted data.
Only posted invoices are included
If your GSTR-1 totals don't match your books, the most common cause is a draft or in-review invoice that hasn't been posted yet — it won't appear here until it's posted. Also confirm you've selected the right period and GSTIN.
Step 4 — Export for filing
Once the data looks right, use the two export buttons:
- Export Excel — a multi-sheet workbook (one sheet per section) for a final human review or your records.
- Export JSON — the file in the official GSTN format. This is the file you upload to the GST portal to file the return.
Click Export JSON, save the file, then log in to the GST portal and upload it there to complete filing. (TrackBooks prepares and validates the return; the submission itself happens on the portal.)
Tips & common issues
Review the Excel before you file
Exporting the Excel and skimming the section sheets is the quickest way to spot a mis-classified invoice or an odd rate before you upload to the portal.
Multiple GSTINs file separately
Each GST registration has its own GSTR-1. If you operate in several states, switch the Branch / GSTIN selector and export a separate JSON for each one.
Rate-wise splitting is automatic
An invoice with items at different GST rates is split into one row per rate in GSTR-1 — TrackBooks handles this for you, so a single invoice may show as multiple rows in a section.
Related guides
- Create & post a sales invoice — the source of all GSTR-1 data.