Create and post a purchase bill
This guide shows you how to record a purchase bill (a vendor's invoice to you) in TrackBooks — entering it, reviewing the accounting and input-tax credit, and posting it to your books.
What this is
A purchase bill records something you bought from a vendor. It's the mirror image of a sales invoice and follows the same lifecycle — Draft → Review → Posted — but on the buying side:
- The amount becomes a payable to the vendor (money you owe).
- The GST you paid becomes Input Tax Credit (ITC) you can claim against your output GST.
As with invoices, you can enter a bill manually or upload the vendor's document for AI extraction; both meet at the same review screen before posting.
Before you begin
- Role required: Admin or Accountant.
- Prerequisites: Ideally the vendor exists (see Manage customers & vendors) — though you can create one inline while entering the bill.
- AI credits: Only the upload path uses credits.
Step 1 — Enter the bill
Go to Purchases → Bills → Create new bill (or Upload Bills to use AI extraction). Fill in:
- Bill Number — the vendor's invoice number (you type it; unlike sales invoices, this is not auto-generated, because it's the vendor's number, not yours).
- Bill Date and optional PO Number.
- Vendor Name and Vendor GSTIN — type a vendor to select or create one.
- Place of Supply — drives the CGST+SGST vs IGST split, exactly as on a sales invoice.
- Line items — description, HSN/SAC, quantity, rate, and GST %. Each row has a Claim ITC checkbox (ticked by default).
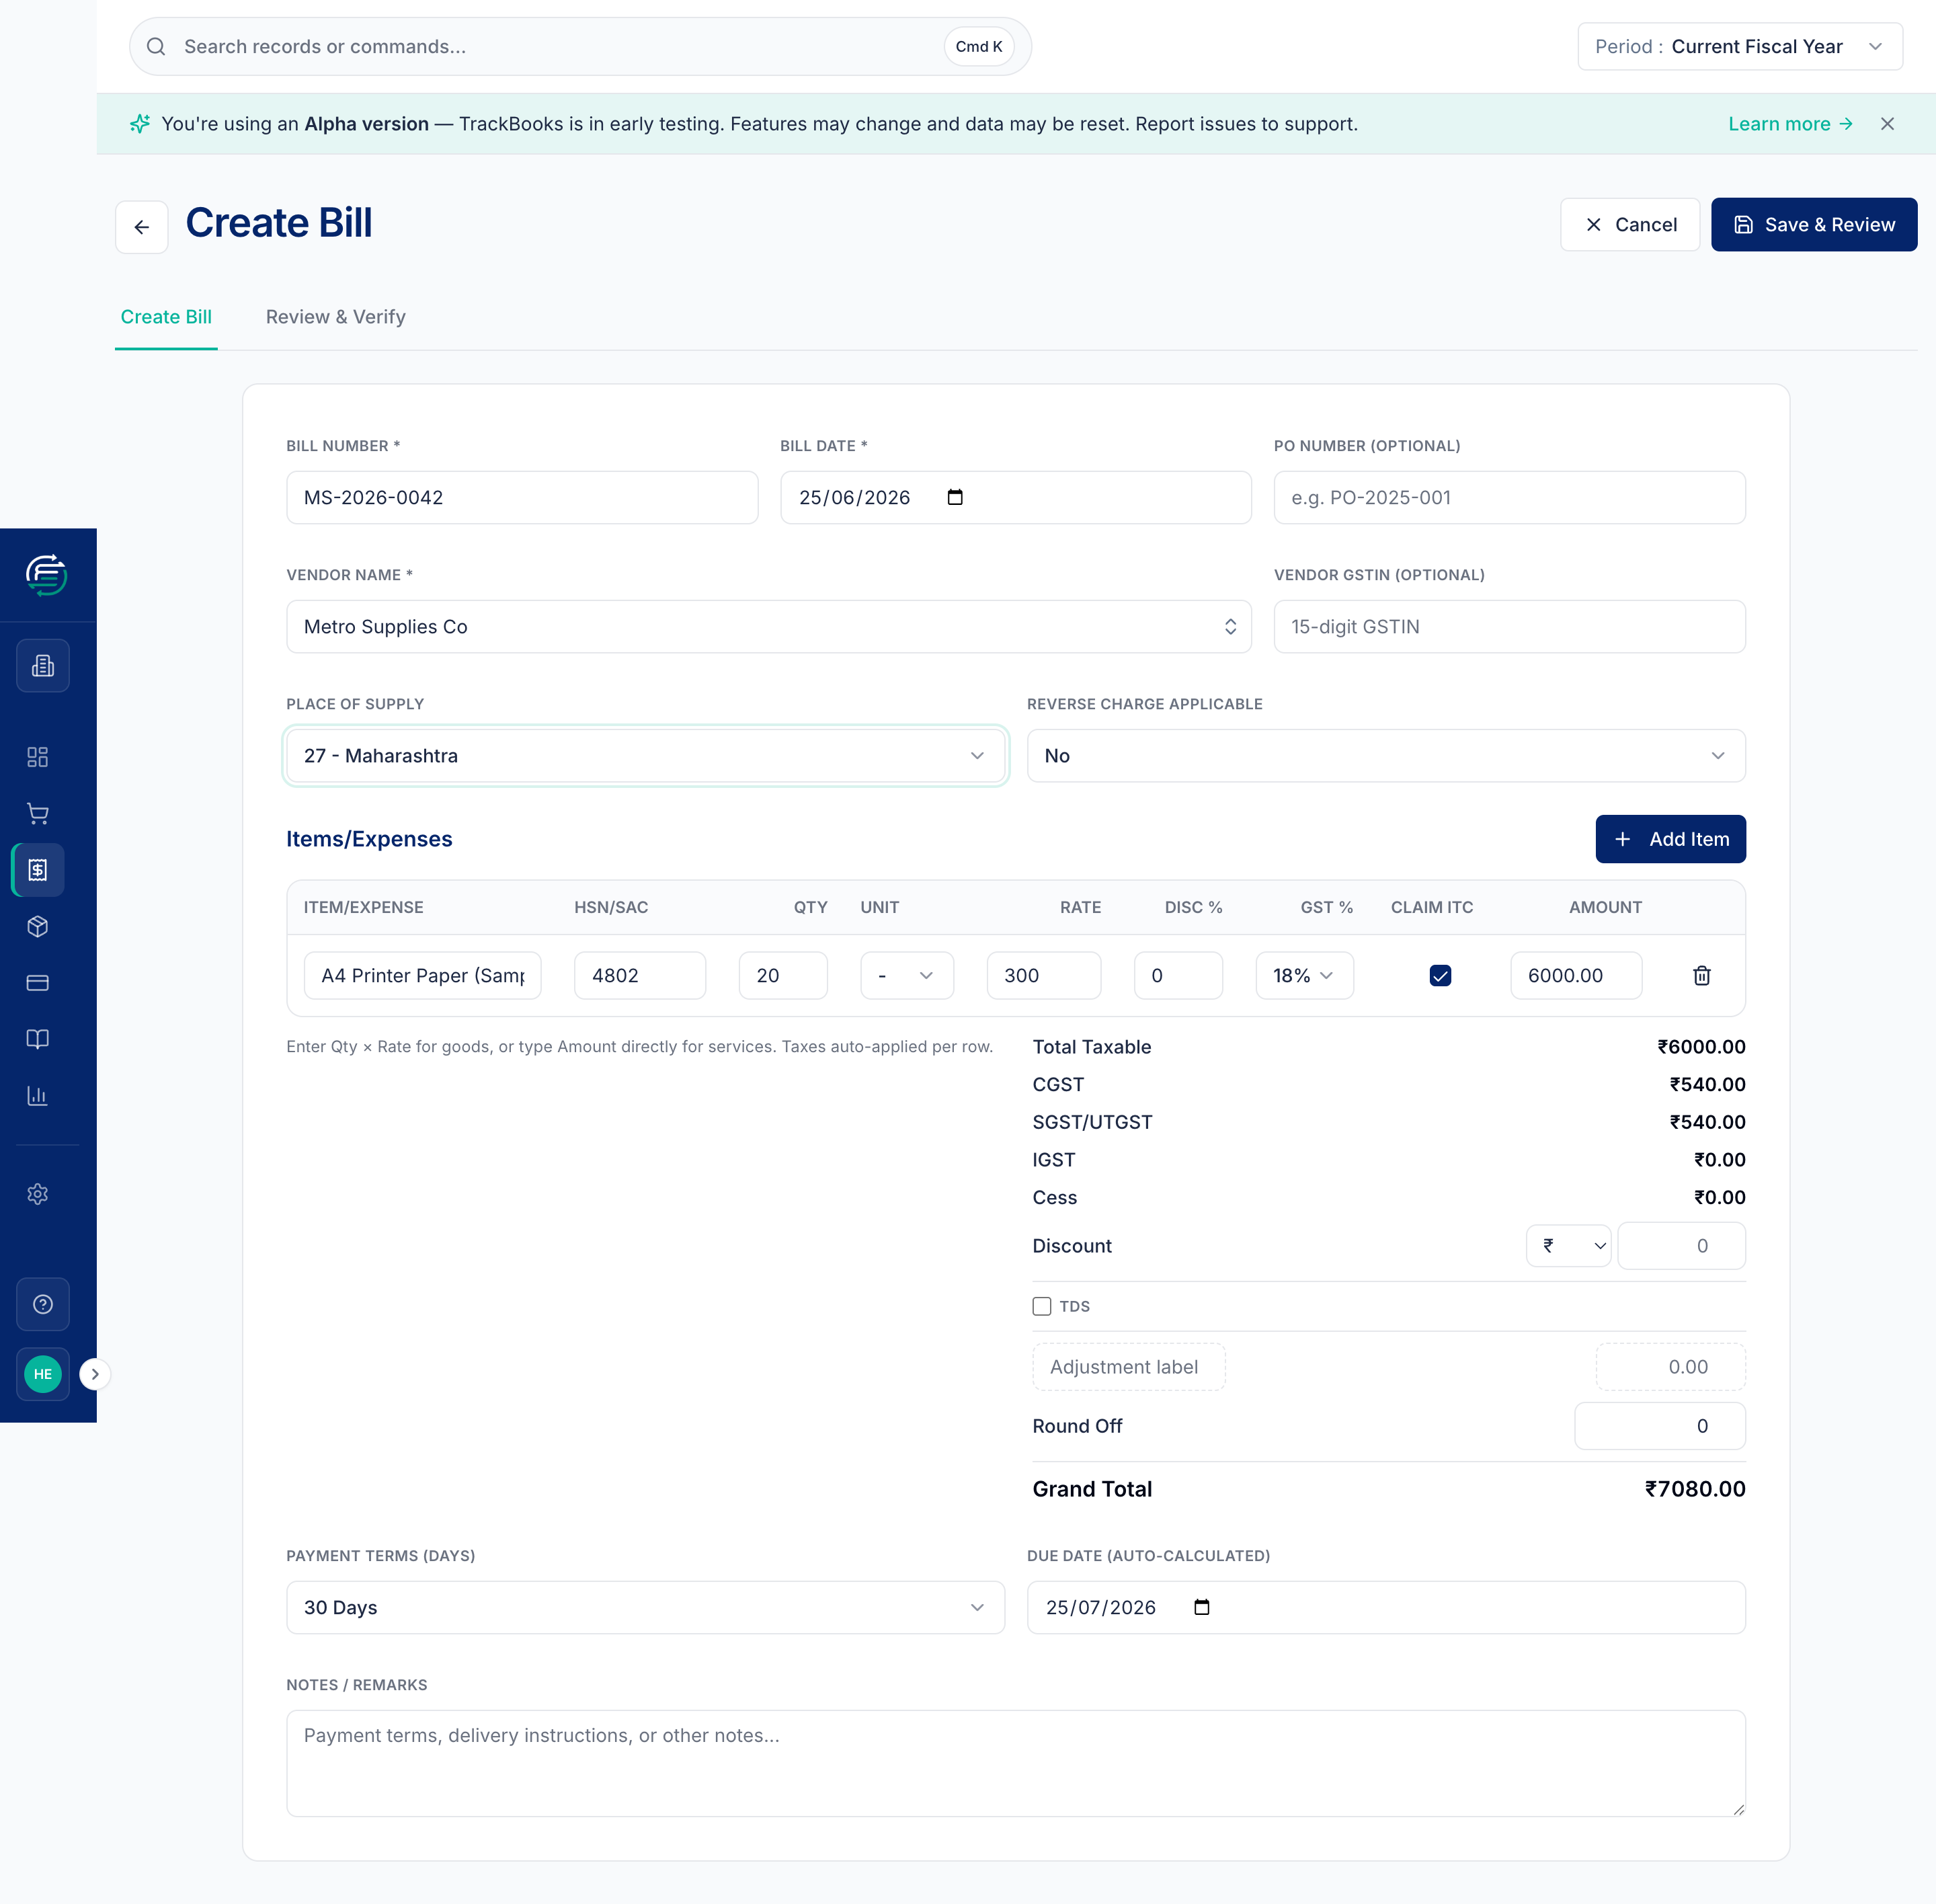
Claim ITC — leave it ticked for eligible purchases
Input Tax Credit lets you offset the GST you paid on purchases against the GST you collected on sales. Keep Claim ITC ticked for normal business purchases. Untick it only for items where ITC is blocked (e.g. certain personal-use or exempt items).
Click Save & Review.
Step 2 — Review the bill and its journal
The review screen mirrors the sales invoice, but the Journal preview is the buying-side double-entry:
| Account | Debit | Credit |
|---|---|---|
| Purchases | ₹6,000 | |
| CGST Input | ₹540 | |
| SGST Input | ₹540 | |
| Vendor (Trade Payables) | ₹7,080 |
Note the GST lines are Input (an asset you'll reclaim), and the vendor is credited (you now owe them). The preview must read Balanced before you can post.
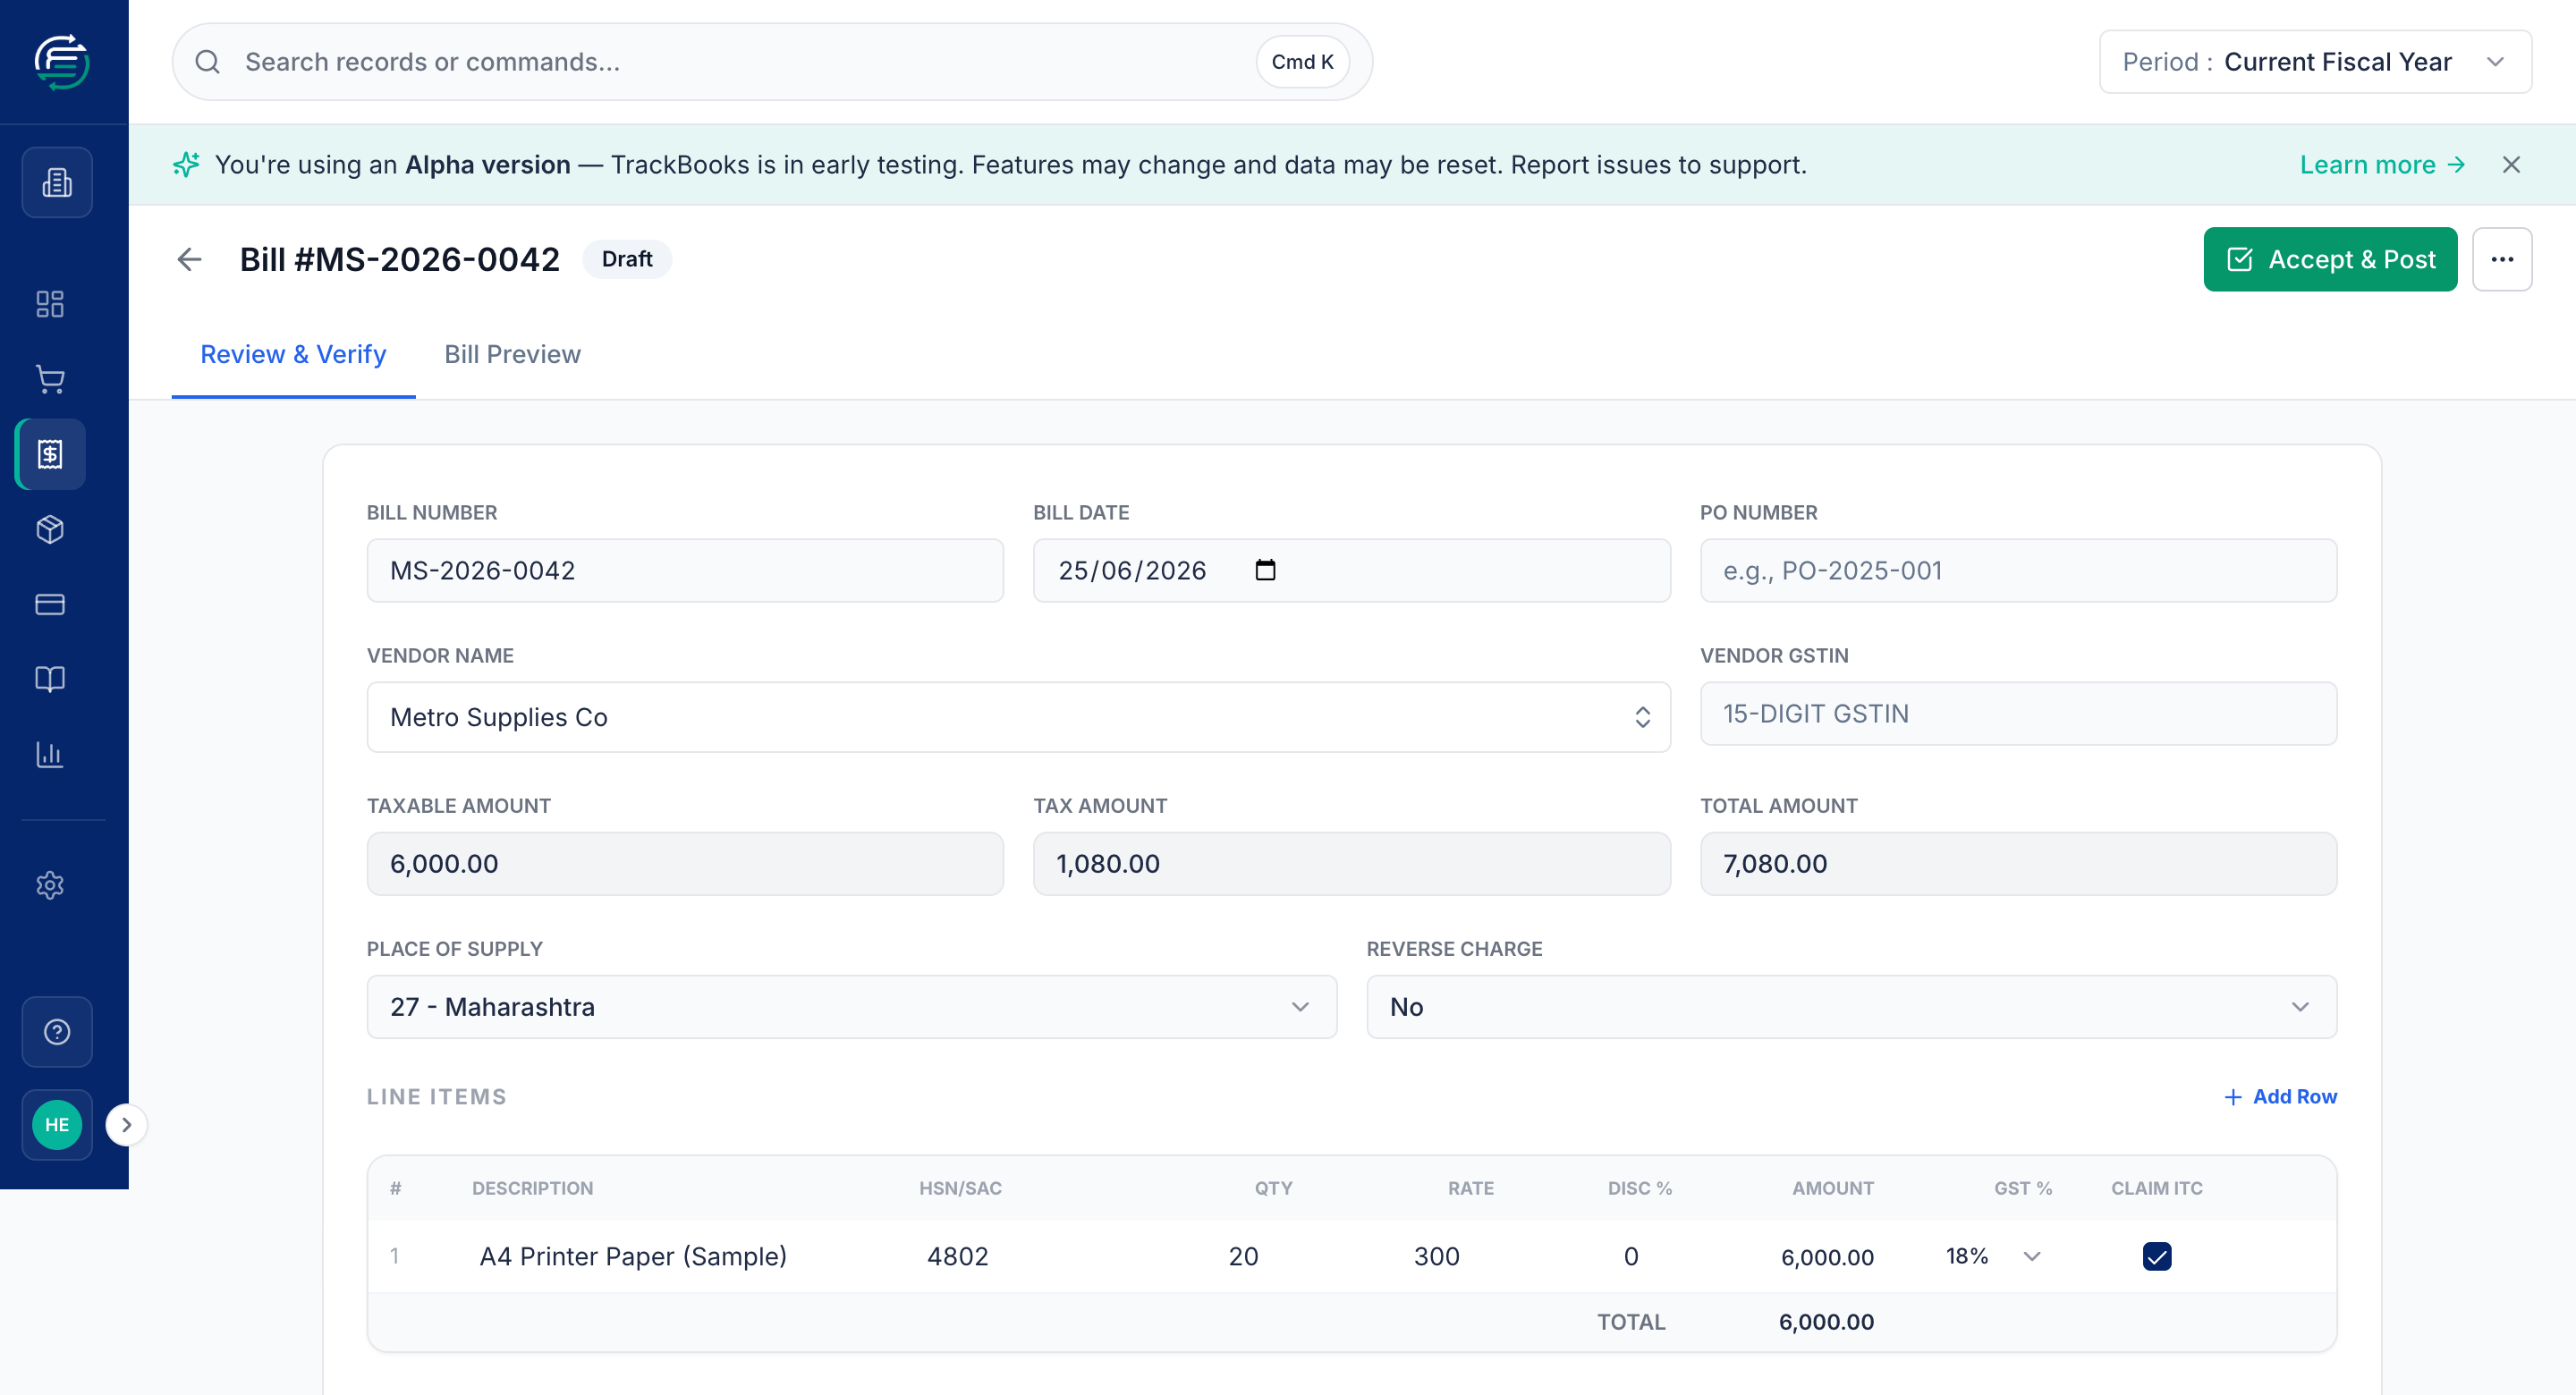
Step 3 — Accept & Post
Click Accept & Post. The status changes to Posted, the journal entry is created
(e.g. JE-20260625-0003), and your payables and Input GST update. The action button
becomes Record Payment.
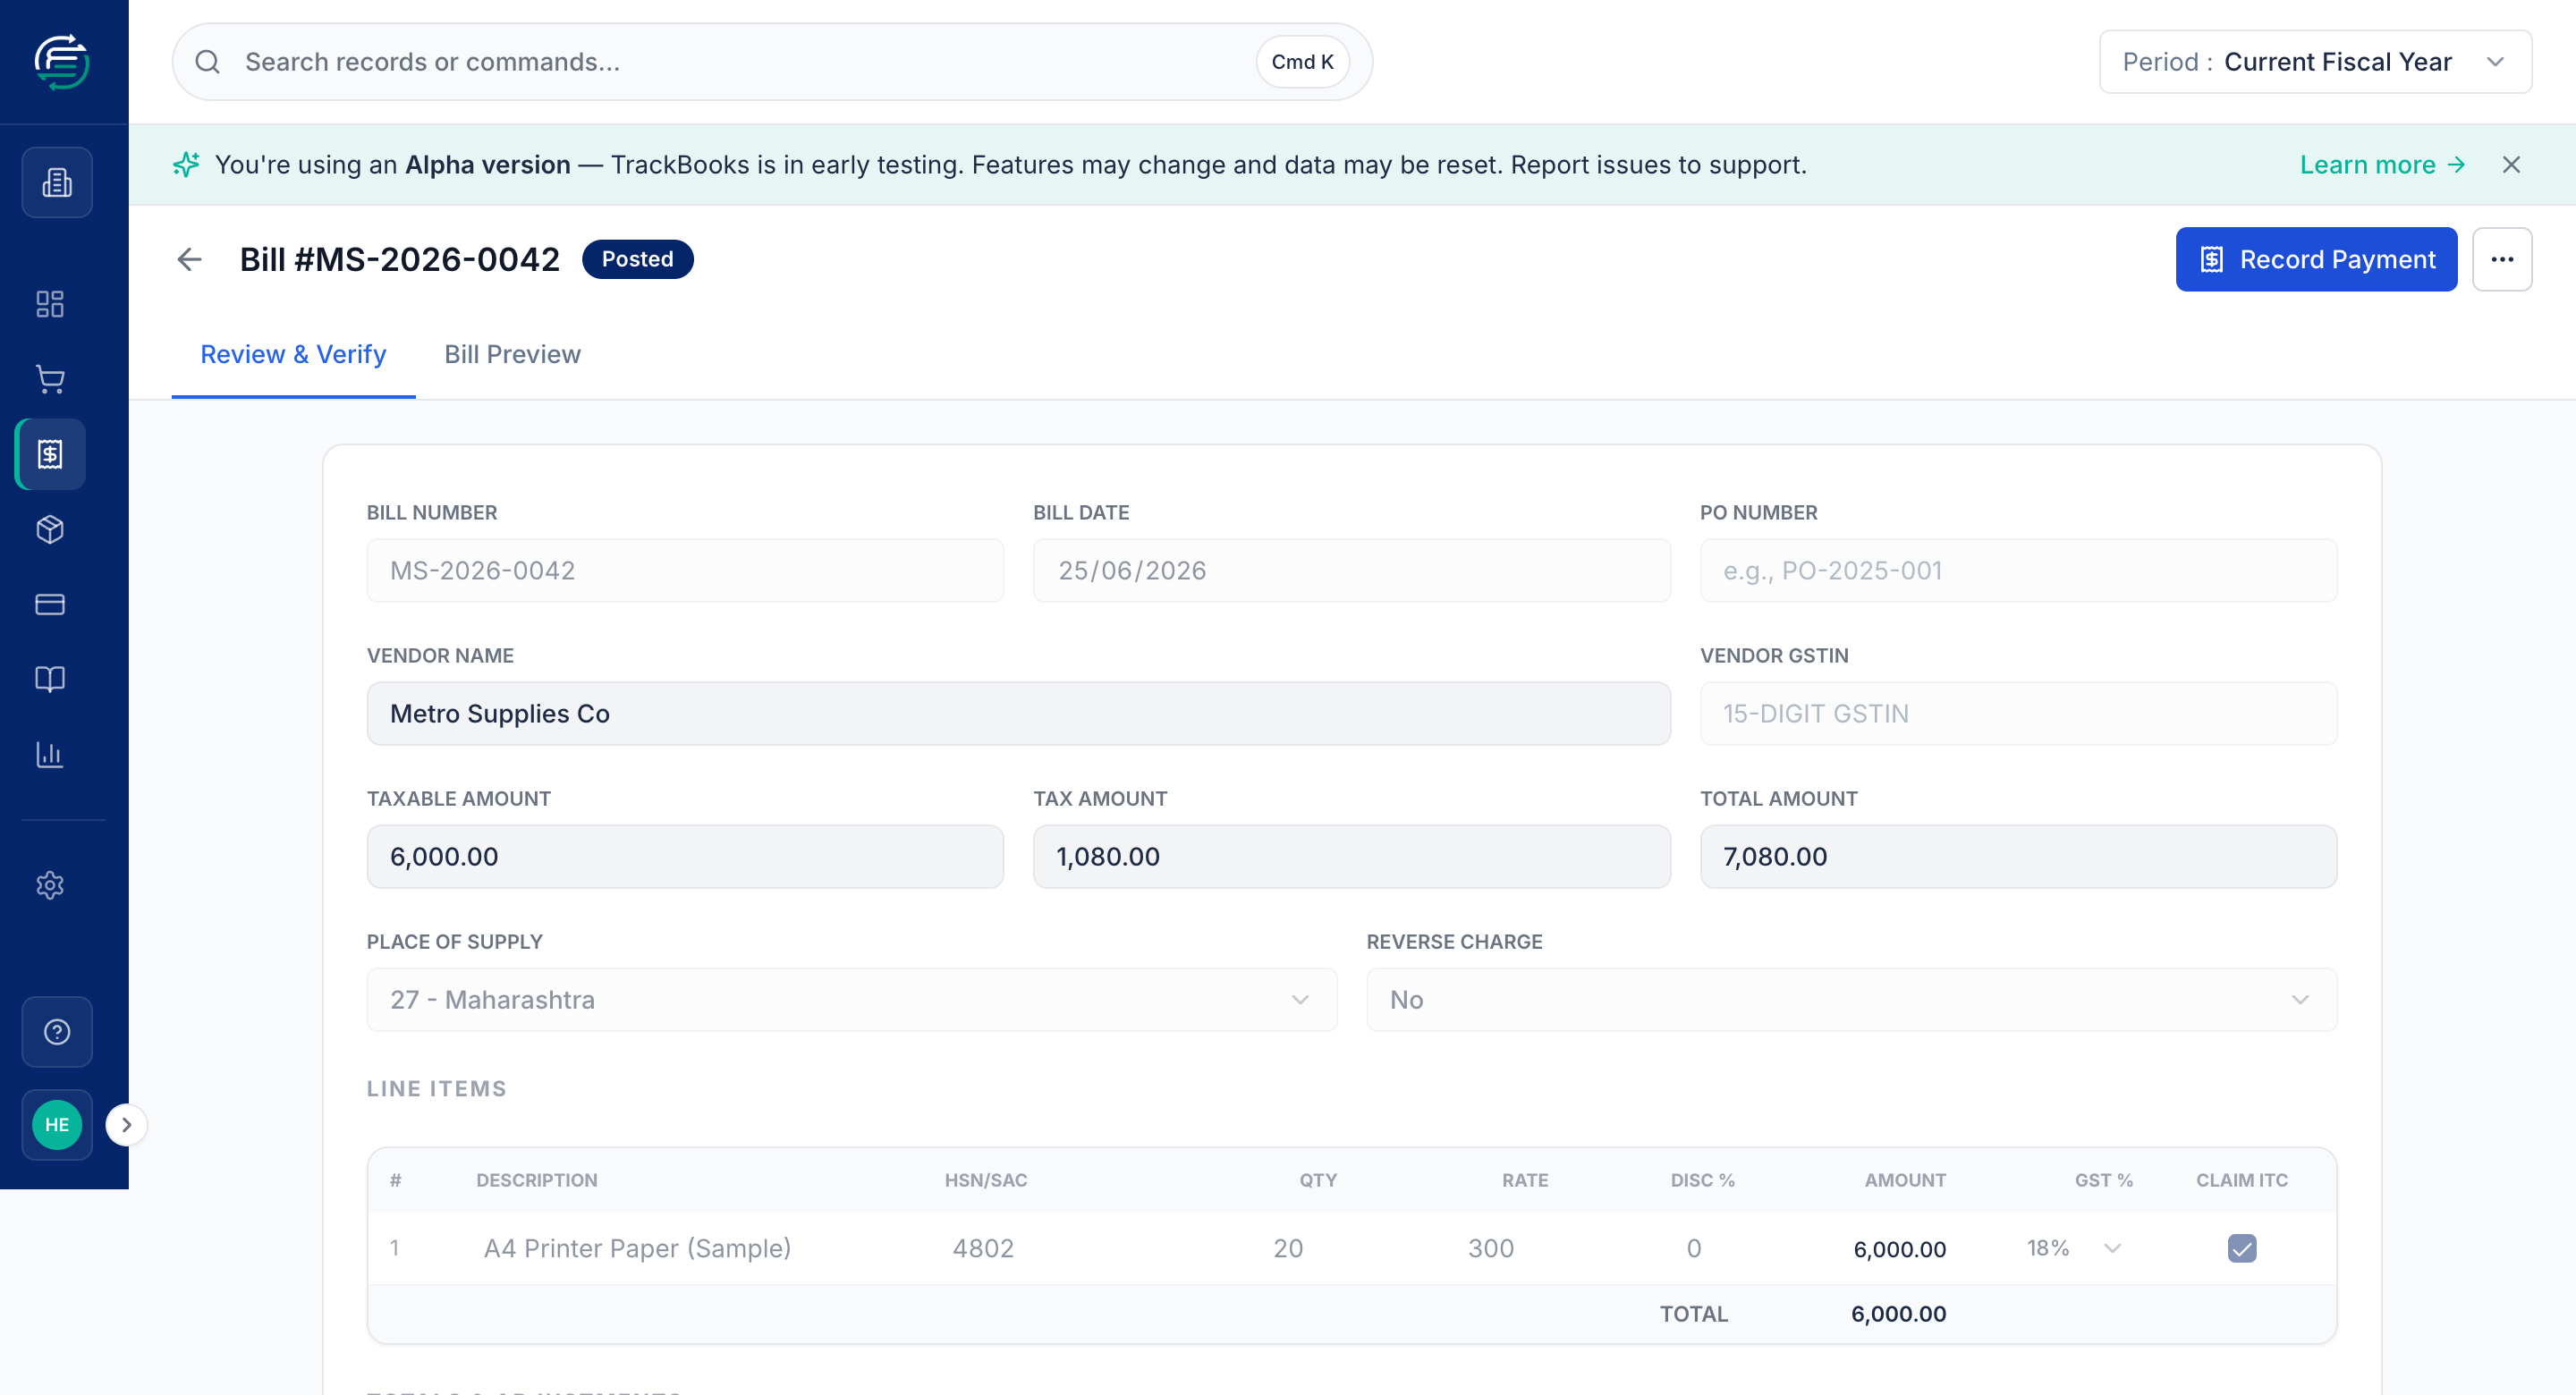
Your bill is now in your books, your payables, and — via Input GST — your GST returns.
Tips & common issues
Record what you pay the vendor
Use Record Payment to mark the bill paid (fully or partly). That posts Dr the vendor / Cr your bank, and moves the bill from Unpaid → Partial → Paid.
Void, don't delete, a posted bill
Like invoices, a posted bill is voided (which posts a reversing entry and preserves the audit trail), not hard-deleted. Only unposted drafts can be deleted.
MSME vendors and overdue payables
If the vendor is flagged MSME, overdue amounts owed to them surface in the Schedule III disclosure — another reason to keep vendor records accurate.
Related guides
- Create & post a sales invoice — the selling-side mirror.
- Reconcile GSTR-2B — match your ITC against the GST portal.
- Manage customers & vendors