Reconcile a bank statement
This guide shows you how to bring your bank statement into TrackBooks and reconcile it — confirming that every line on your bank statement is accounted for in your books, and posting anything that isn't.
What this is
Reconciliation is the process of matching what your bank says happened (the statement) against what your books say happened (your ledger entries), so the two agree. In TrackBooks the workspace has two sides:
- In Books — bank-ledger entries you've already recorded (e.g. a customer payment you posted).
- In Bank — transactions imported from your bank statement.
Reconciling means pairing each In Bank line with its In Books entry. Anything on the bank statement that has no book entry yet (bank charges, interest, a direct deposit you never recorded) gets posted to the books from right inside the workspace. When the Difference reaches ₹0.00, you're reconciled.
Before you begin
- Role required: Admin or Accountant.
- Prerequisites: A bank account must exist, and it must be linked to a bank ledger in your Chart of Accounts. If you haven't added one yet, go to Banking → Bank Accounts → Add bank account. (When creating it, you pick the Chart-of-Accounts ledger it posts to; you can create that ledger on the spot.)
- Settings/flags: None specific.
- AI credits: Only the AI Scan import method uses credits. Local Scan and Excel Import are free.
Step 1 — Import your bank statement
Go to Banking → Bank Transactions (or the account's page) and choose Import. TrackBooks offers three ways to bring transactions in:
- AI Scan — reads a PDF or image statement using AI (uses credits).
- Local Scan — free, for supported bank PDF layouts.
- Excel Import — for a spreadsheet (
.xls/.xlsx) exported from your bank's net-banking portal. The most reliable option when your bank offers a spreadsheet export.
Pick Excel Import, choose the bank account, then upload the file.
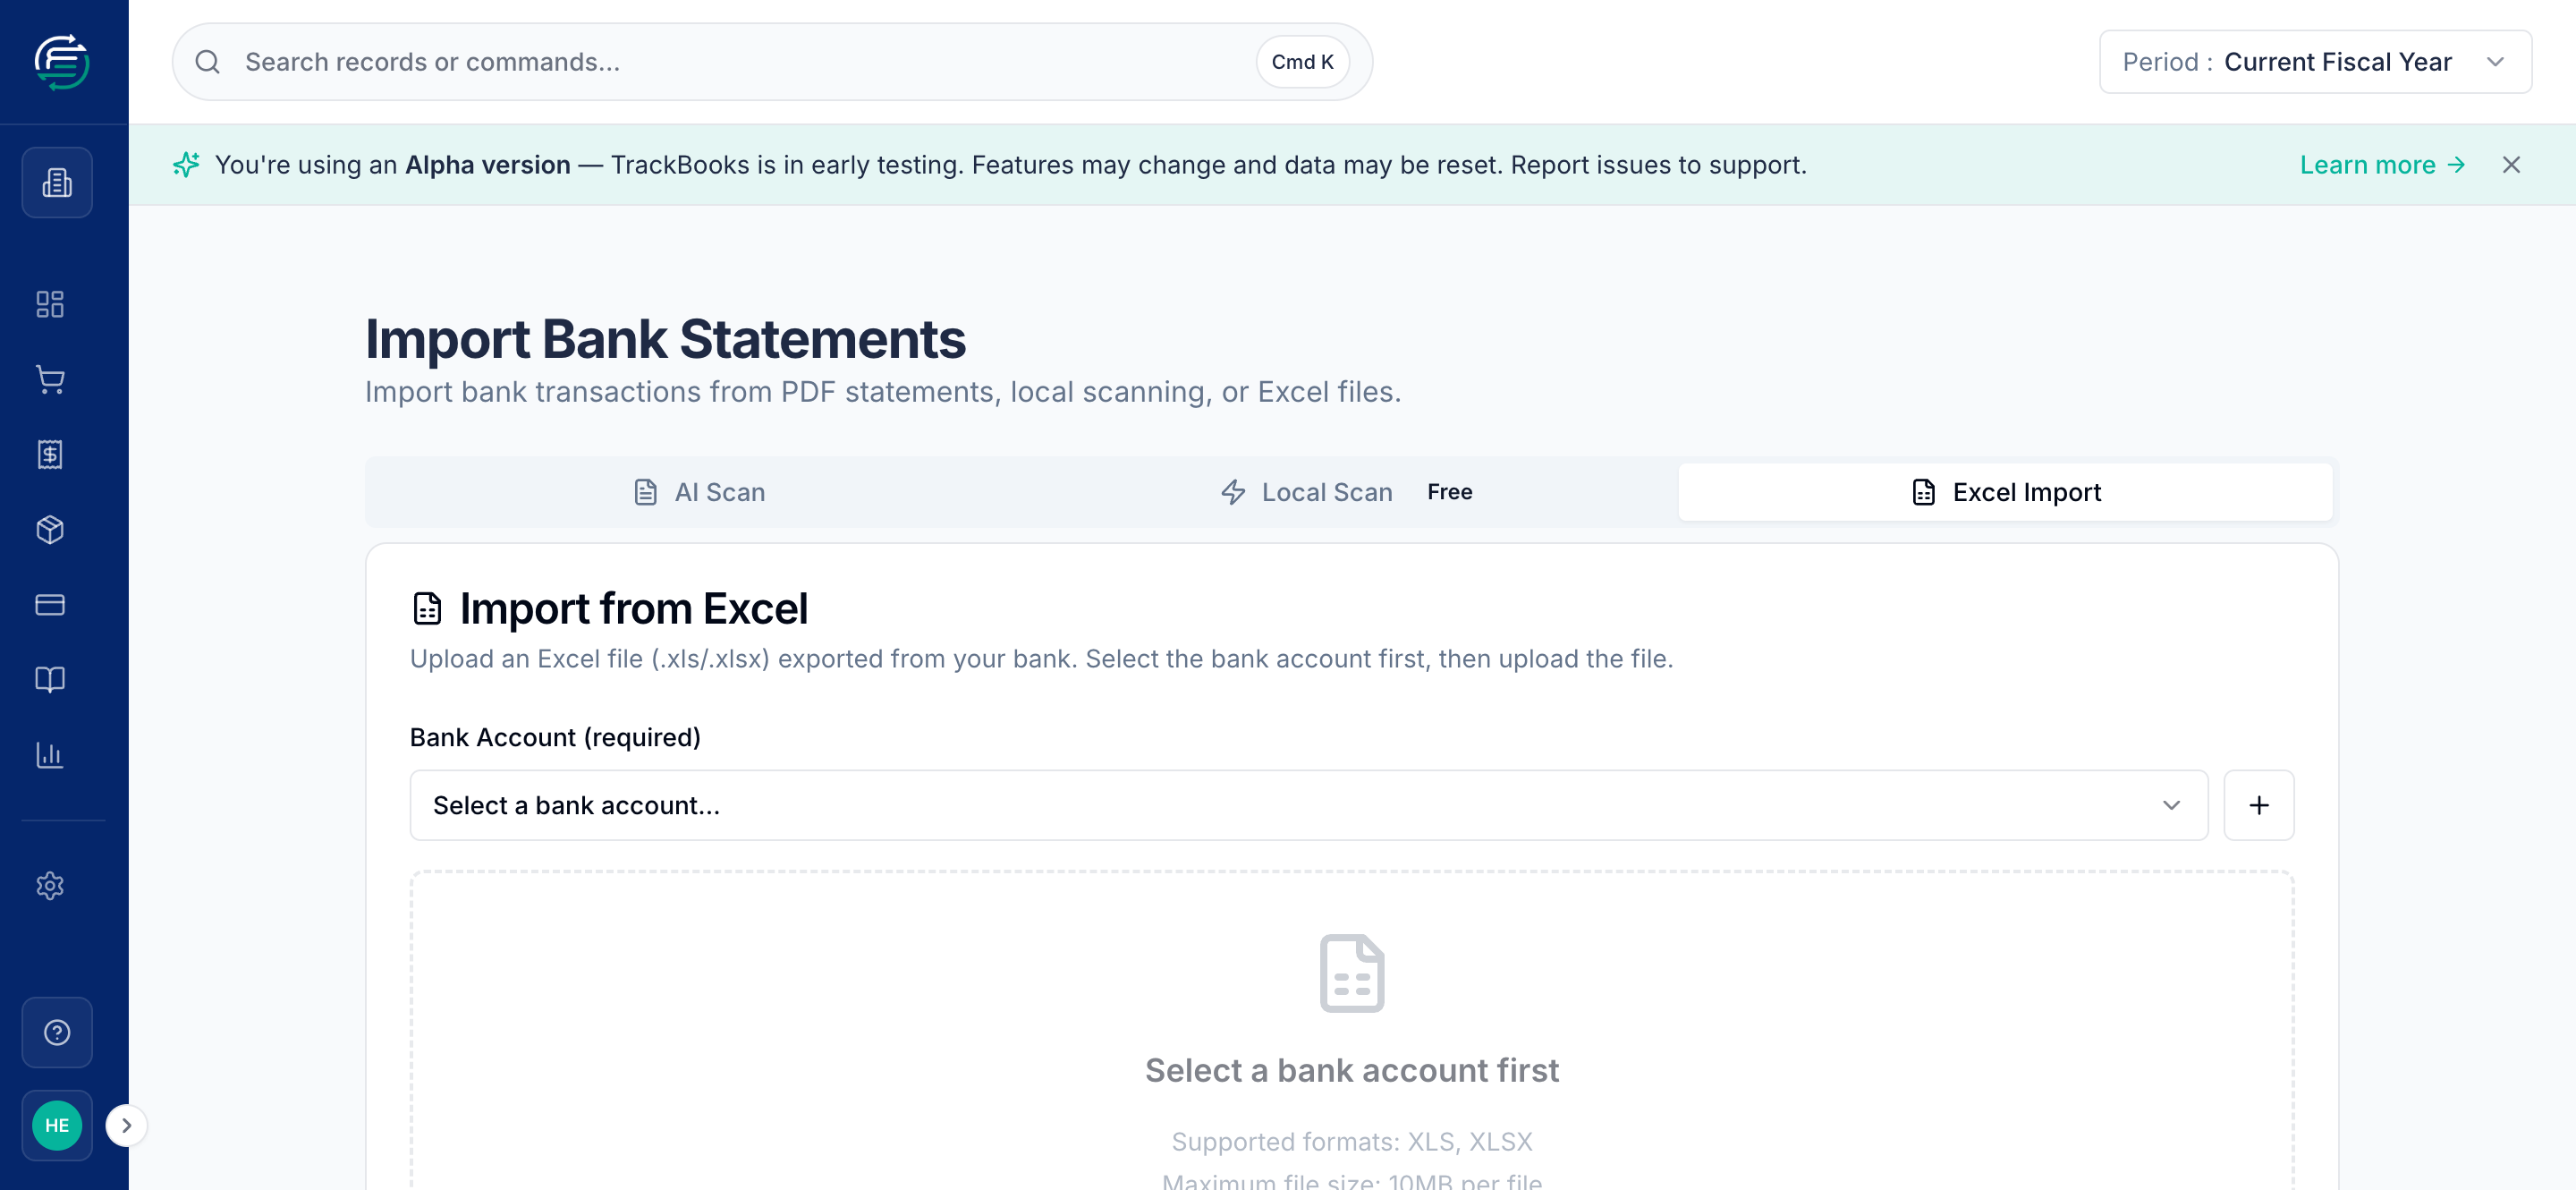
Expected columns
TrackBooks looks for Date, Description, Reference Number, Debit, Credit, Balance,
and auto-detects common bank column names (Narration, Particulars, Withdrawal,
Deposit, …). Dates can be DD/MM/YYYY, DD-MM-YYYY, or YYYY-MM-DD. Duplicate
rows are detected and skipped automatically. Use Download Template if you're
unsure of the format.
After import you'll see a processing summary (e.g. 2 transactions, 1 file successful).
Step 2 — Open the reconciliation workspace
Go to Banking → Bank Reconciliation. Pick your bank account at the top. The date range defaults to the span of the statement you imported.
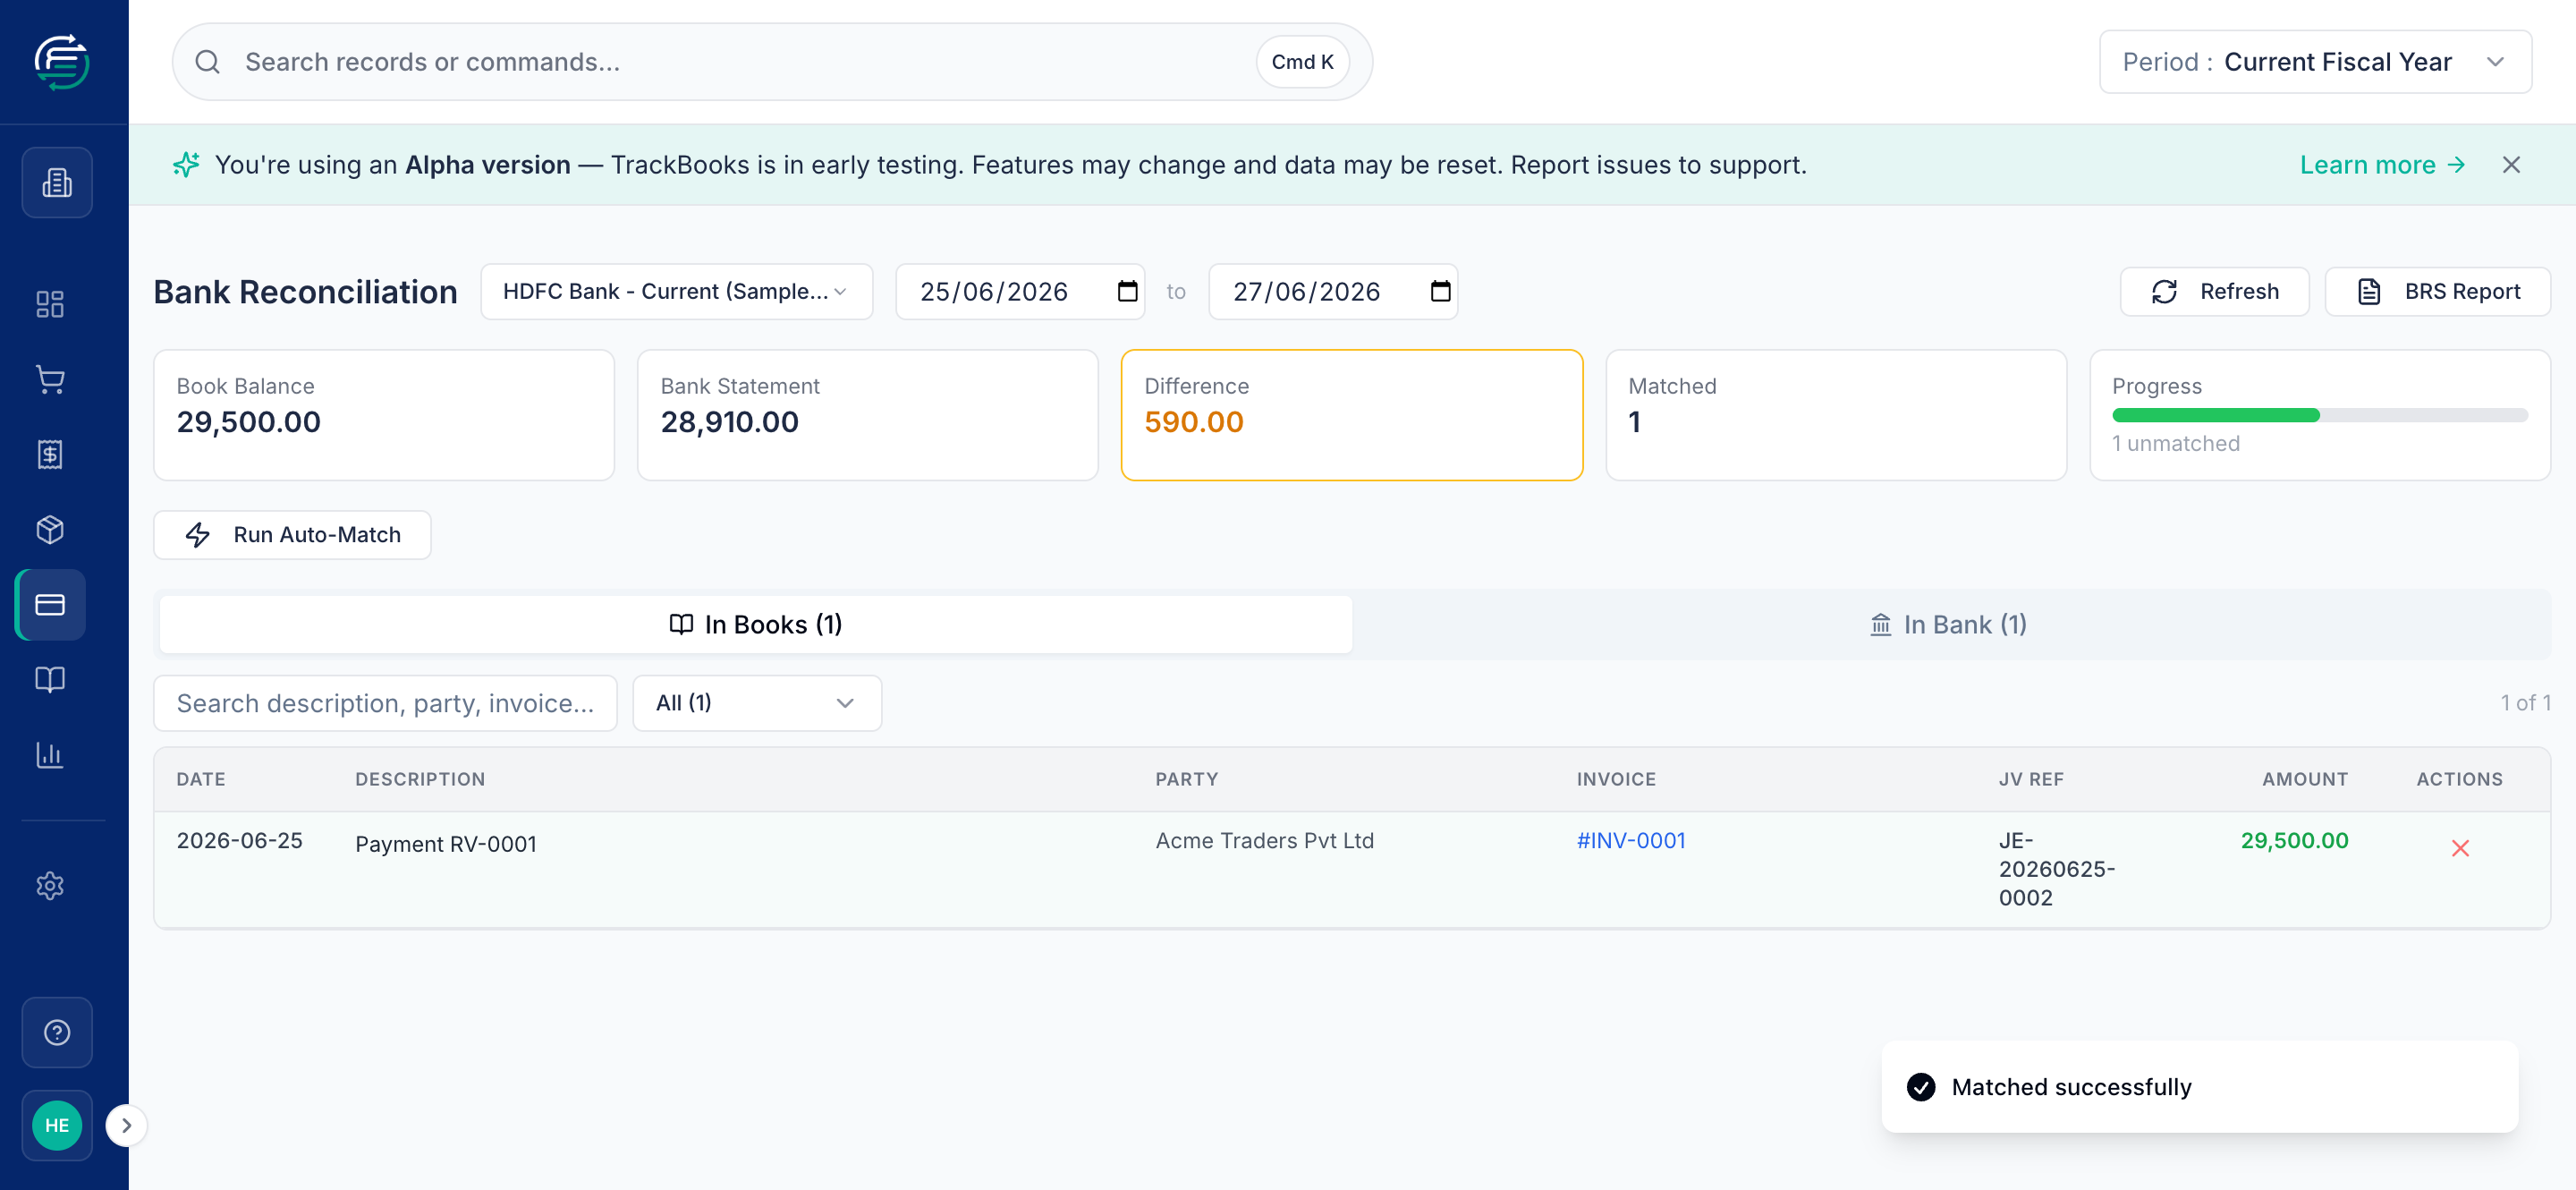
The summary cards show, at a glance:
- Book Balance — total of your bank-ledger entries.
- Bank Statement — total from the imported statement.
- Difference — the gap you're working to close.
- Matched / Progress — how many items are reconciled vs still unmatched.
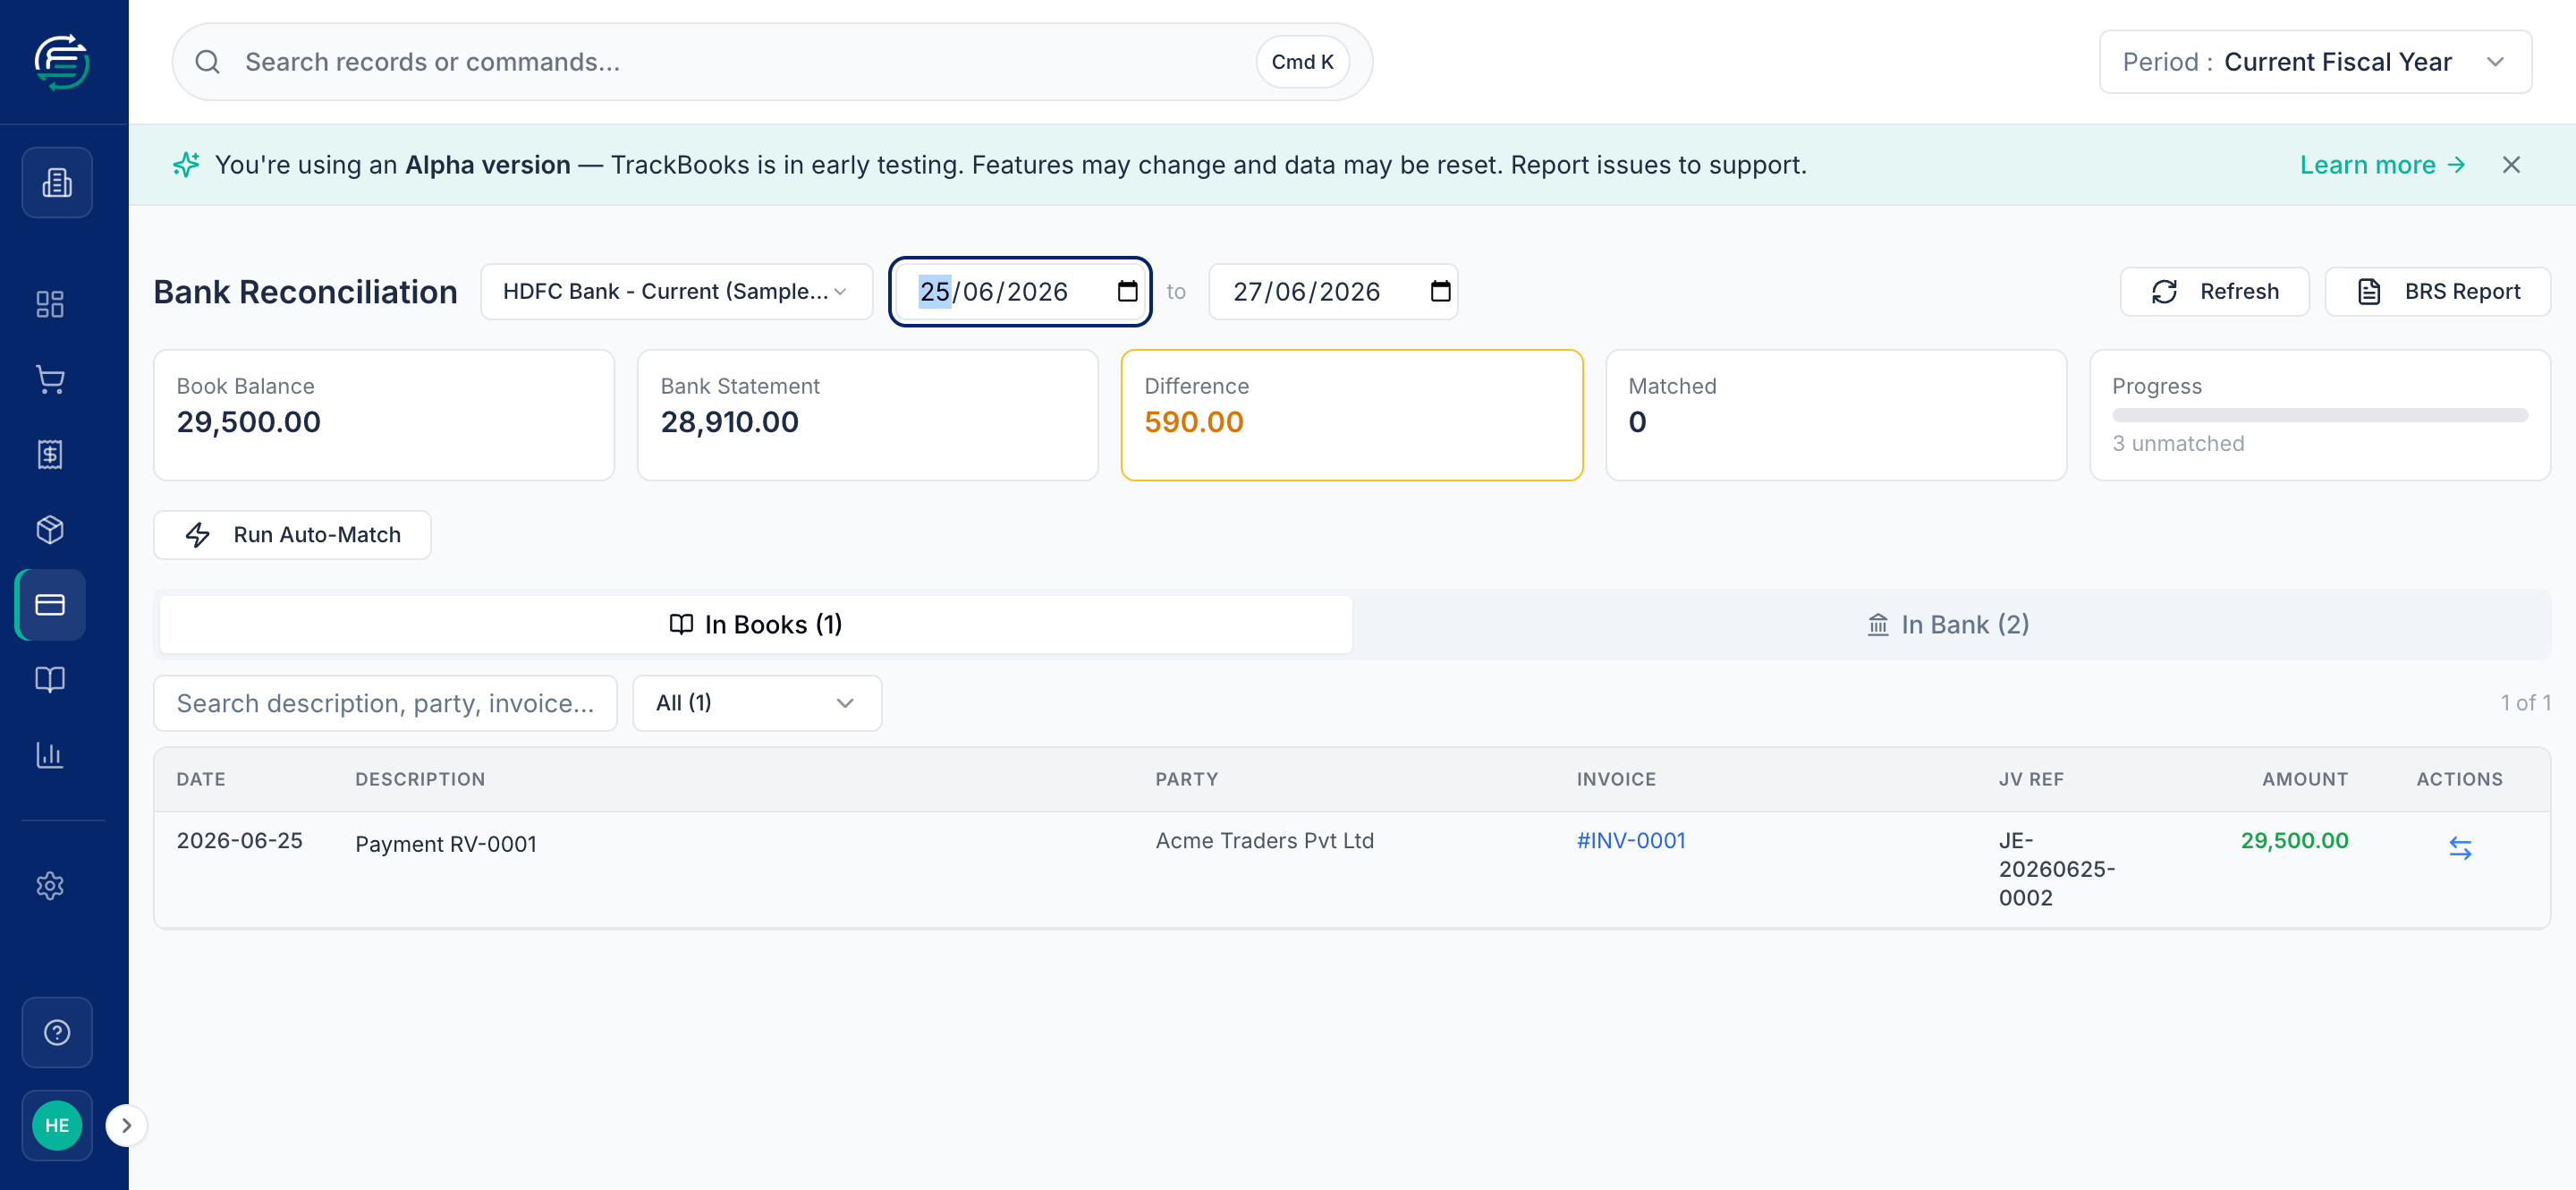
Mind the date range
The workspace only lists entries within the selected date range. A book entry dated just outside the statement window won't appear under In Books — a common surprise when you record a customer's payment on the day you raise the receipt but the bank shows the credit a day later. If an entry seems missing, widen the from date.
Switch to the In Bank tab to see the imported transactions waiting to be reconciled.
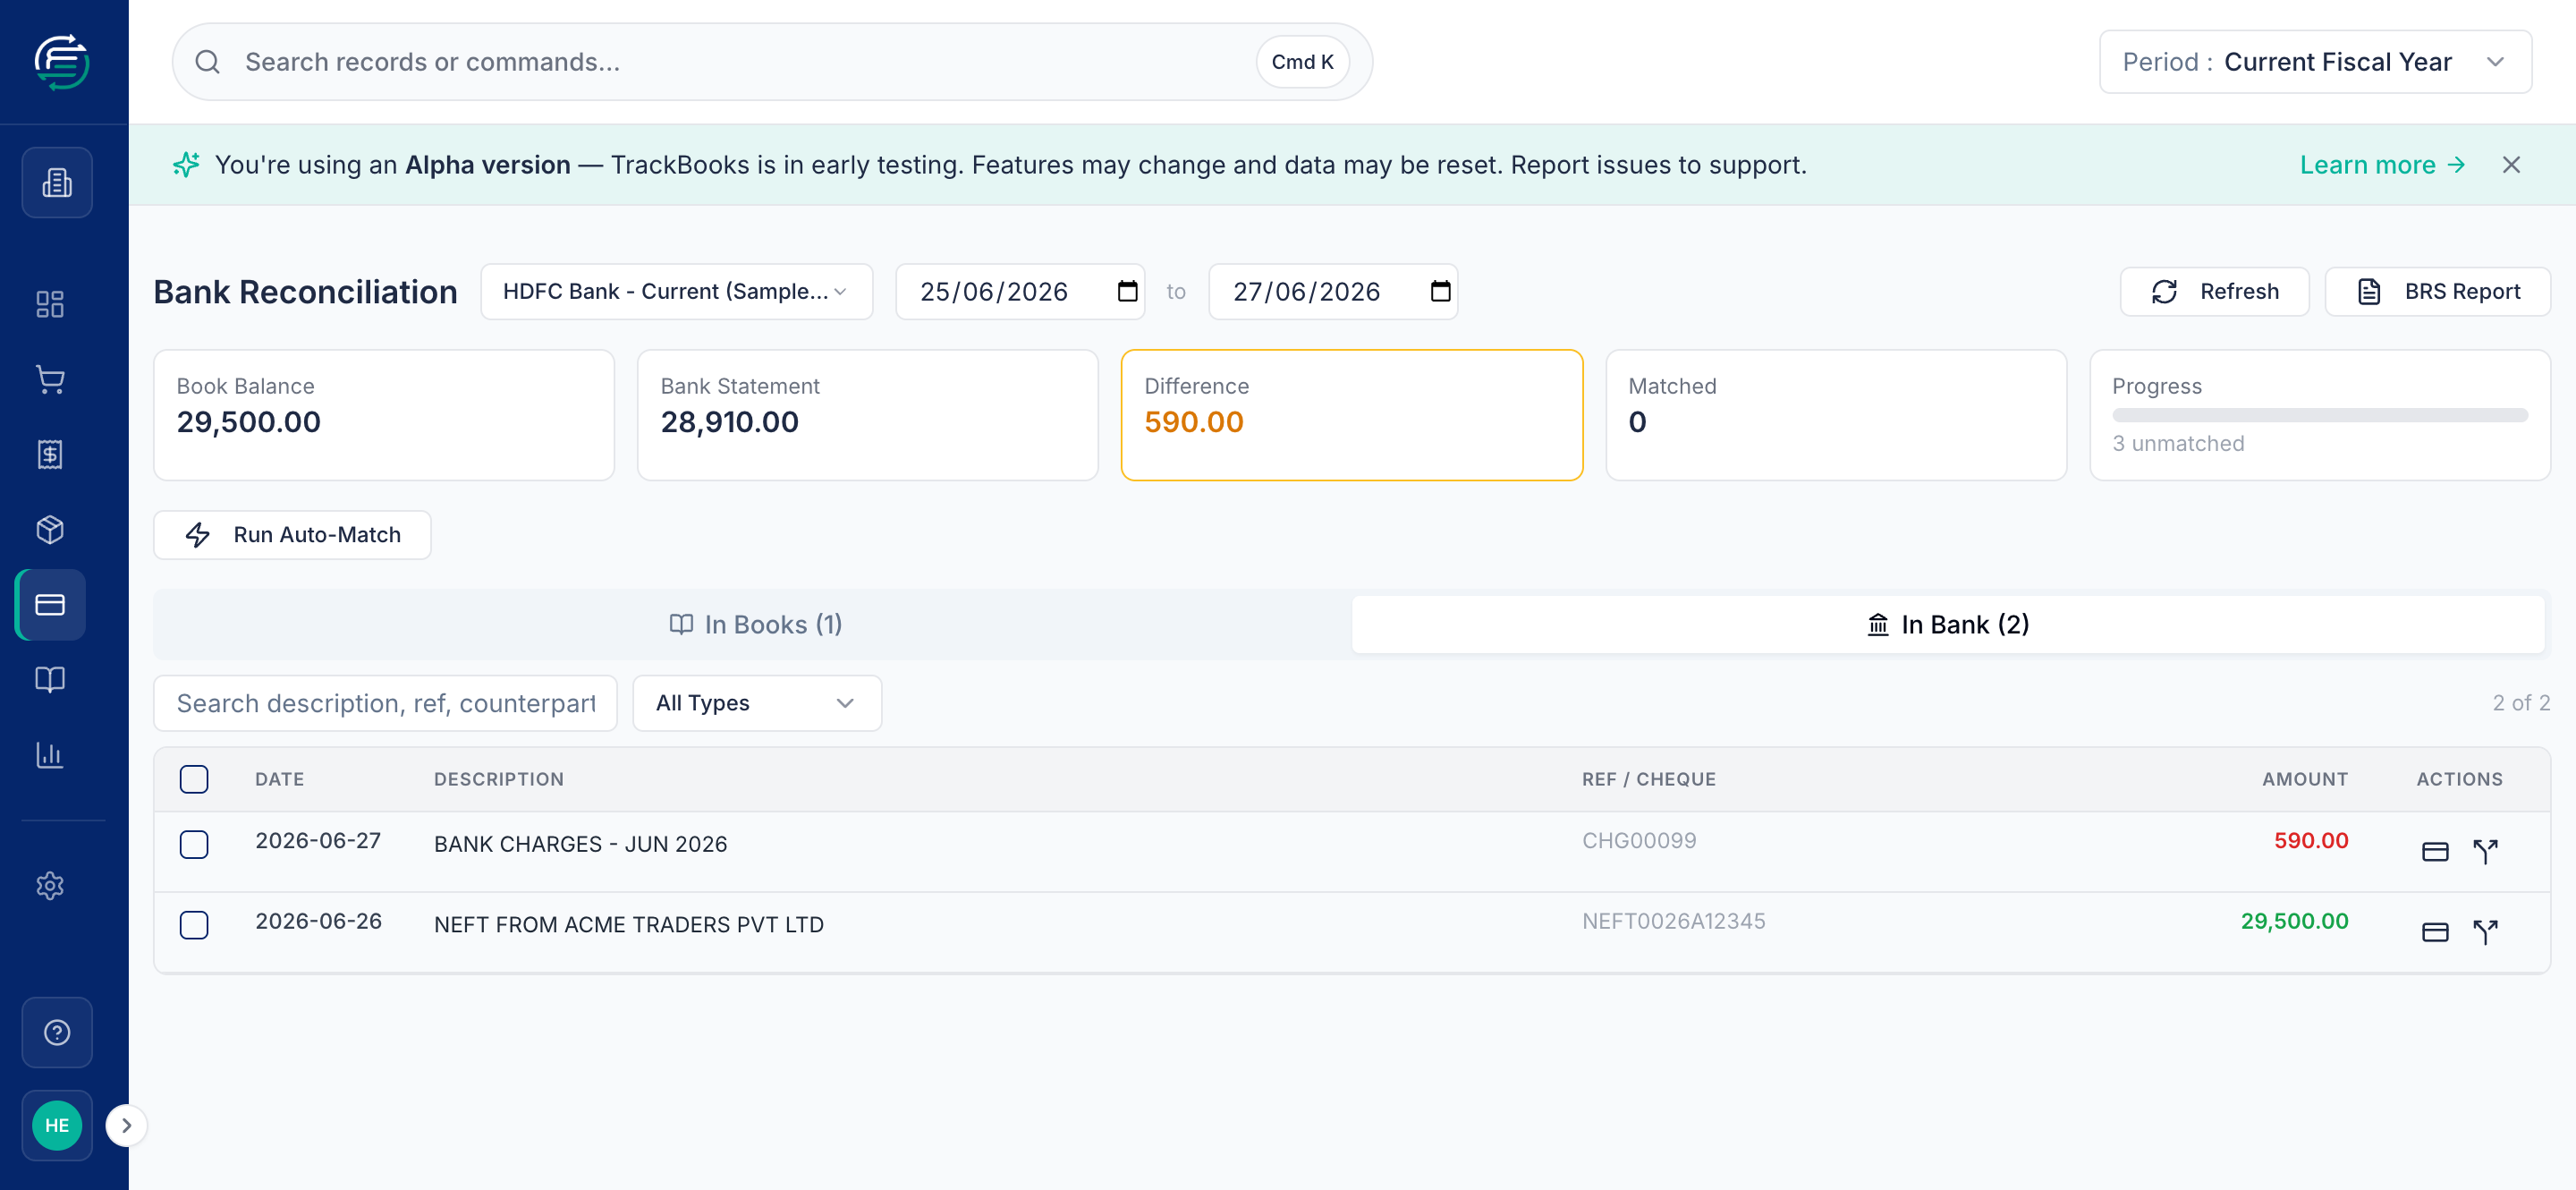
Step 3 — Match transactions
Try Auto-Match first
Click Run Auto-Match. TrackBooks pairs bank lines to book entries automatically when it's confident (it looks at reference numbers, amounts, and dates). High-confidence pairs are matched for you; anything it's unsure about (for instance, a book entry and a bank line a day apart) is left for you to confirm manually.
Match the rest manually
On the In Books tab, click Match bank transaction on an unmatched entry. TrackBooks shows the candidate bank line(s) with the amount and party. Click Match to confirm the pair.
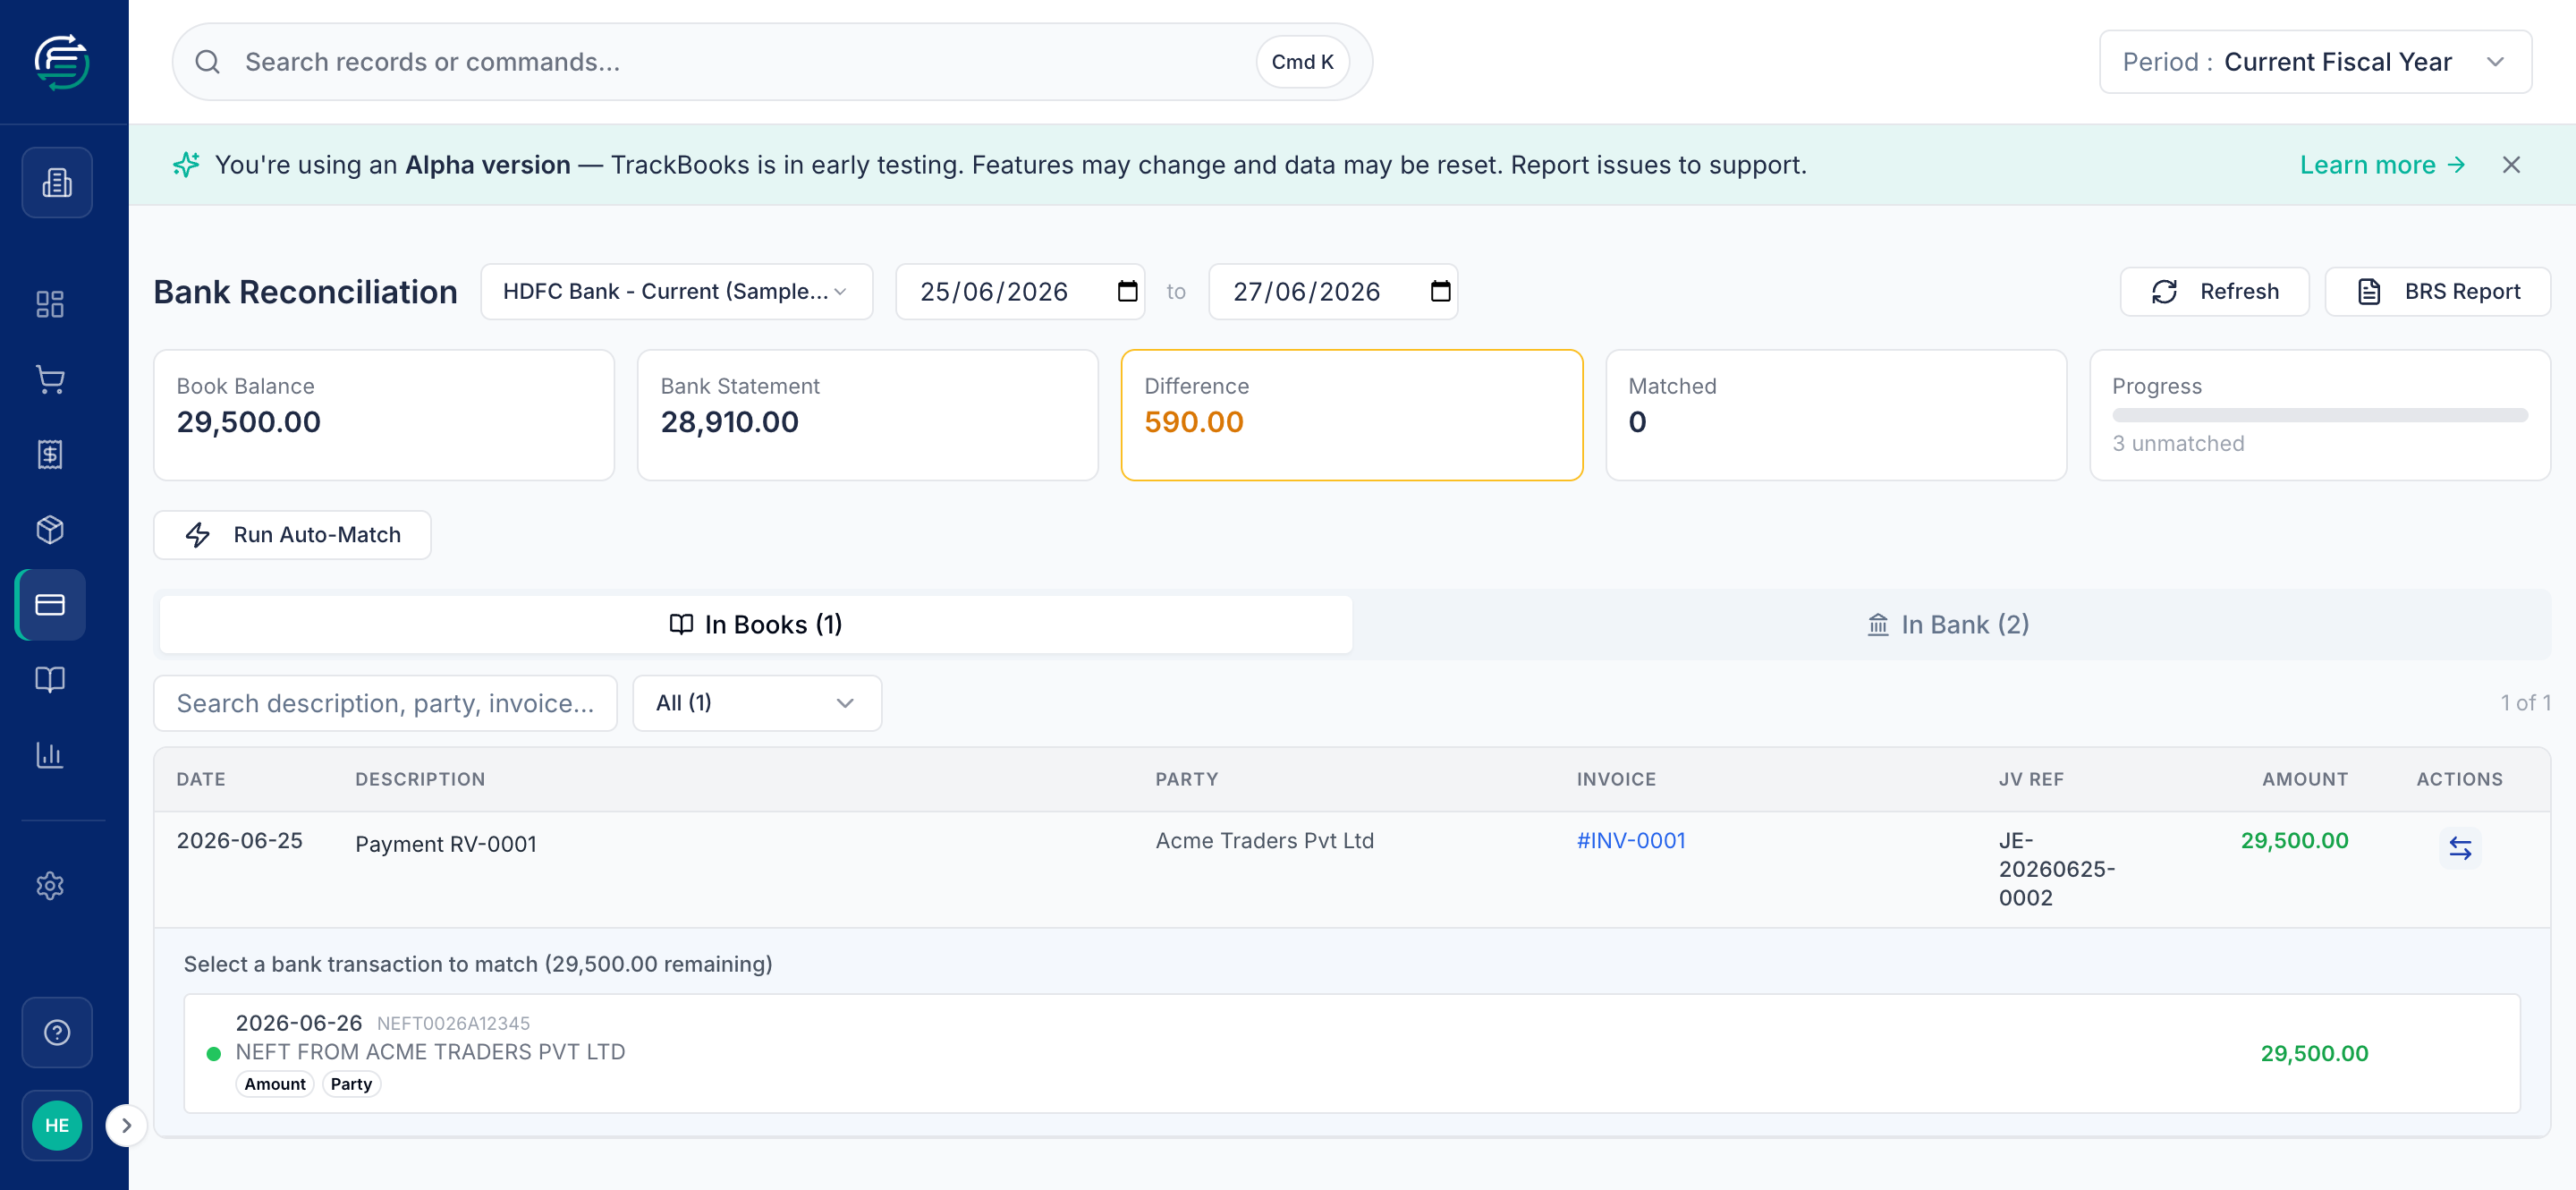
The entry is now reconciled — the Matched count goes up, the bank line disappears from In Bank, and the matched book row gains an Unlink match action in case you need to undo it.
Step 4 — Post bank-only transactions
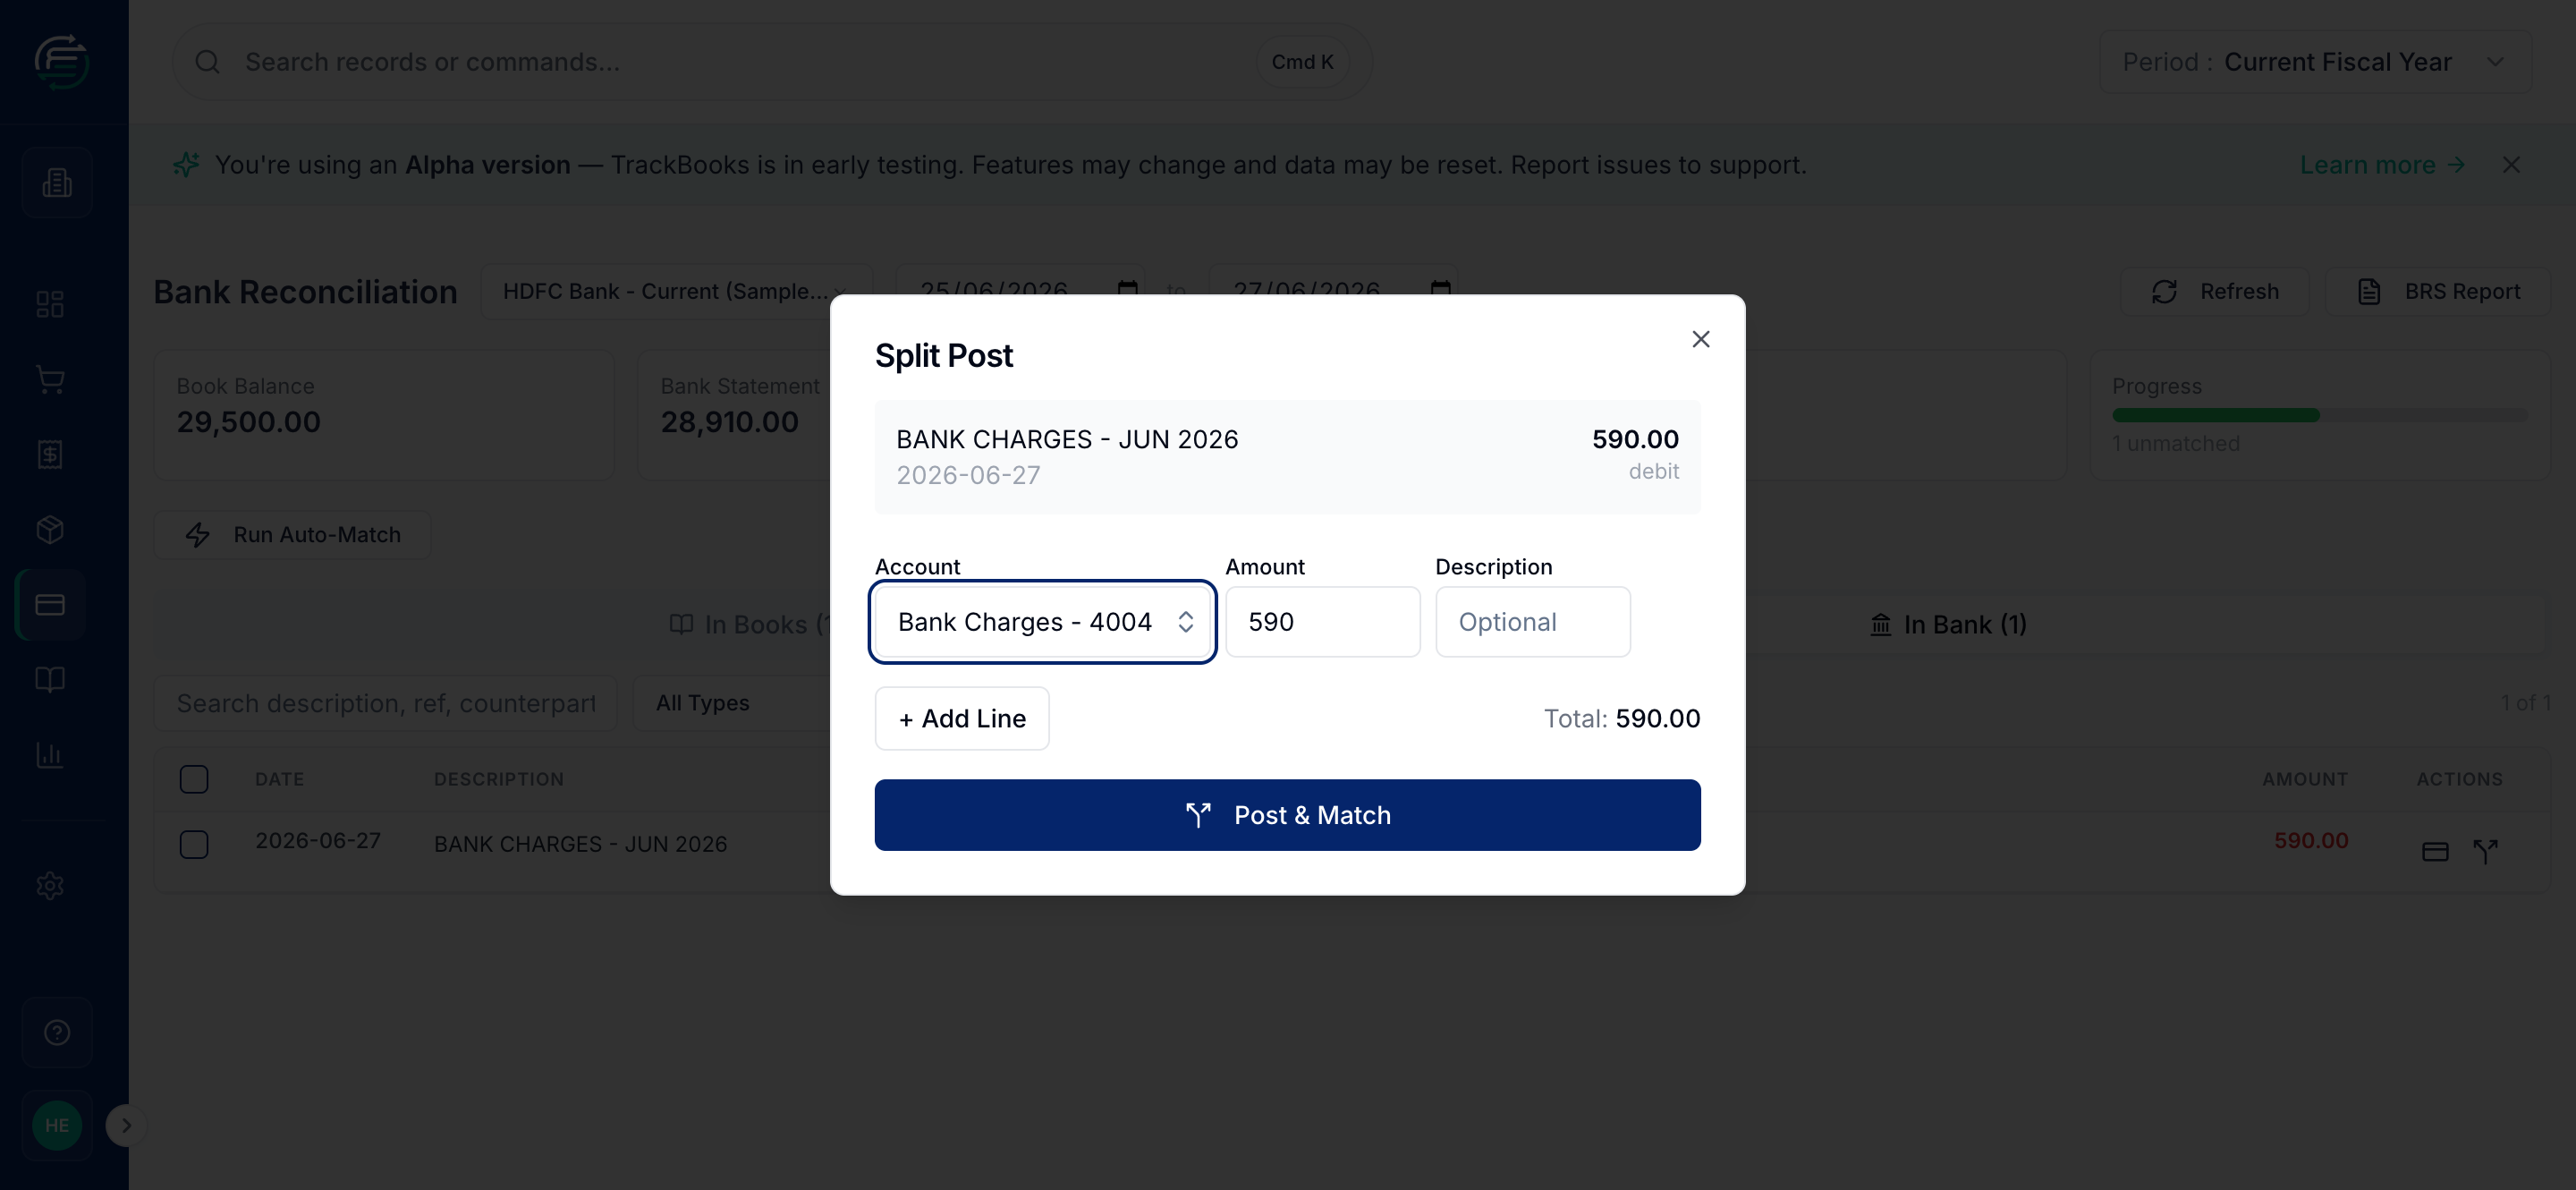
Some bank lines have no book entry — bank charges, interest credited, a payment that was never recorded. These stay under In Bank and keep the Difference non-zero. Post them straight from the workspace using a bank line's actions:
- Split Post — post the amount to one or more ledger accounts (e.g. bank charges to an expense account). You can split a single bank line across several accounts.
- Payment Post / Match to Invoice — book a receipt or payment against a party or an open invoice.
For a bank charge, open Split Post, search the Bank Charges expense account, confirm the amount, and click Post & Match — this creates the book entry and reconciles the line in one step.
Step 5 — Confirm you're reconciled
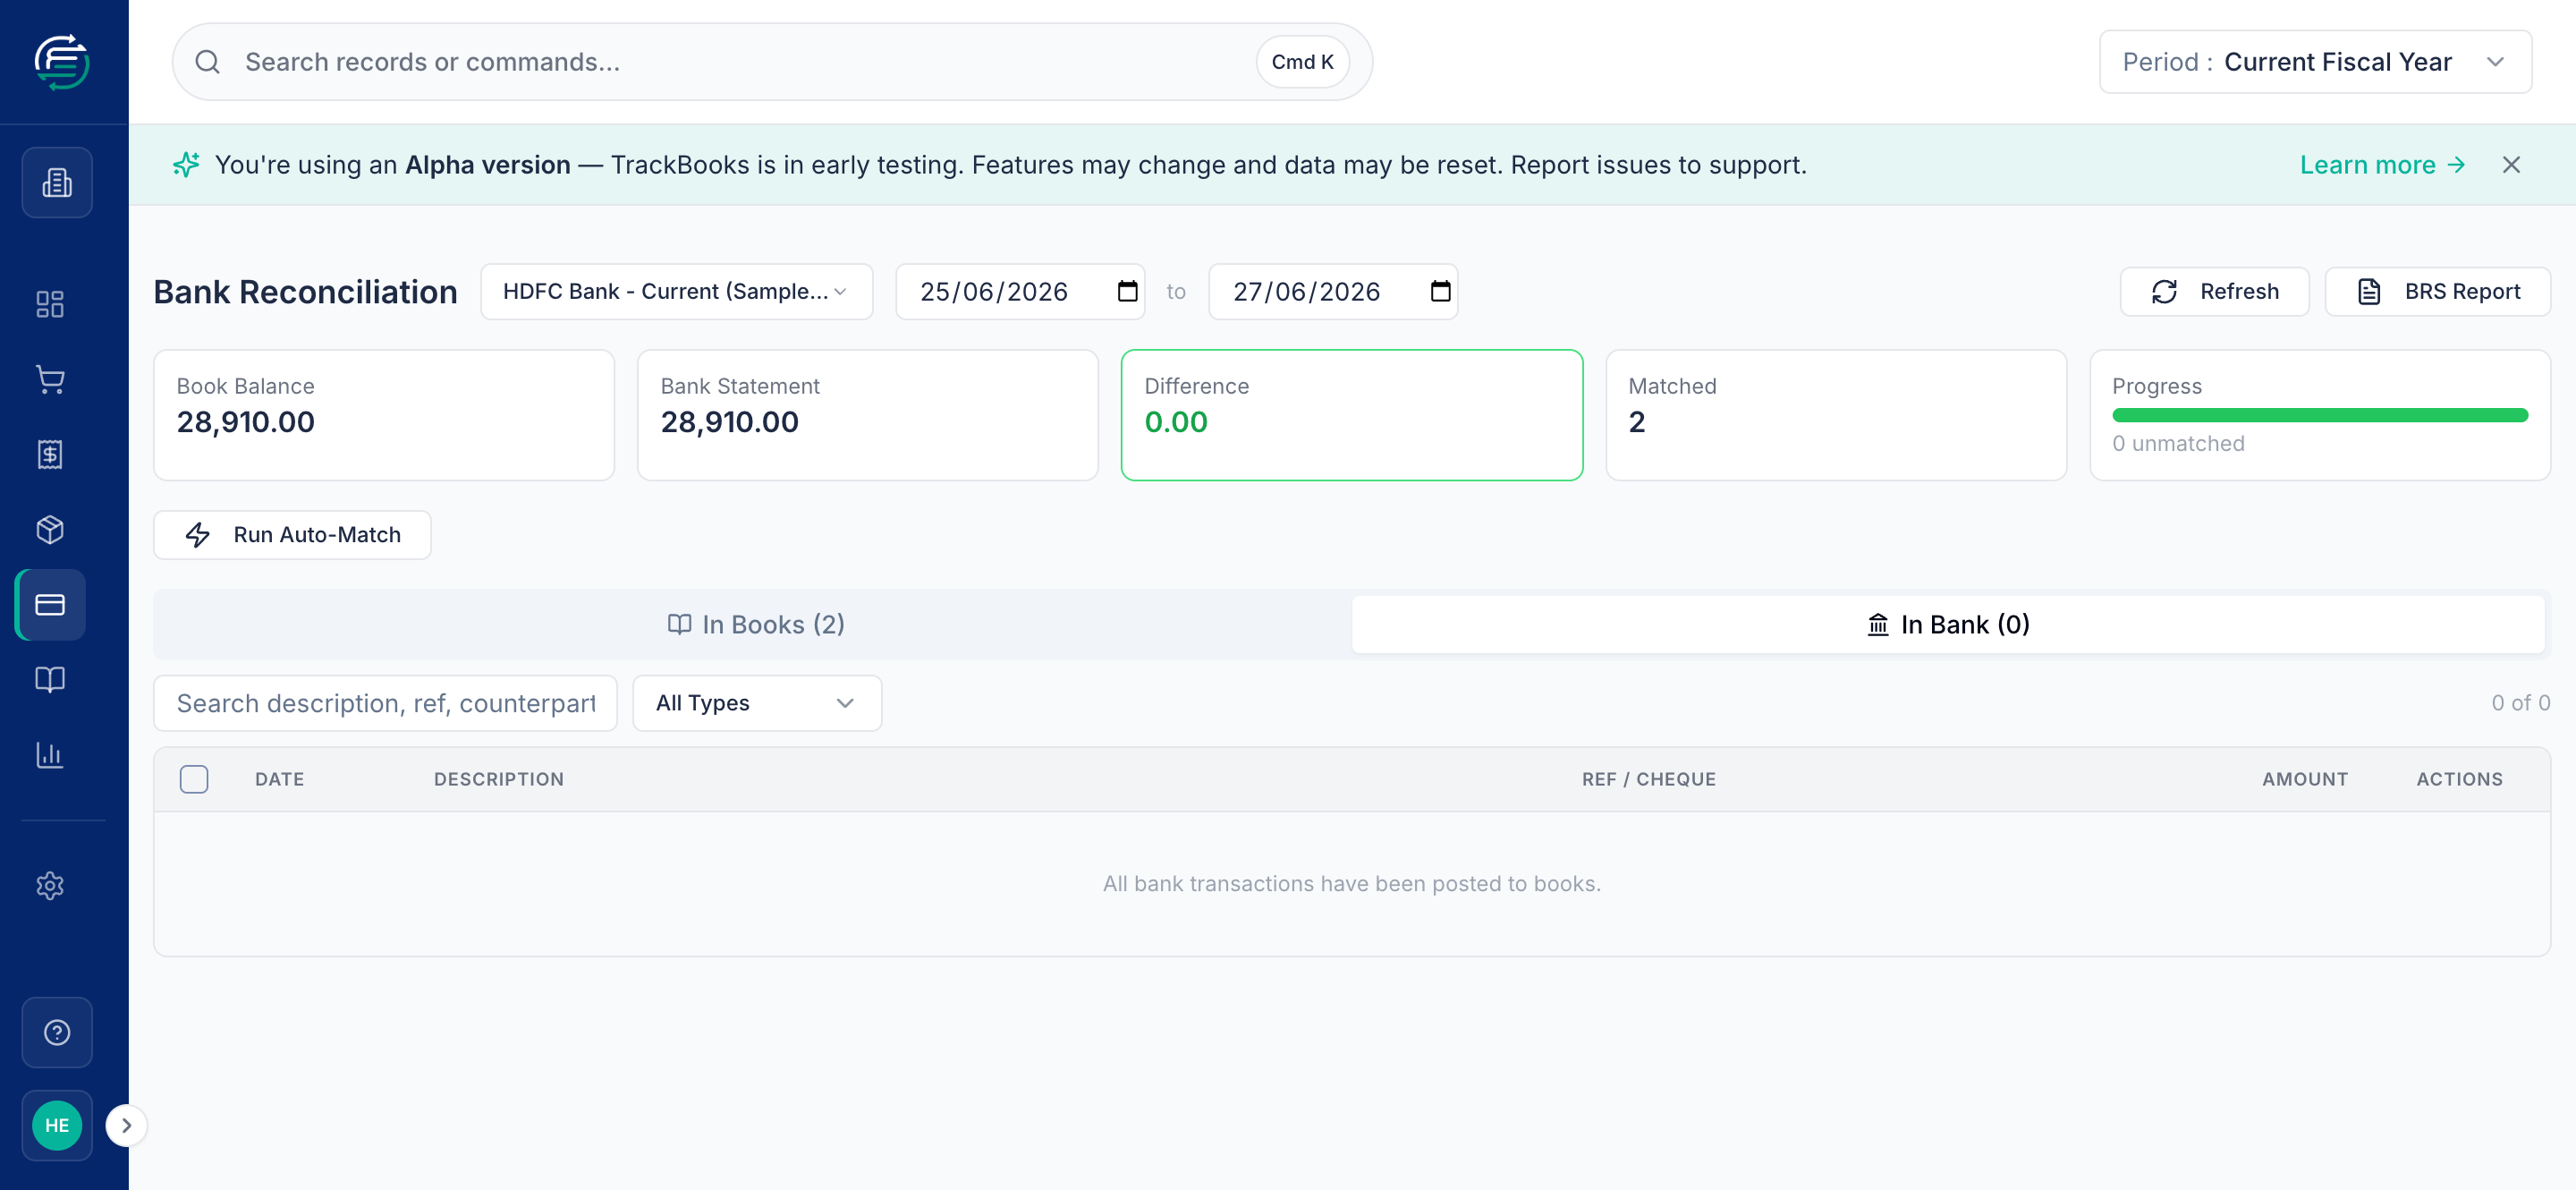
When every line is matched or posted, the Difference reads ₹0.00, Progress shows 0 unmatched, and the In Bank tab says "All bank transactions have been posted to books."
Step 6 — Generate the Bank Reconciliation Statement (BRS)
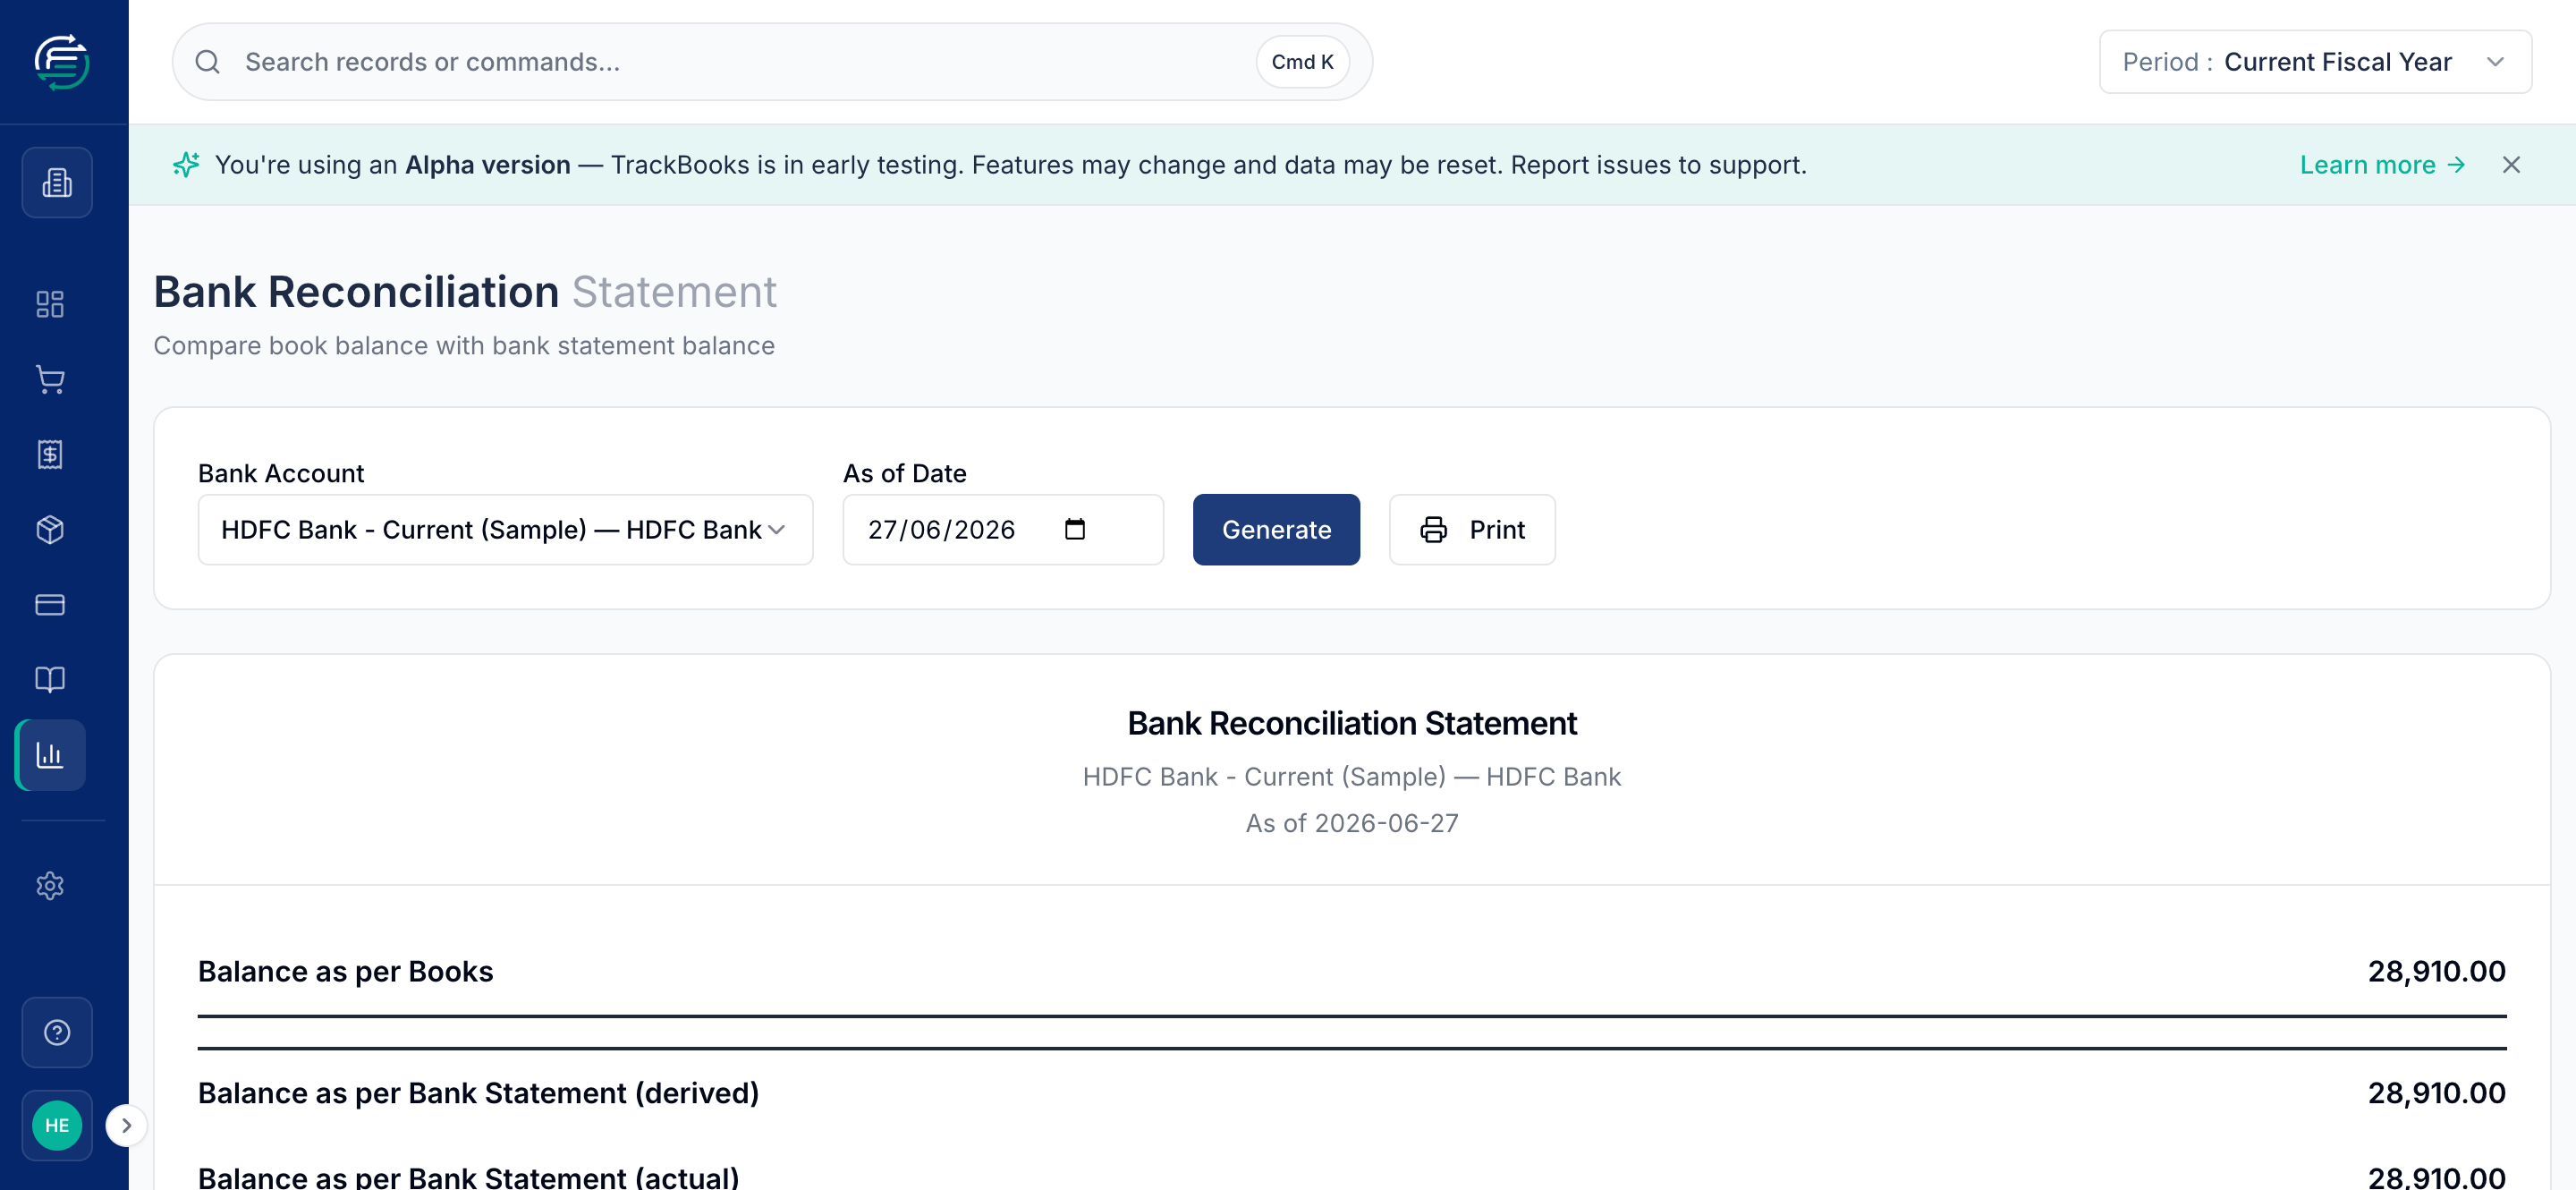
Click BRS Report (or go to Reports → Bank Reconciliation Statement), pick the bank account and an as-of date, and click Generate. The BRS compares your book balance with the bank balance and confirms the position — here, Fully Reconciled, Difference: NIL. You can Print it for your records.
Tips & common issues
Reconcile regularly
Import and reconcile each statement as it arrives (monthly is typical). Small, frequent reconciliations are far easier than one giant year-end catch-up.
Difference won't go to zero?
The usual culprits: a book entry dated outside the date range (widen it), a bank-only line not yet posted (Split/Payment Post it), or a duplicate. The Difference card always equals the sum of what's still unreconciled.
Made a wrong match? Unlink it
Matches aren't permanent — use Unlink match on a reconciled row to separate the pair and try again.
Related guides
- Create & post a sales invoice — the customer payments you reconcile here come from posted invoices.