Track cost centres with Financial Dimensions
This guide shows you how to define reporting axes such as cost centre, project, or salesperson, tag your income and expenses with them, and read the Dimension Report that compares them side by side.
What this is
Your chart of accounts answers what was earned or spent: Rent, Sales of Goods. A Dimension adds a second question: which part of the business it belongs to. A ₹50,000 rent bill stays ₹50,000 of Rent in your ledgers; tagging it Operations 60% and Admin 40% only records who bears it, so the Dimension Report can show rent, and every other income or expense account, per cost centre.
A company can define up to five dimensions. Each applies to sales, to purchases and expenses, or to both, and has a controlled list of values (Operations, Admin, Sales & Marketing). Tagging never changes a ledger total, a tax figure, or a GST return. Amounts you have not tagged are reported under Unallocated, so named values plus Unallocated always equal the figure in your Profit & Loss.
Before you begin
- Role required: Admin or Accountant to define dimensions and tag documents. Any role can open the Dimension Report.
- Prerequisites: Decide the axes you want to report on before you start. Tags live on posted journal lines, so documents posted before you define a dimension stay Unallocated until you correct them.
Steps
1. Define a dimension
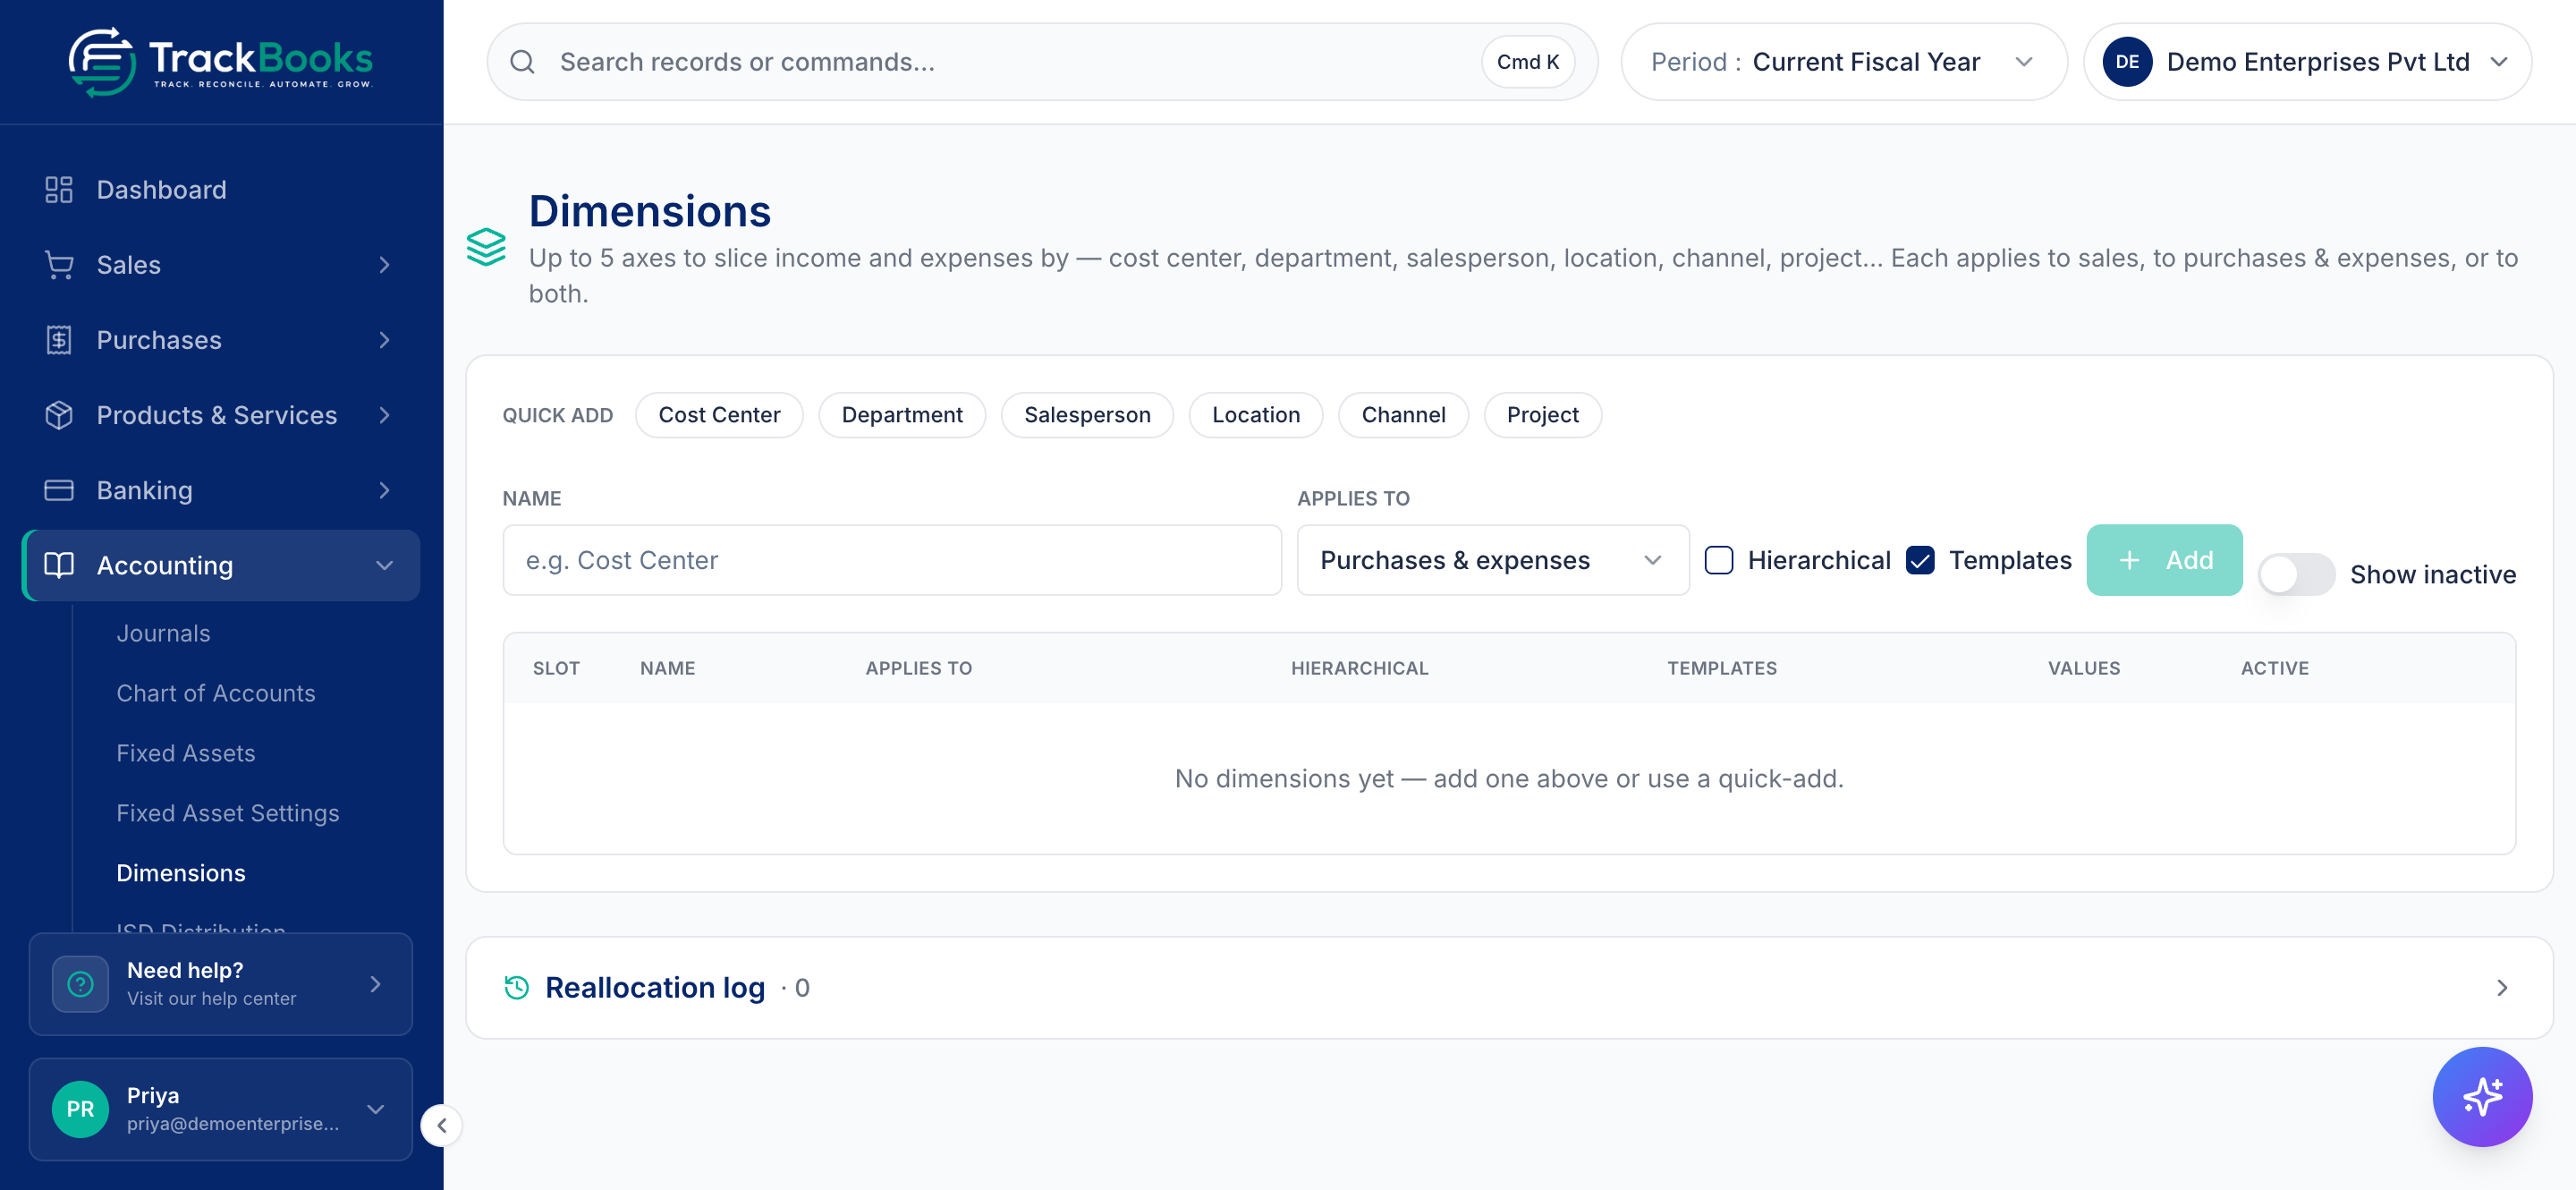
Open Accounting → Dimensions. The Dimensions page explains itself: "Up to 5 axes to slice income and expenses by…". Use a Quick add chip (Cost Center, Department, Salesperson, Location, Channel, Project) or type a Name, then pick Applies to: Sales, Purchases & expenses, or Both. Tick Hierarchical if values should nest (up to three levels, such as West, then Mumbai, then Bhiwandi) and leave Templates ticked if you want percentage splits. Click Add. The dimension takes the next free slot of five, and the table shows its slot, name, scope, hierarchy, templates, value count and Active switch.
2. Add its values
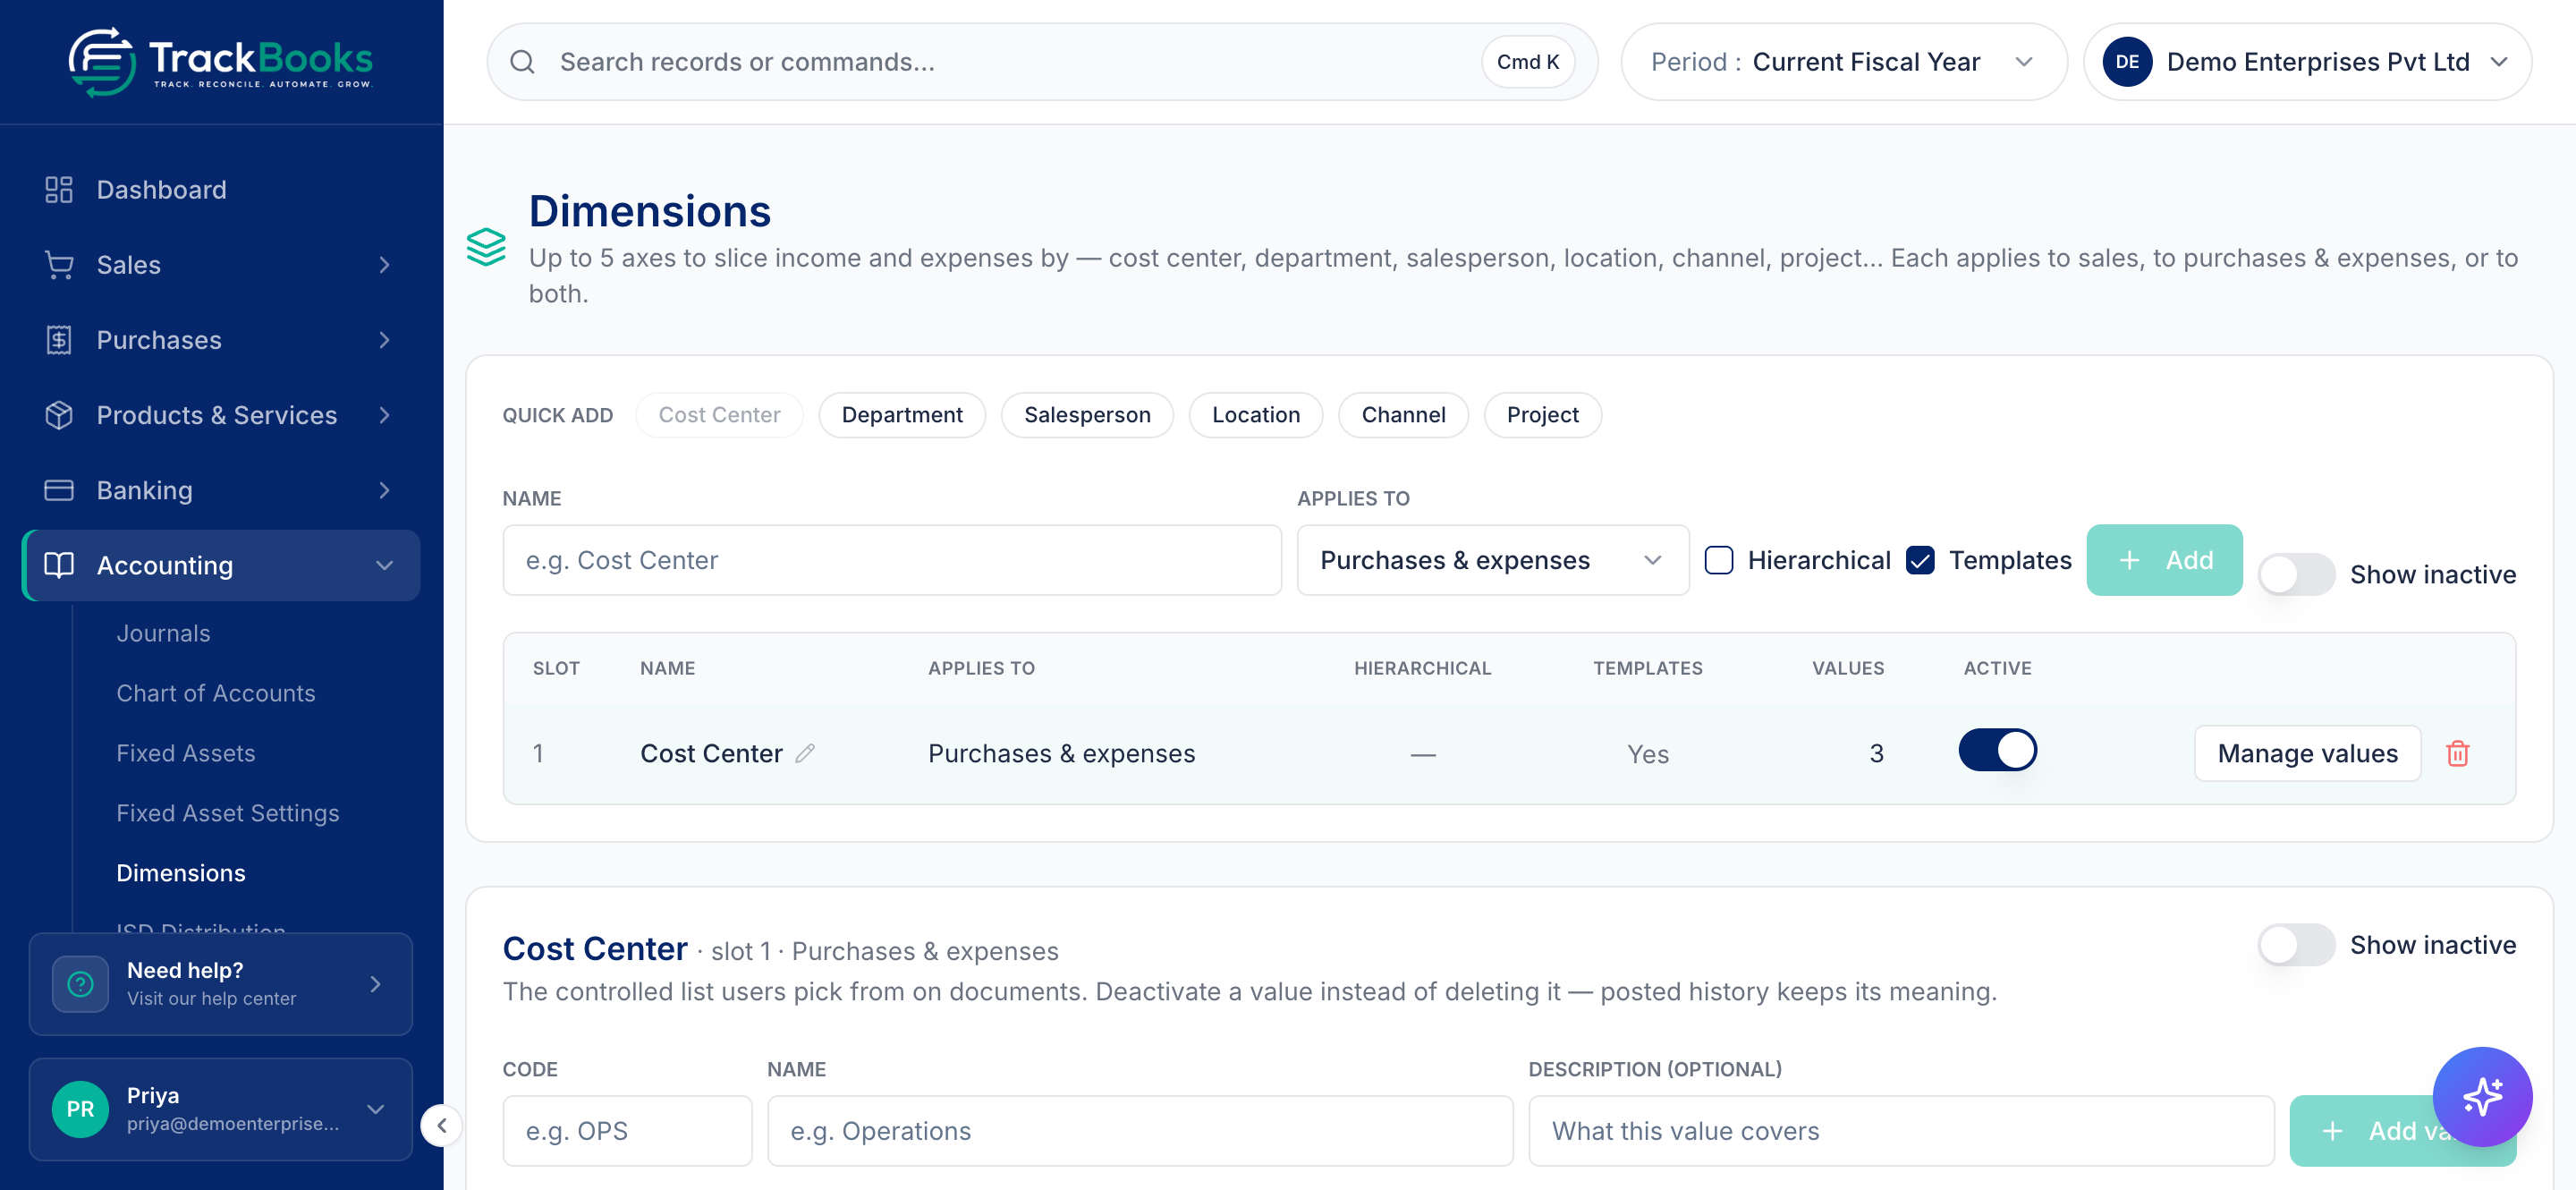
Select the dimension and click Manage values. For each value enter a short Code (OPS), a Name (Operations), a Description (optional), and for a hierarchical dimension a Parent. Click Add value. A Cost Center might hold OPS Operations, ADM Admin and SAL Sales & Marketing. Click a code or name later to rename it. The Posted lines column shows how many posted journal lines carry each value, and the Active switch retires a value without losing that history.
3. Save an allocation template
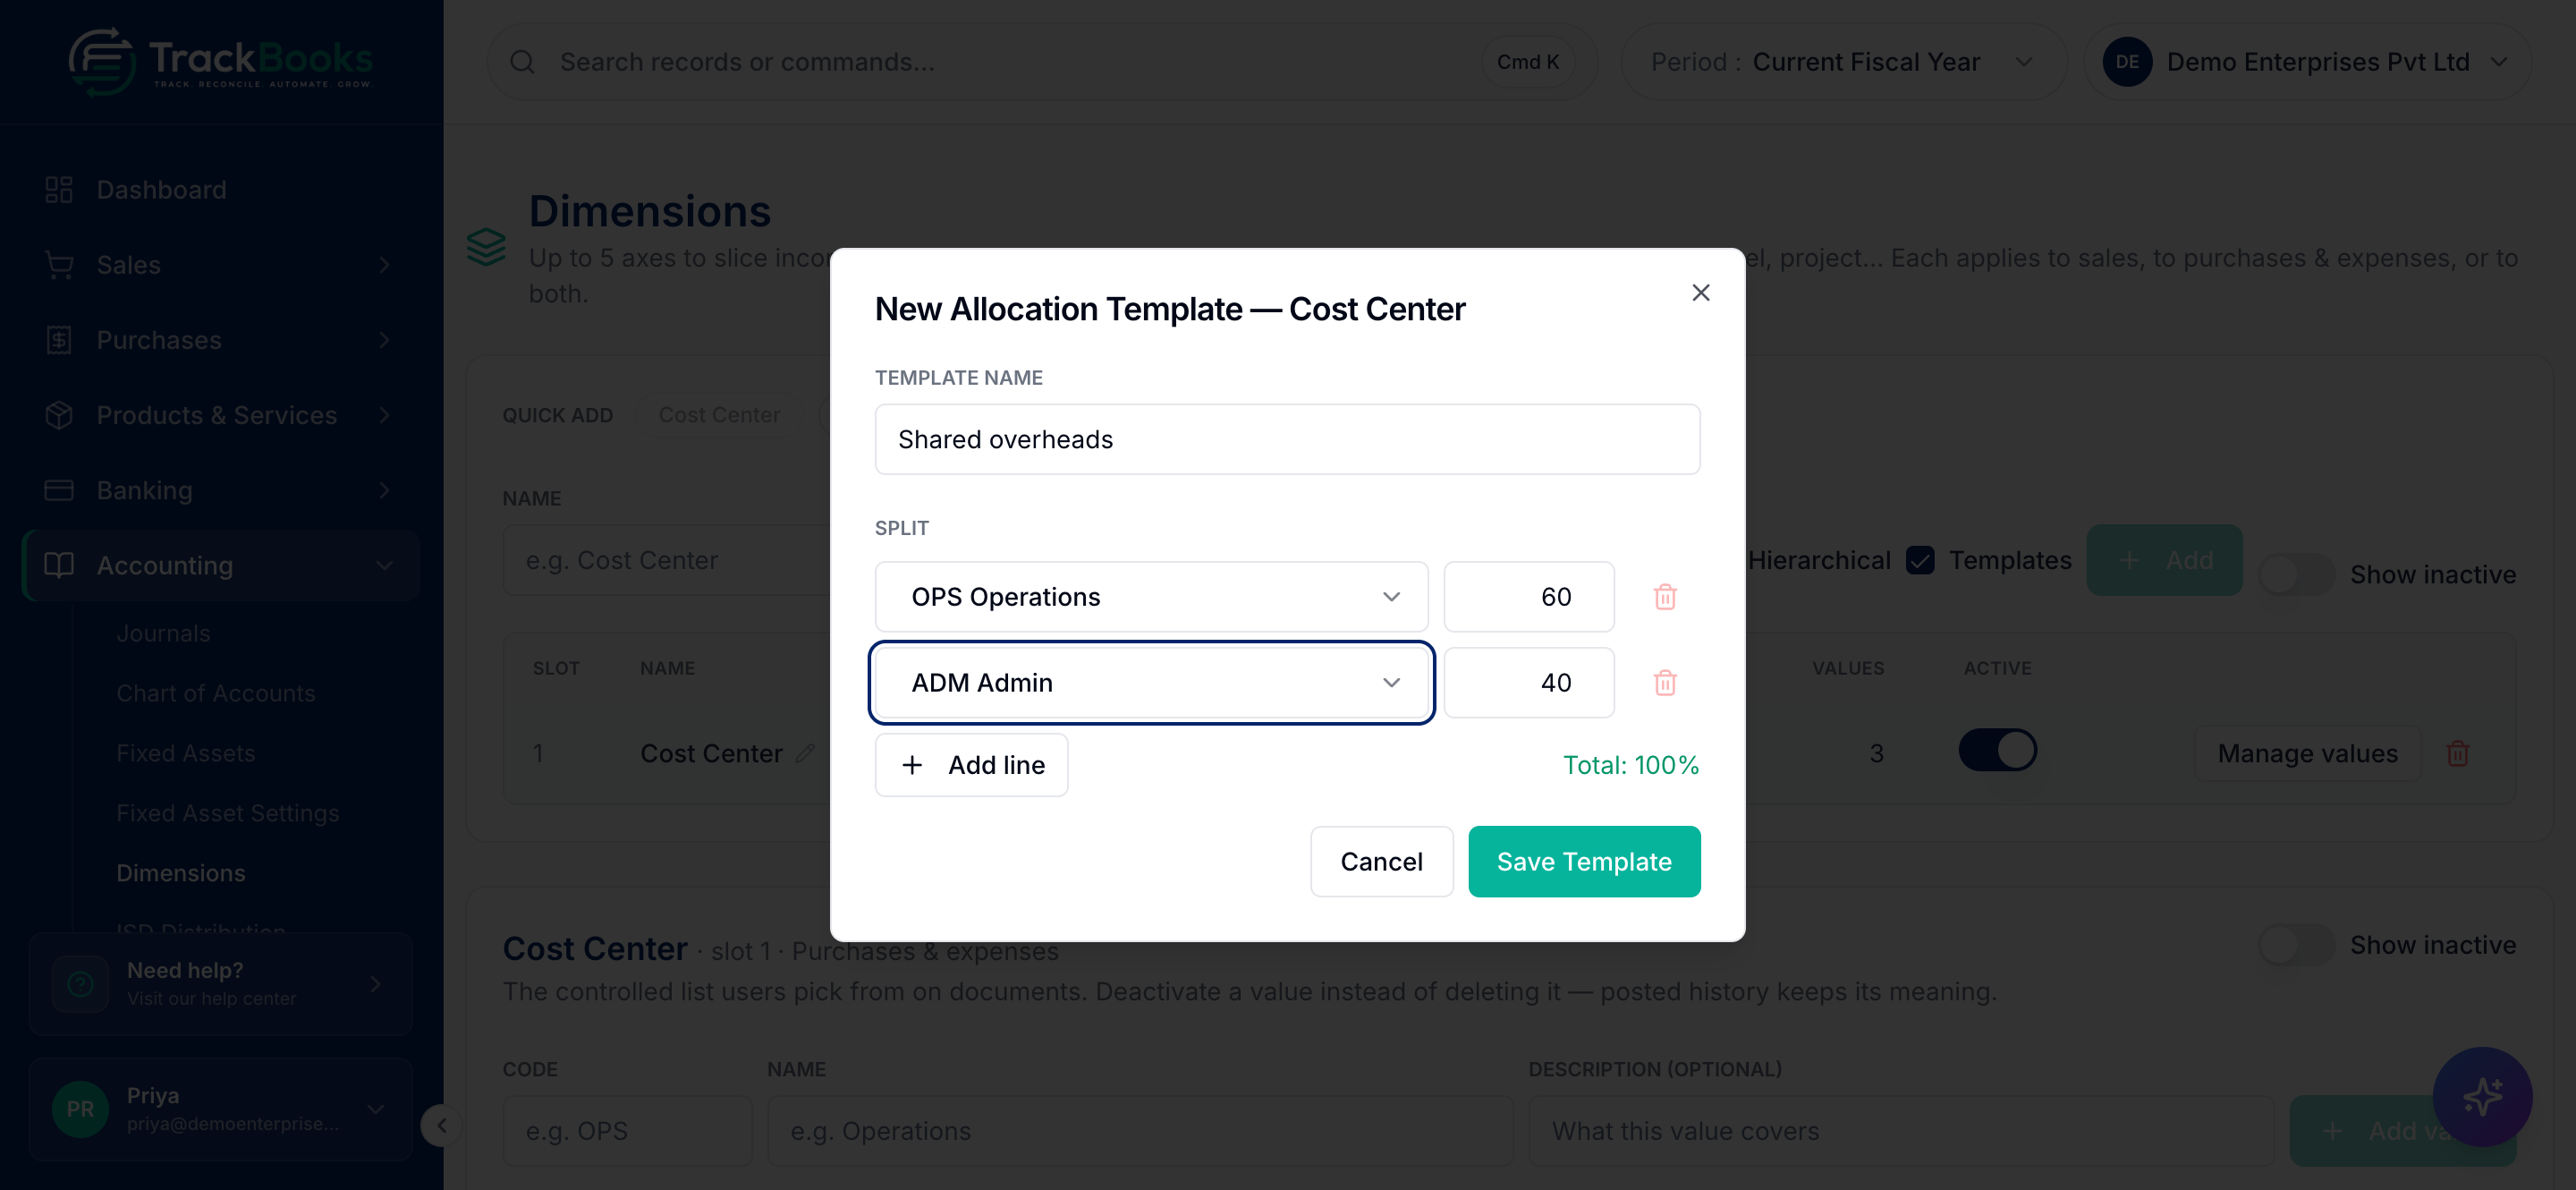
Shared costs rarely belong to one value. Under Allocation Templates, click New Template, give it a Template name such as Shared overheads, and build the Split: one line per value with a percentage, for example Operations 60 and Admin 40. Use Add line for more. The dialog keeps a running "Total: 100% (must be exactly 100)". Click Save Template.
4. Tag invoices, bills, and expenses
Every invoice, bill, and expense form shows one picker per applicable dimension, labelled with its name and (optional), for example Cost Center (optional) on Record Expense and Create Bill. Pick a value, or a template from the Templates group, or leave it Unallocated. Sales dimensions appear on invoices, purchase dimensions on bills and expenses, and a dimension set to Both appears on all of them.
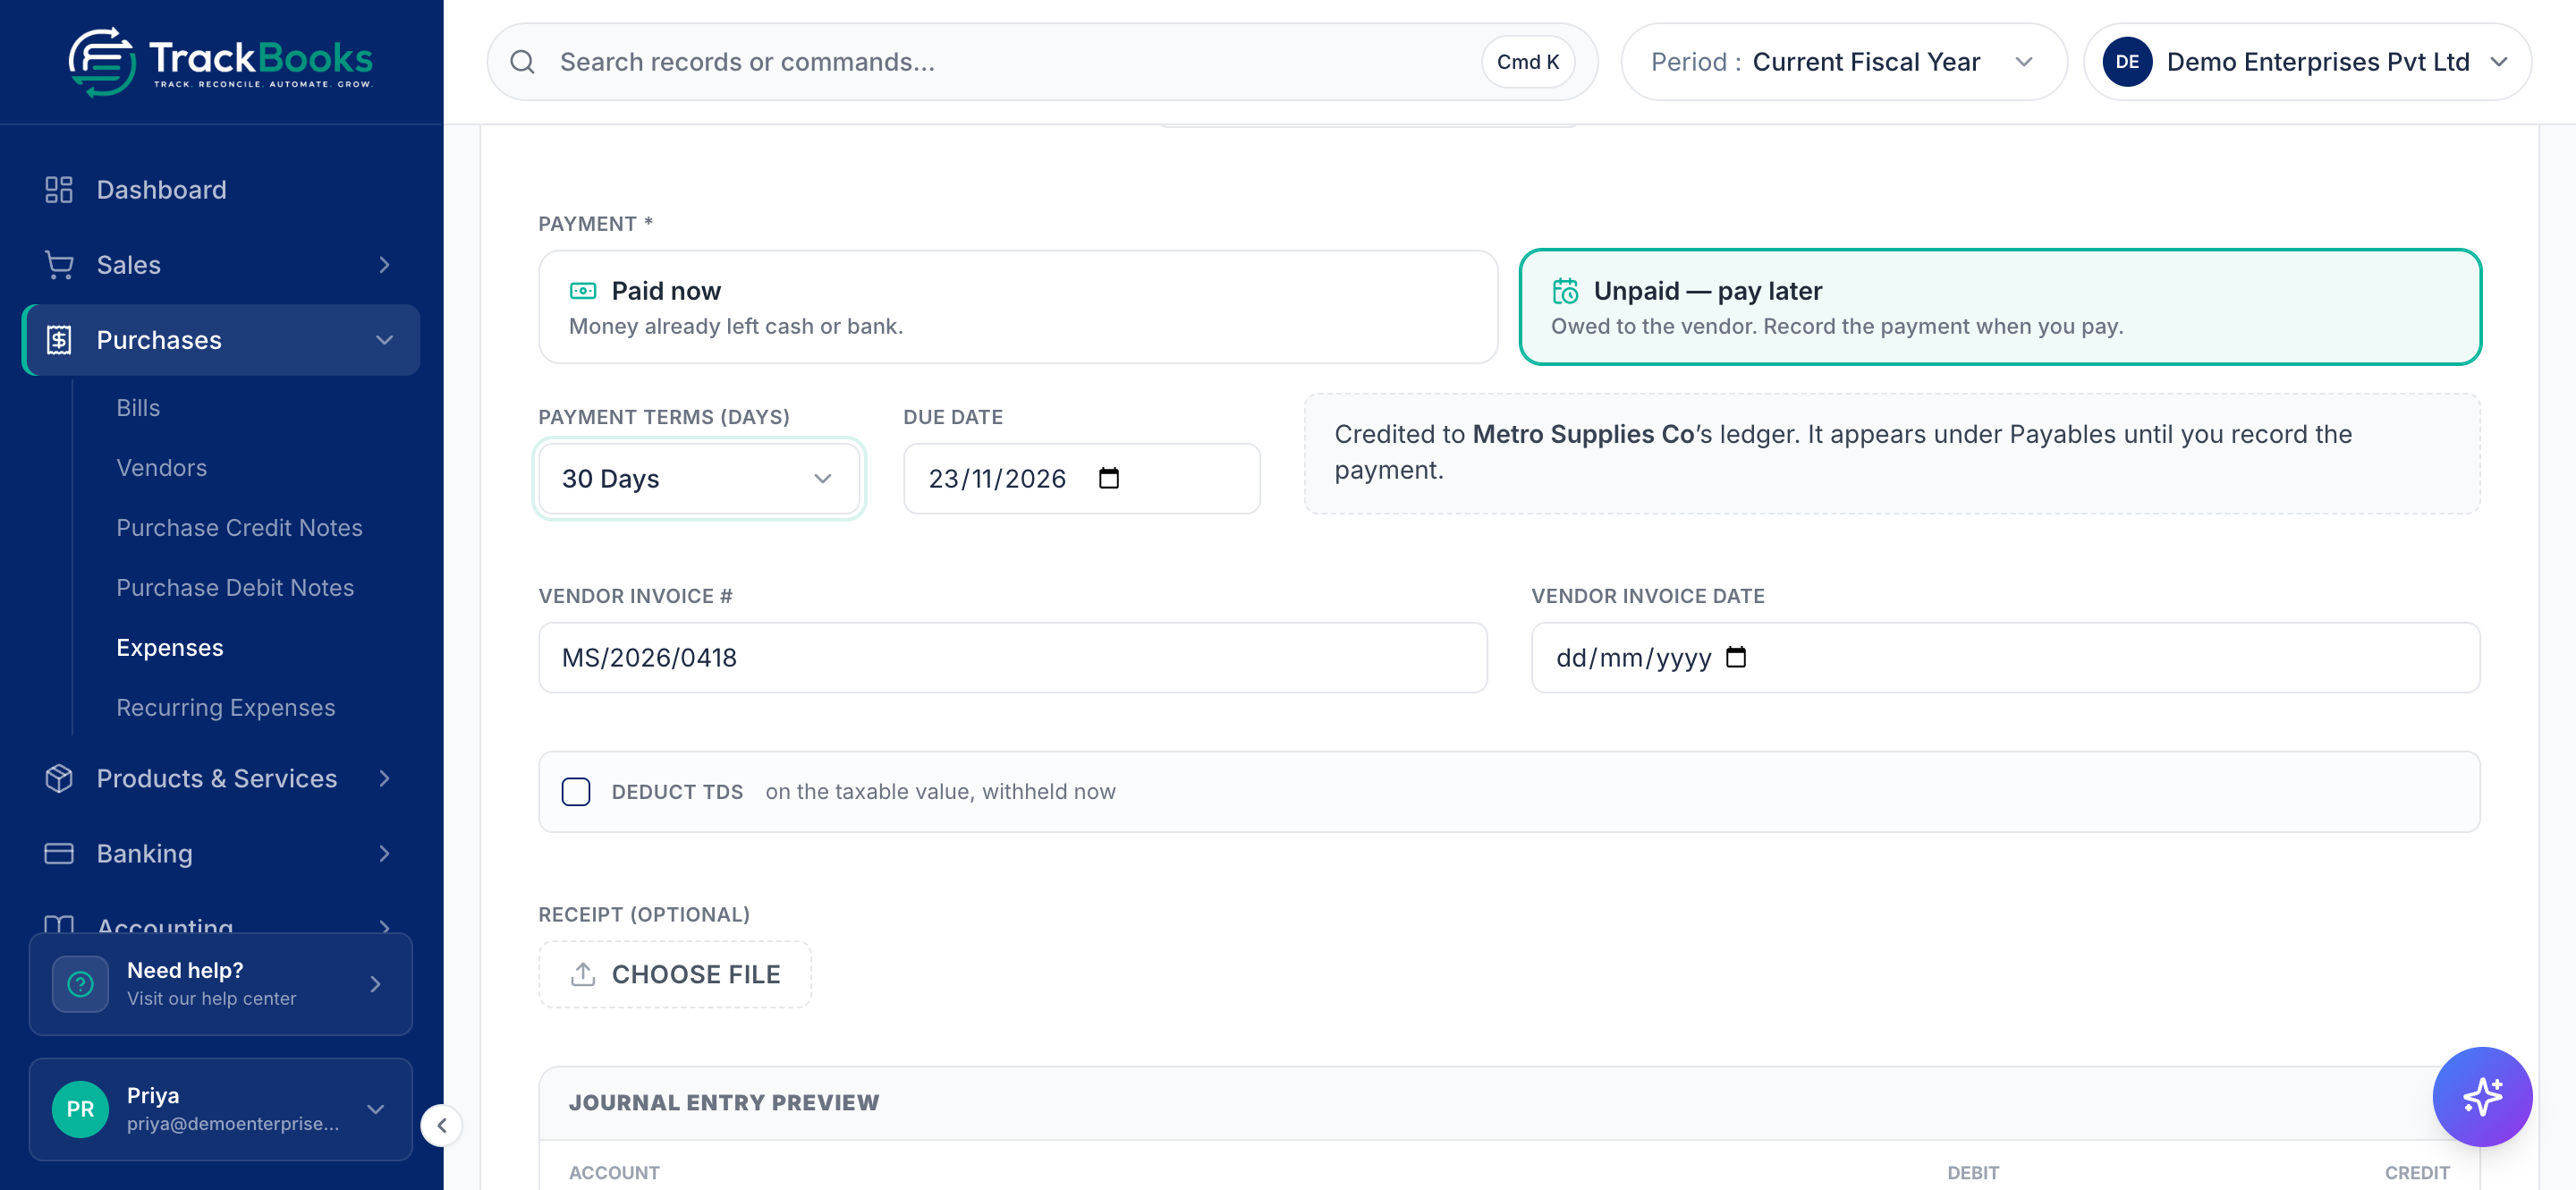
On the review screen, for scanned documents and manual drafts alike, the same pickers sit in the Dimensions section, and a change there is saved at once.
What gets tagged: the income lines of a sale or the expense lines of a purchase. GST, party, stock, round-off, and discount lines are never tagged. Only one template may be used per document; the other dimensions take single values. Credit and debit notes inherit the tags of the document they reverse. Recurring expense schedules carry no dimensions.
5. Tag manual journals
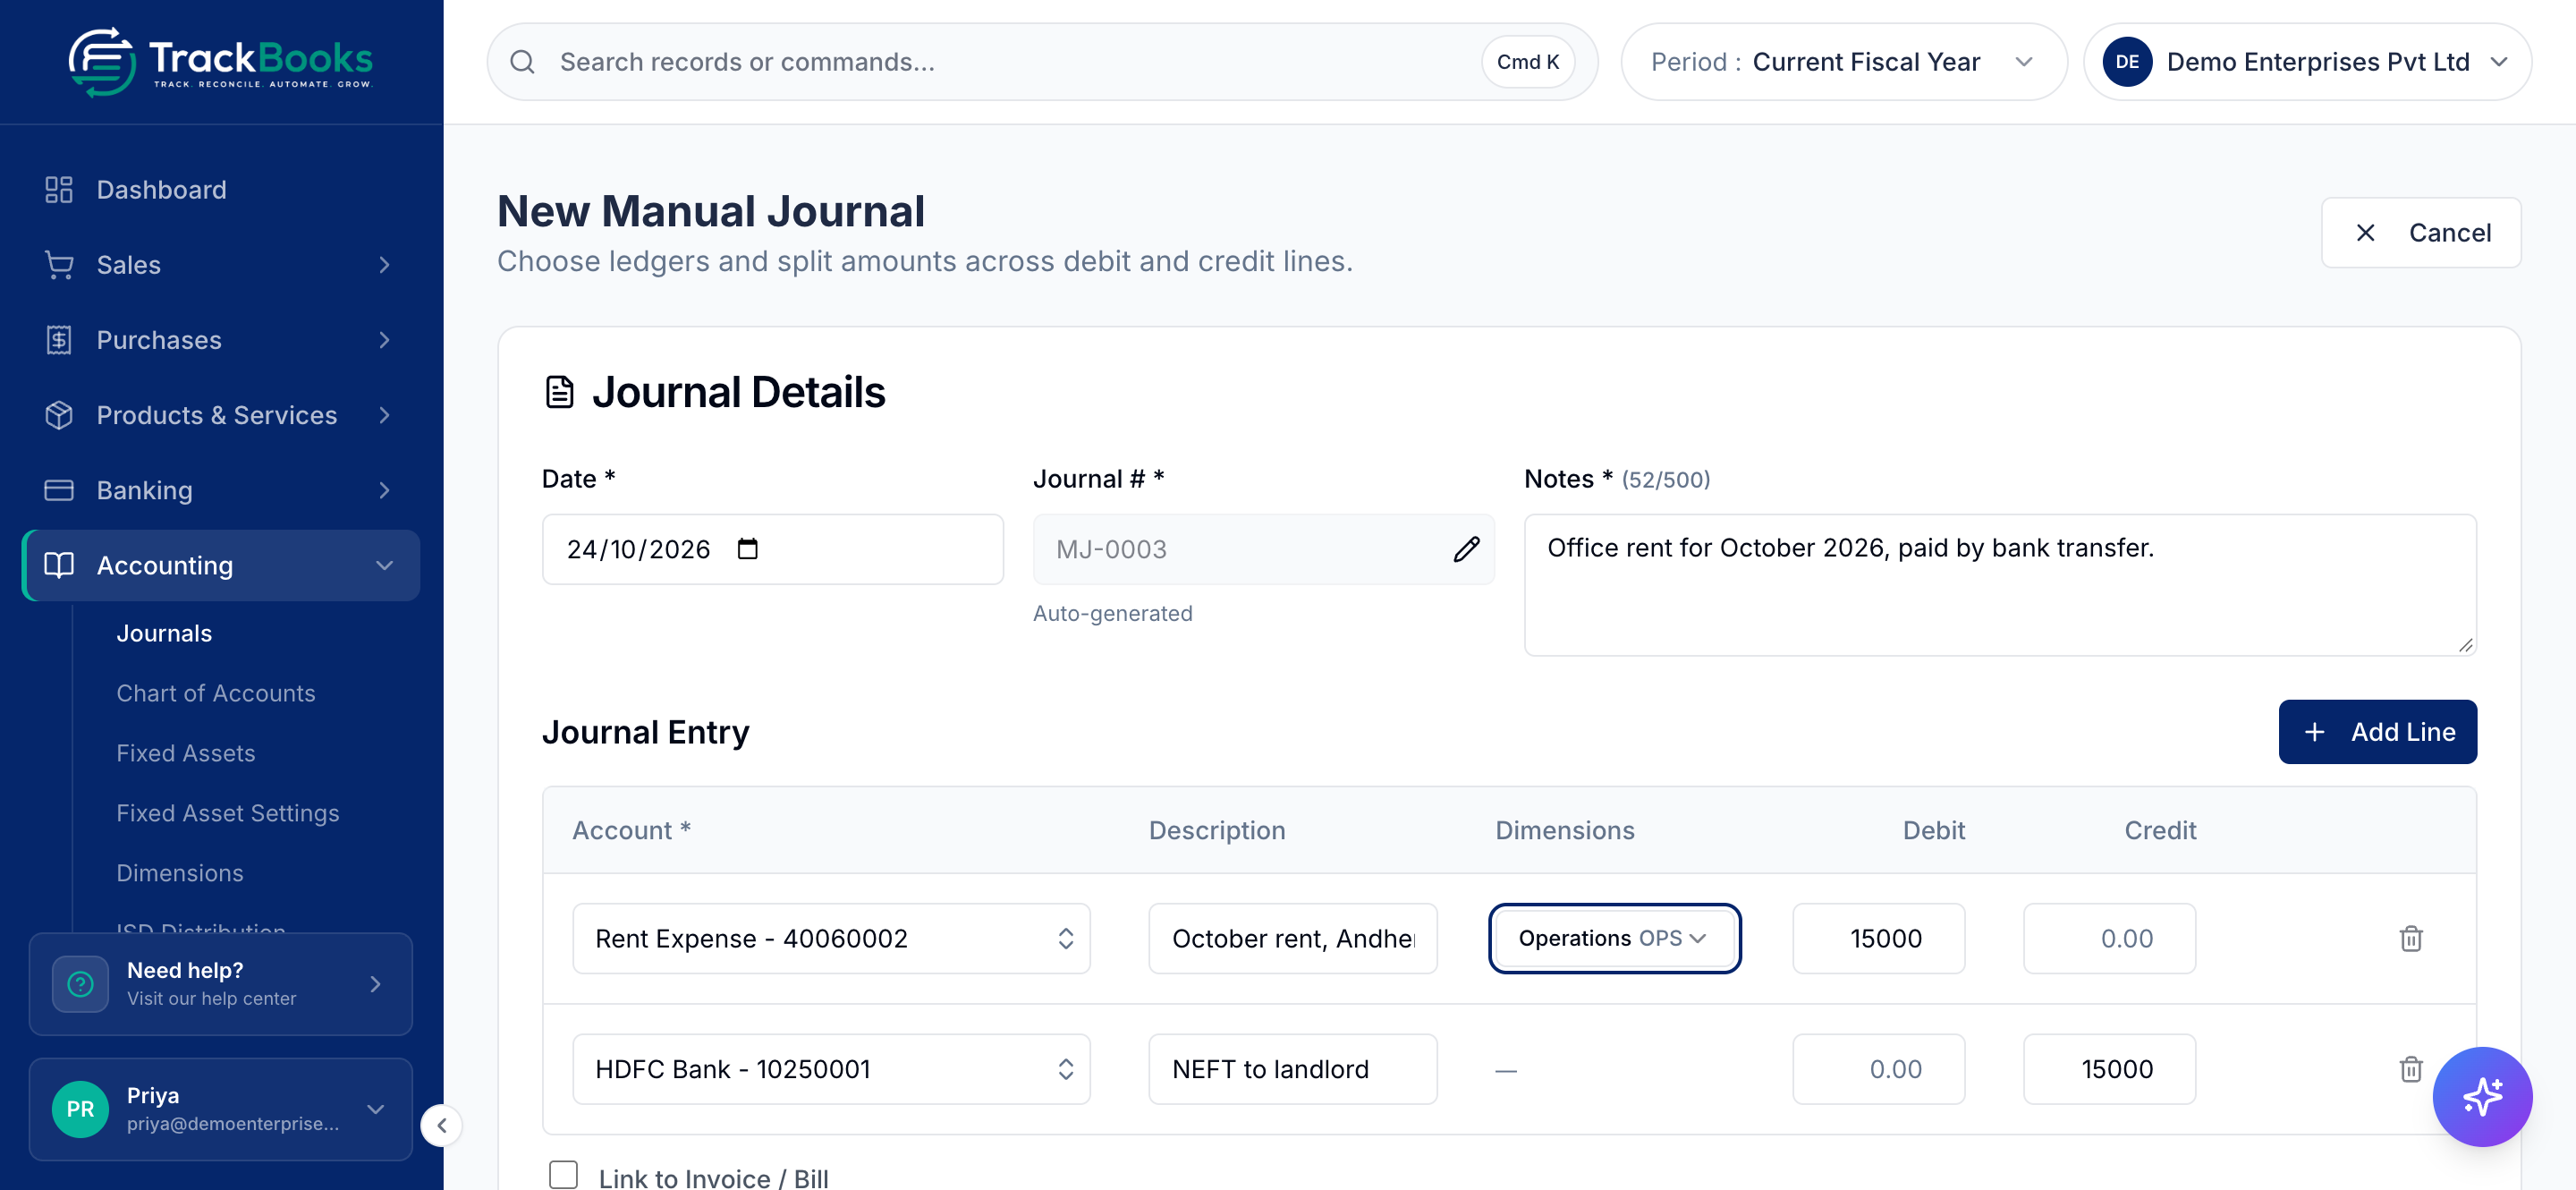
In Accounting → Journals, a new journal shows a Dimensions column with a picker per line. Pickers are offered only on Income and Expense account lines, and only for single values; bank, party, and asset lines show a dash. The posted journal's detail page shows the same Dimensions column.
6. Know what freezes when
- A template's percentages are copied onto the document the moment you pick it. Editing the template later does not change that draft; clear the picker and pick the template again if you want the new split.
- Posting writes the values onto the journal lines, and from then on they are fixed. Editing a posted journal shows "Dimensions on a posted journal are locked. To reclassify, post a correcting entry." Voiding a document reverses its lines with the same tags.
- To move everything that carries one value, use Reallocate (step 8). It is the only way a posted tag changes, and every use is logged.
7. Read the Dimension Report
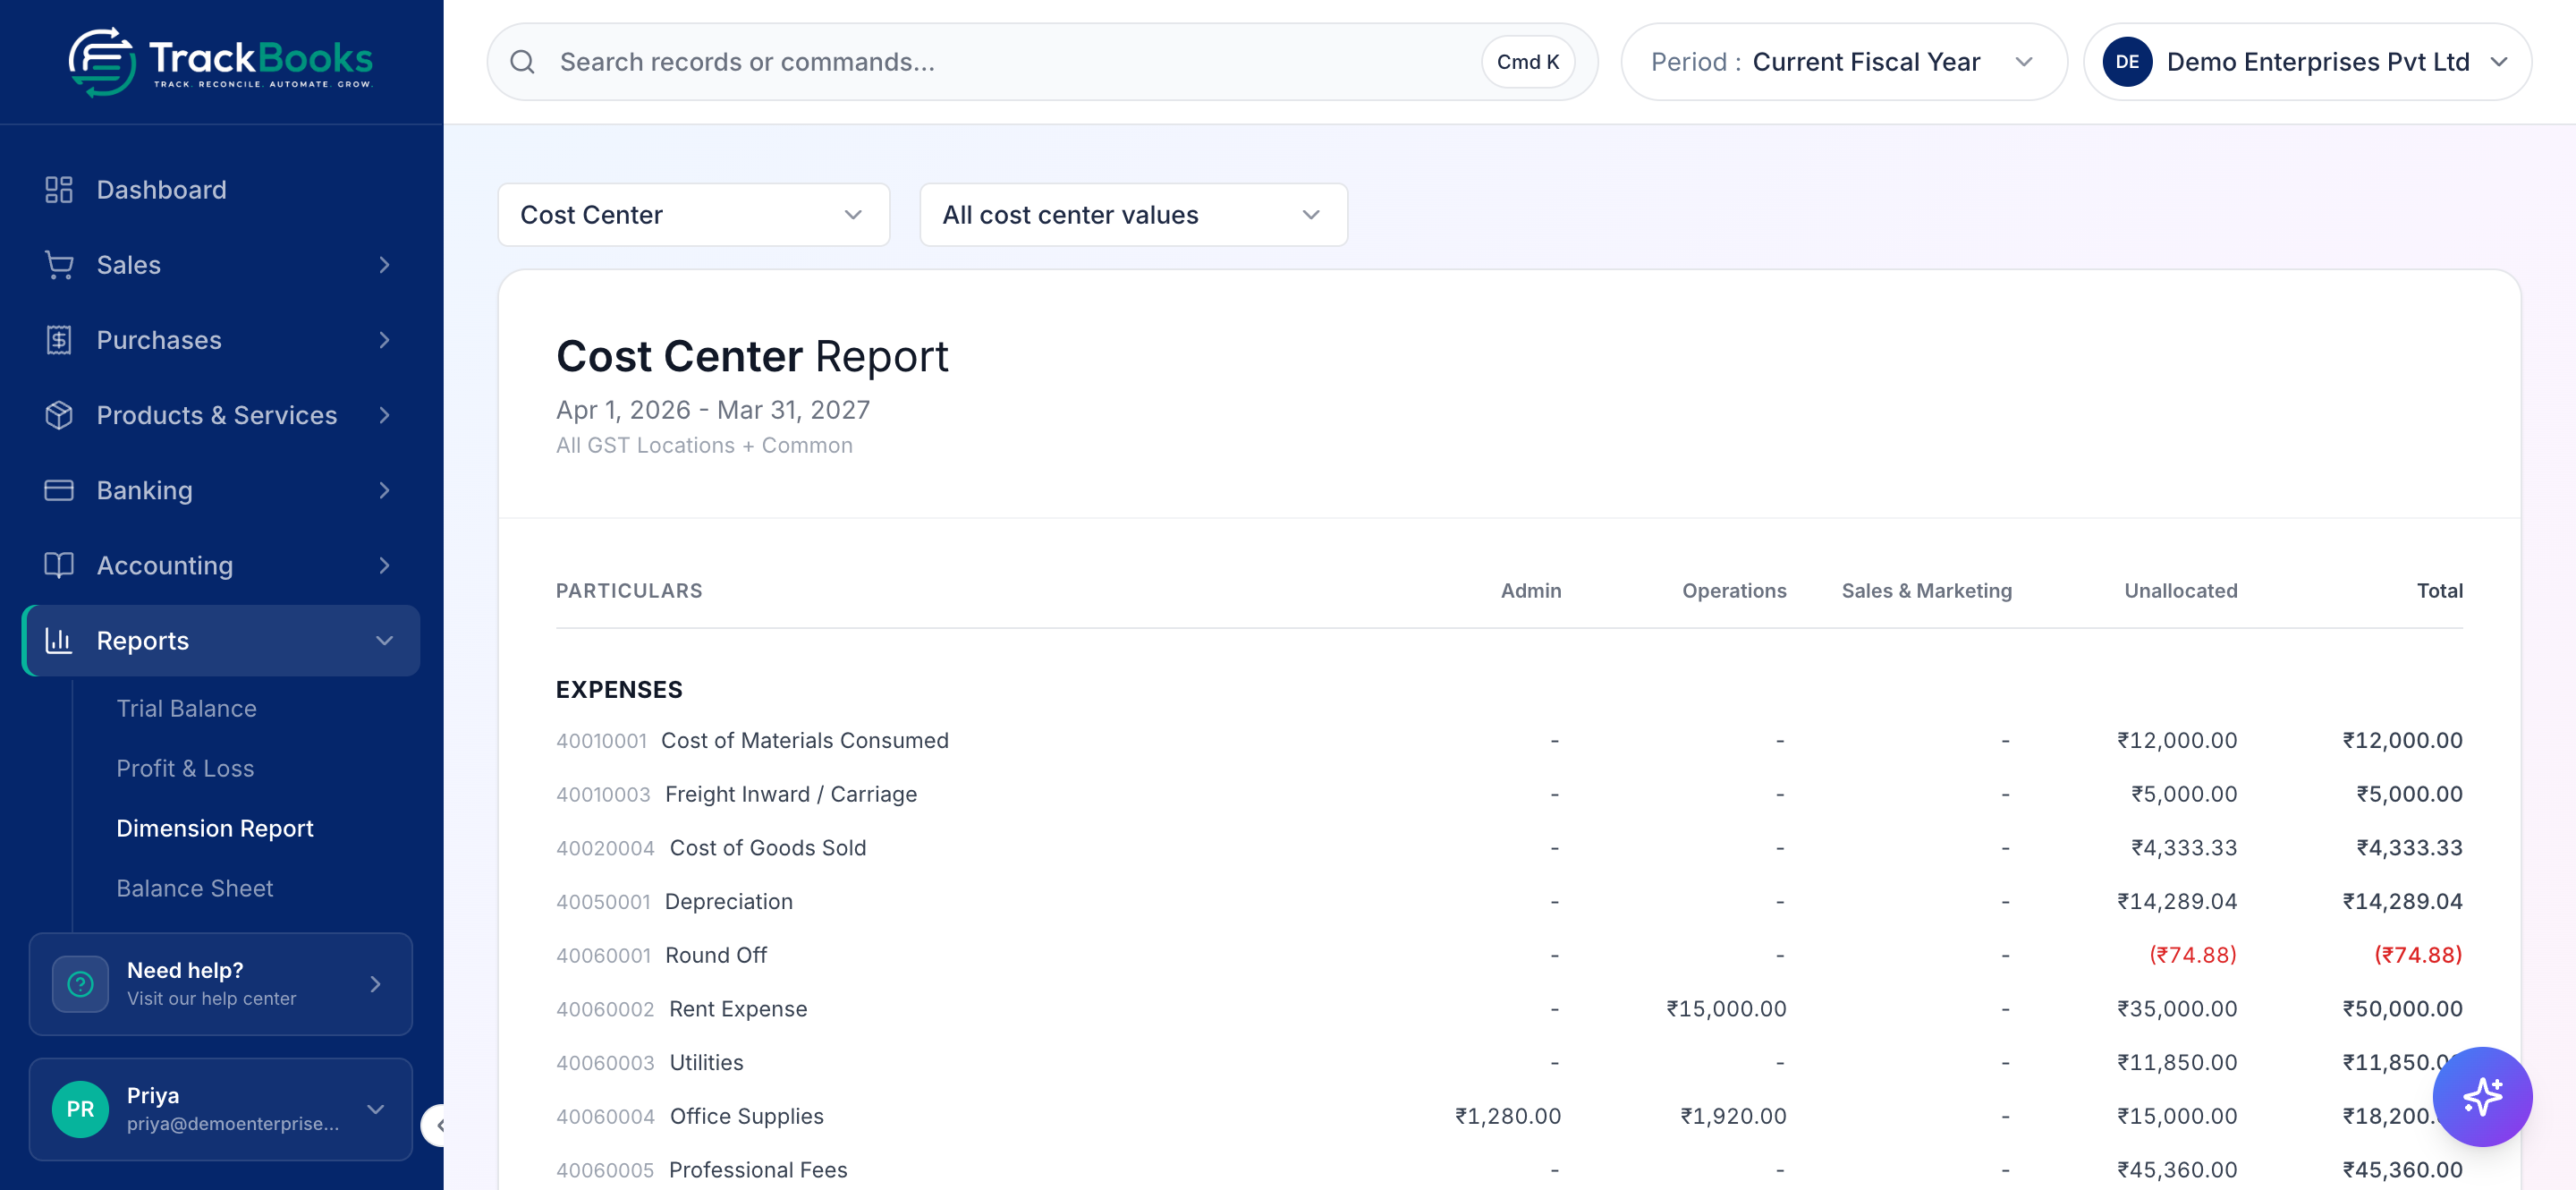
Open Reports → Dimension Report. Pick the Dimension; the period comes from the Period selector in the top bar, and multi-location companies also get the GST location scope (All locations + Common by default). For a hierarchical dimension choose Level: Top level rolls children into their parent, All values lists every value indented.
Rows are the income or expense accounts of that dimension's side, grouped under section headings such as Expenses; columns are its values (Admin, Operations, Sales & Marketing), Unallocated, and Total. The section totals (Total Income, Total Expenses) are built from the same posted lines as your Profit & Loss, so they match it for the same period and scope. Net (before unallocated costs) closes the table, and the note under it says what is structurally unallocated (cost of goods sold, stock adjustments, discounts, bank-reconciliation postings).
The view selector next to the dimension (All cost center values) switches to a single value to see just its column; the Total column still shows the full period, so that view does not reconcile on its own. Retired dimensions stay in the list marked (inactive) so old periods remain reportable.
8. Reallocate and retire a value
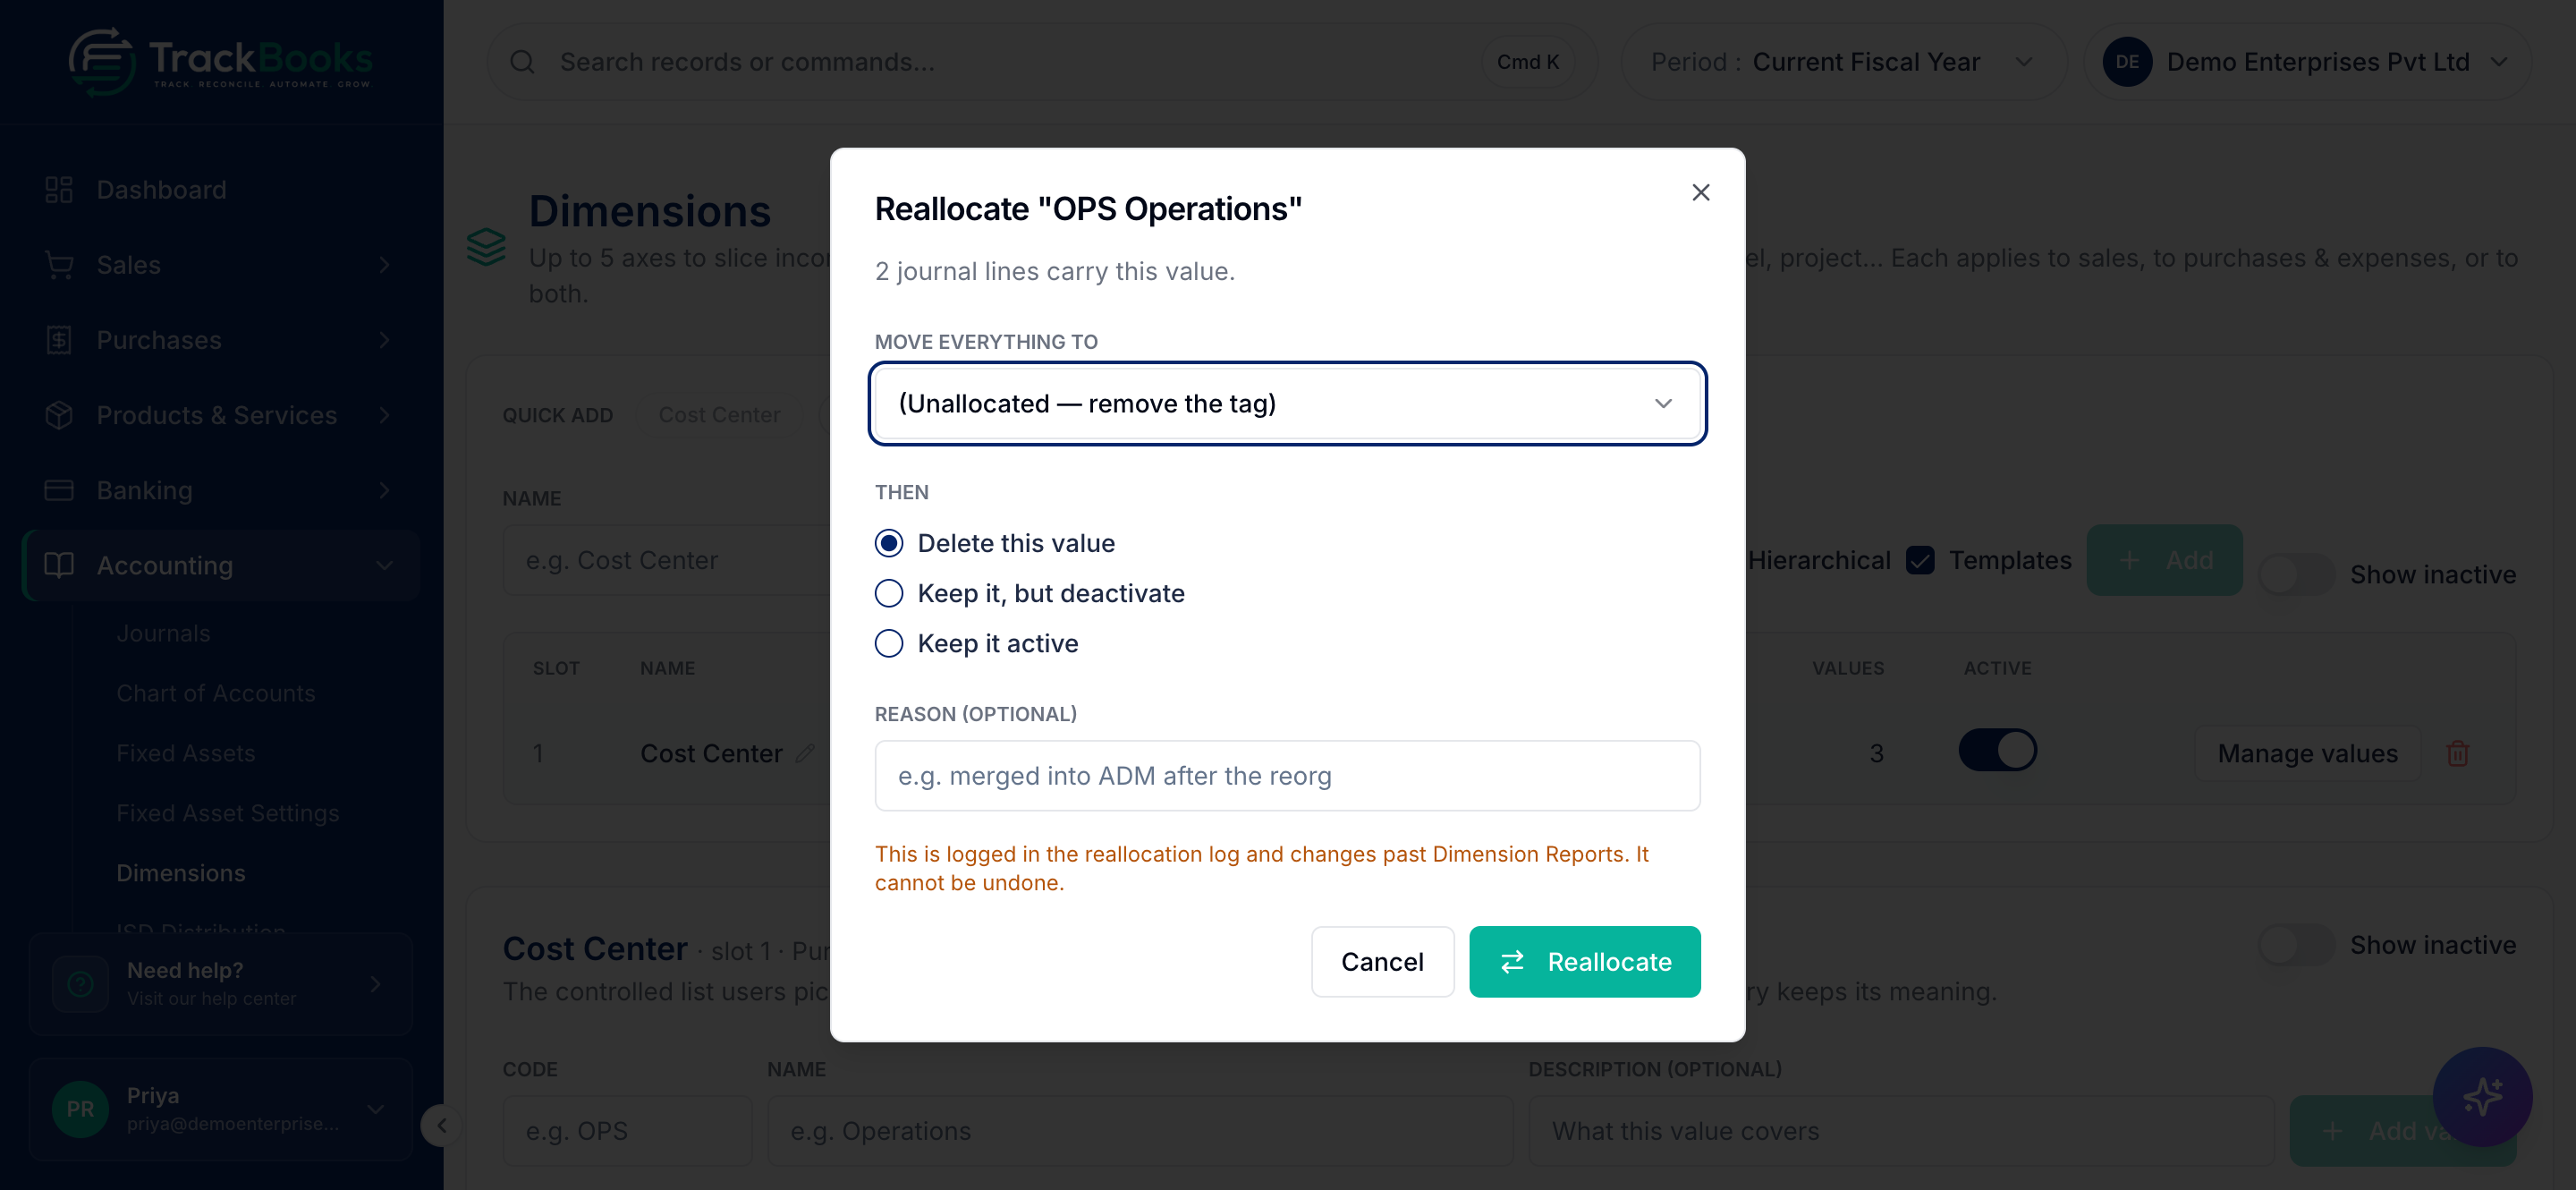
Two teams merged, or a value was a mistake. In Manage values, click the reallocate icon on the row. The dialog is titled after the value, for example Reallocate "OPS Operations", and starts by saying how many journal lines carry it ("2 journal lines carry this value."). Choose Move everything to: another value, or the default (Unallocated — remove the tag). Under Then choose Delete this value, Keep it, but deactivate, or Keep it active. Add a Reason (optional). The warning reads "This is logged in the reallocation log and changes past Dimension Reports. It cannot be undone." Click Reallocate. Every posted line, draft, frozen split, and template line that carried the value moves.
The move is written to the Reallocation log at the bottom of the Dimensions page (When, Dimension, From, To, Moved, Action, By, Reason). It survives even after the value or the dimension is deleted.
To retire a whole dimension, switch it off with Active: it keeps its slot and its history. Deleting it with the bin icon frees the slot: an unused dimension goes at once, while an in-use one asks you to tick I understand past reports for this dimension change and click Delete with allocations, after which every tagged line becomes Unallocated and the moves are logged.
Tips & common issues
Start with one dimension
One well-kept Cost Center beats five half-tagged axes. Add the next only when the first is tagged routinely.
Unallocated is information, not an error
Nothing forces a tag. The Unallocated column tells you what is still unclassified; tag it on the next edit, or leave it if it is genuinely company-wide.
Stale classification before posting
If a value, template, or dimension used on a draft is deactivated or re-scoped, the picker shows "This classification is no longer active or applicable — clear it or reactivate it in Settings → Dimensions". Clear it or reactivate the value under Accounting → Dimensions before posting. Deactivating a value that a template uses affects every document that uses that template.
Reallocation rewrites history
Reallocate and Delete with allocations change past Dimension Reports and cannot be undone. Ledger totals, GST, and the Profit & Loss are untouched.
Related guides
- Chart of accounts & journals
- Create & post a sales invoice
- Create & post a purchase bill
- Record expenses & recurring expenses
- Financial reports
Last checked against TrackBooks on 24 October 2026.