Create and post a sales invoice
This guide shows you how to raise a sales invoice in TrackBooks — either by typing it in yourself or by uploading a file for AI extraction — review it, and post it so it updates your books and GST returns.
What this is
A sales invoice records something you sold to a customer. In TrackBooks every invoice moves through a short lifecycle:
Draft → Review → Posted
- Draft — the invoice exists but has not yet affected your accounts.
- Review — you check the figures, tax split, and the accounting entry TrackBooks will make.
- Posted — the invoice is final: TrackBooks creates the double-entry journal, updates your ledgers, and includes the invoice in your GST returns (GSTR-1) and reports.
Until an invoice is posted, it does not appear in your financial statements. You can post in two ways: create the invoice manually, or upload a document and let AI pre-fill it for you. Both paths meet at the same Review screen before posting.
Before you begin
- Role required: Admin or Accountant. View-only users can open invoices but cannot create or post them.
- Prerequisites: Your company and at least one GSTIN registration should be set up (this determines your home state and the GST numbering).
- Settings/flags: If multi-location is enabled for your company, choose the correct branch/GSTIN from the location switcher before you start — the invoice is raised under that registration.
- AI credits: Only the upload path consumes AI credits (for reading the document). Manual entry is free.
Where invoices live
Open Sales → Invoices from the sidebar. This is the invoice register: every invoice, its status, amounts, and per-row actions. The two buttons at the top — Upload Invoices and Create new invoice — are the two ways to start.
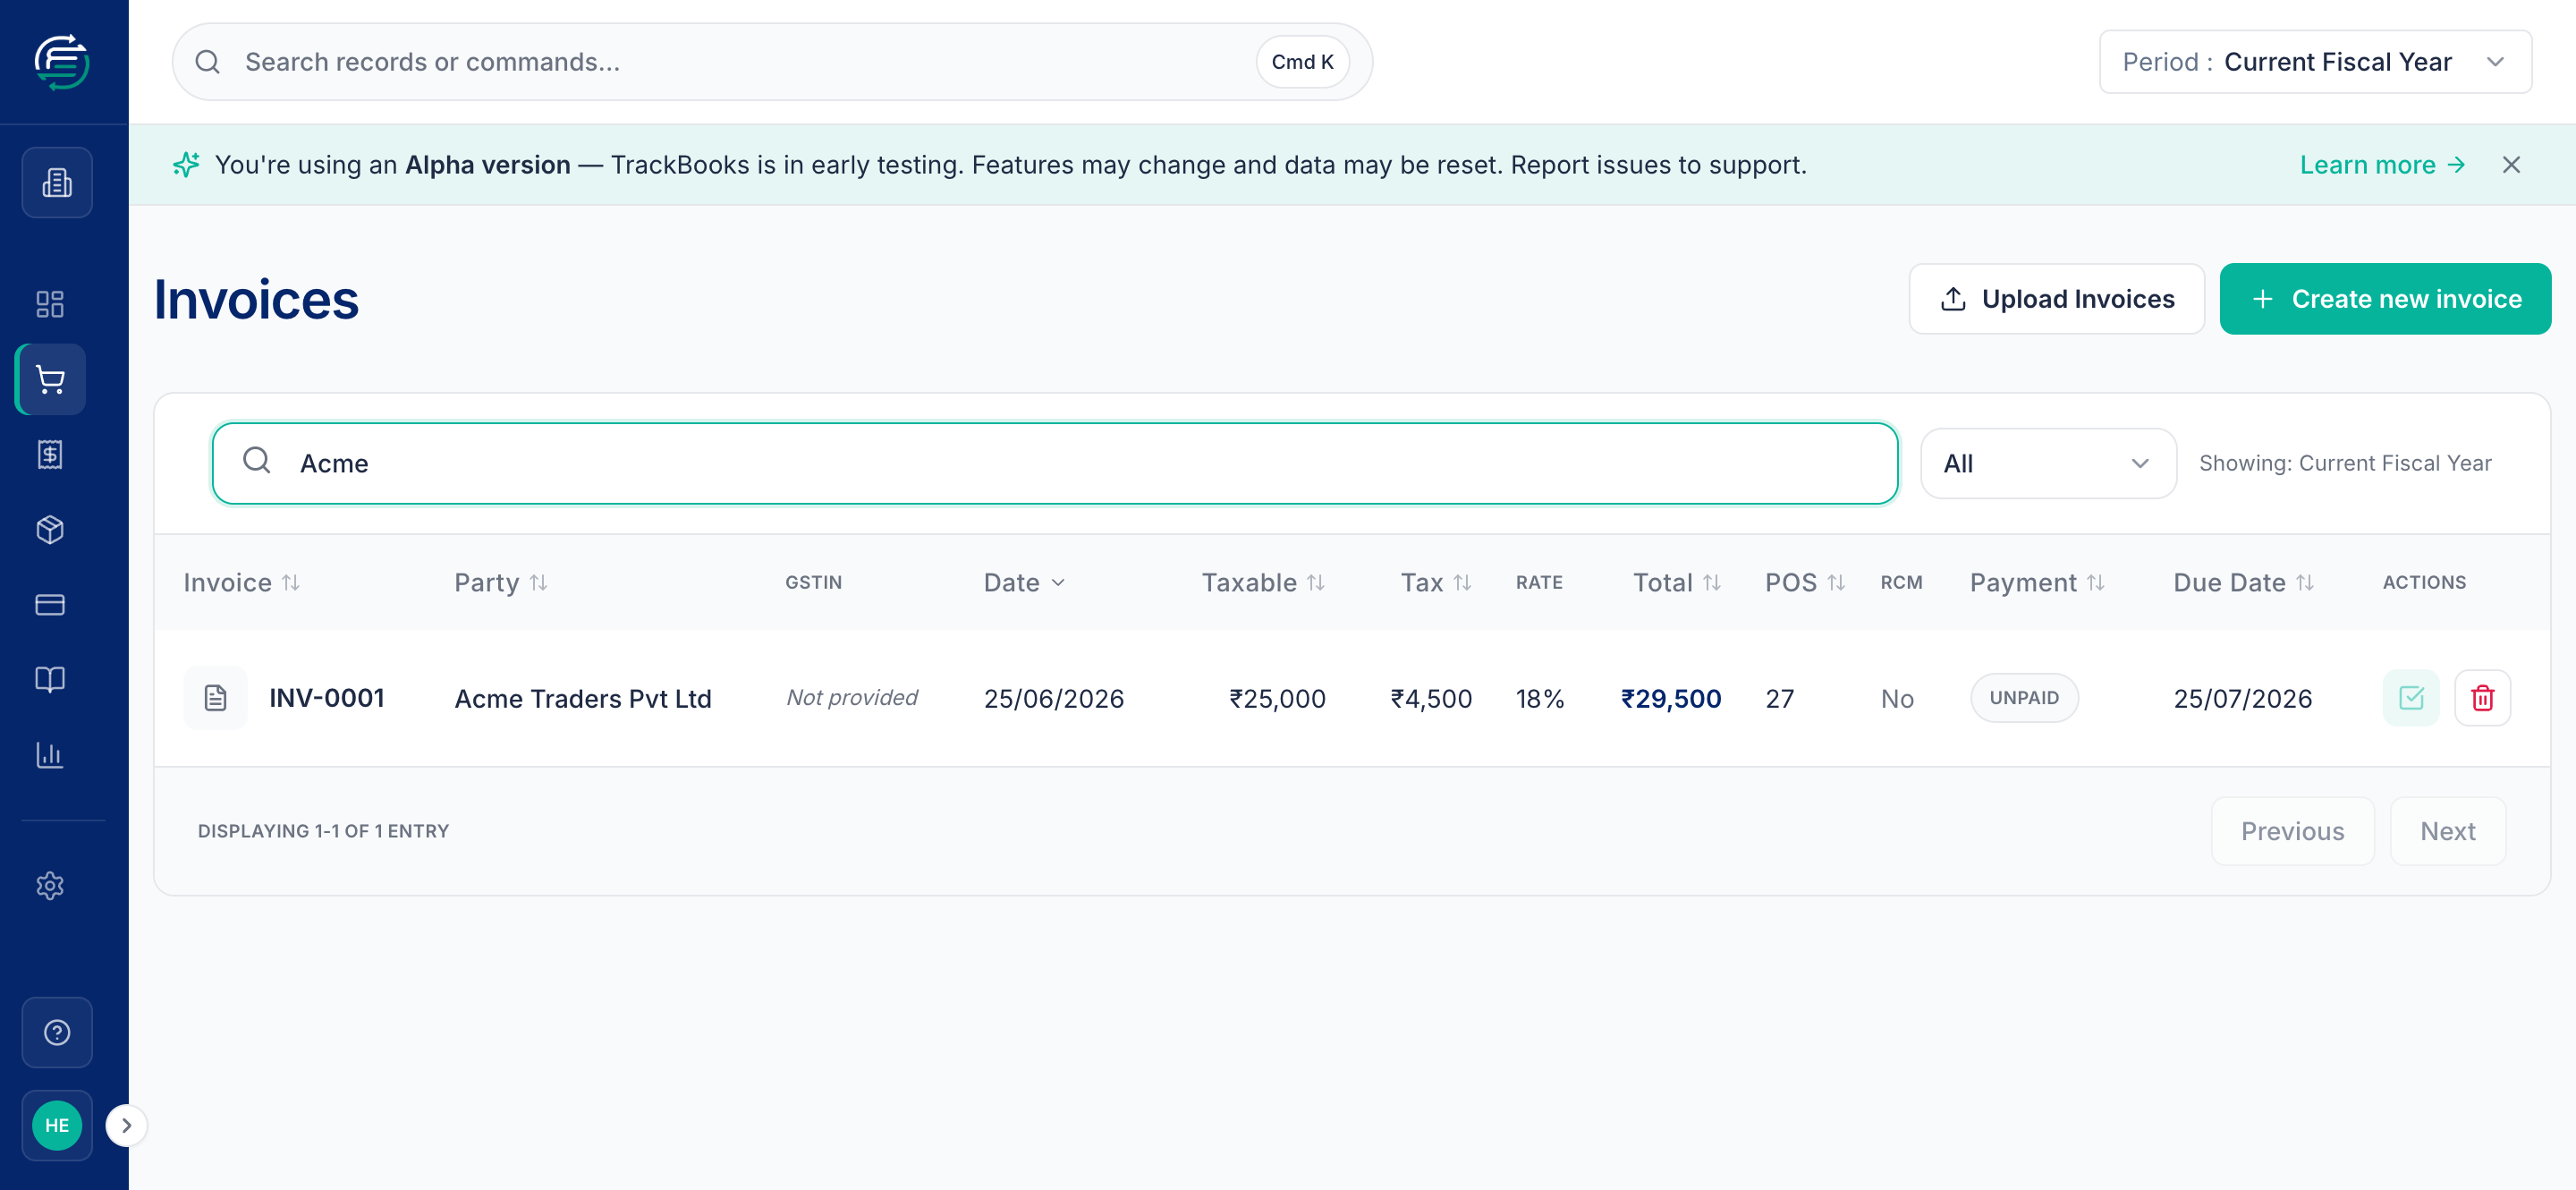
Read the Actions column
A draft invoice shows a Post Invoice button so you can post straight from the list. A posted invoice instead shows Record Payment, and its post button is greyed out — a quick way to see what is already in your books.
Option A — Create an invoice manually
1. Open the create form
Click Create new invoice. The form opens with an auto-generated invoice number
(e.g. INV-0001) and today's date already filled in.
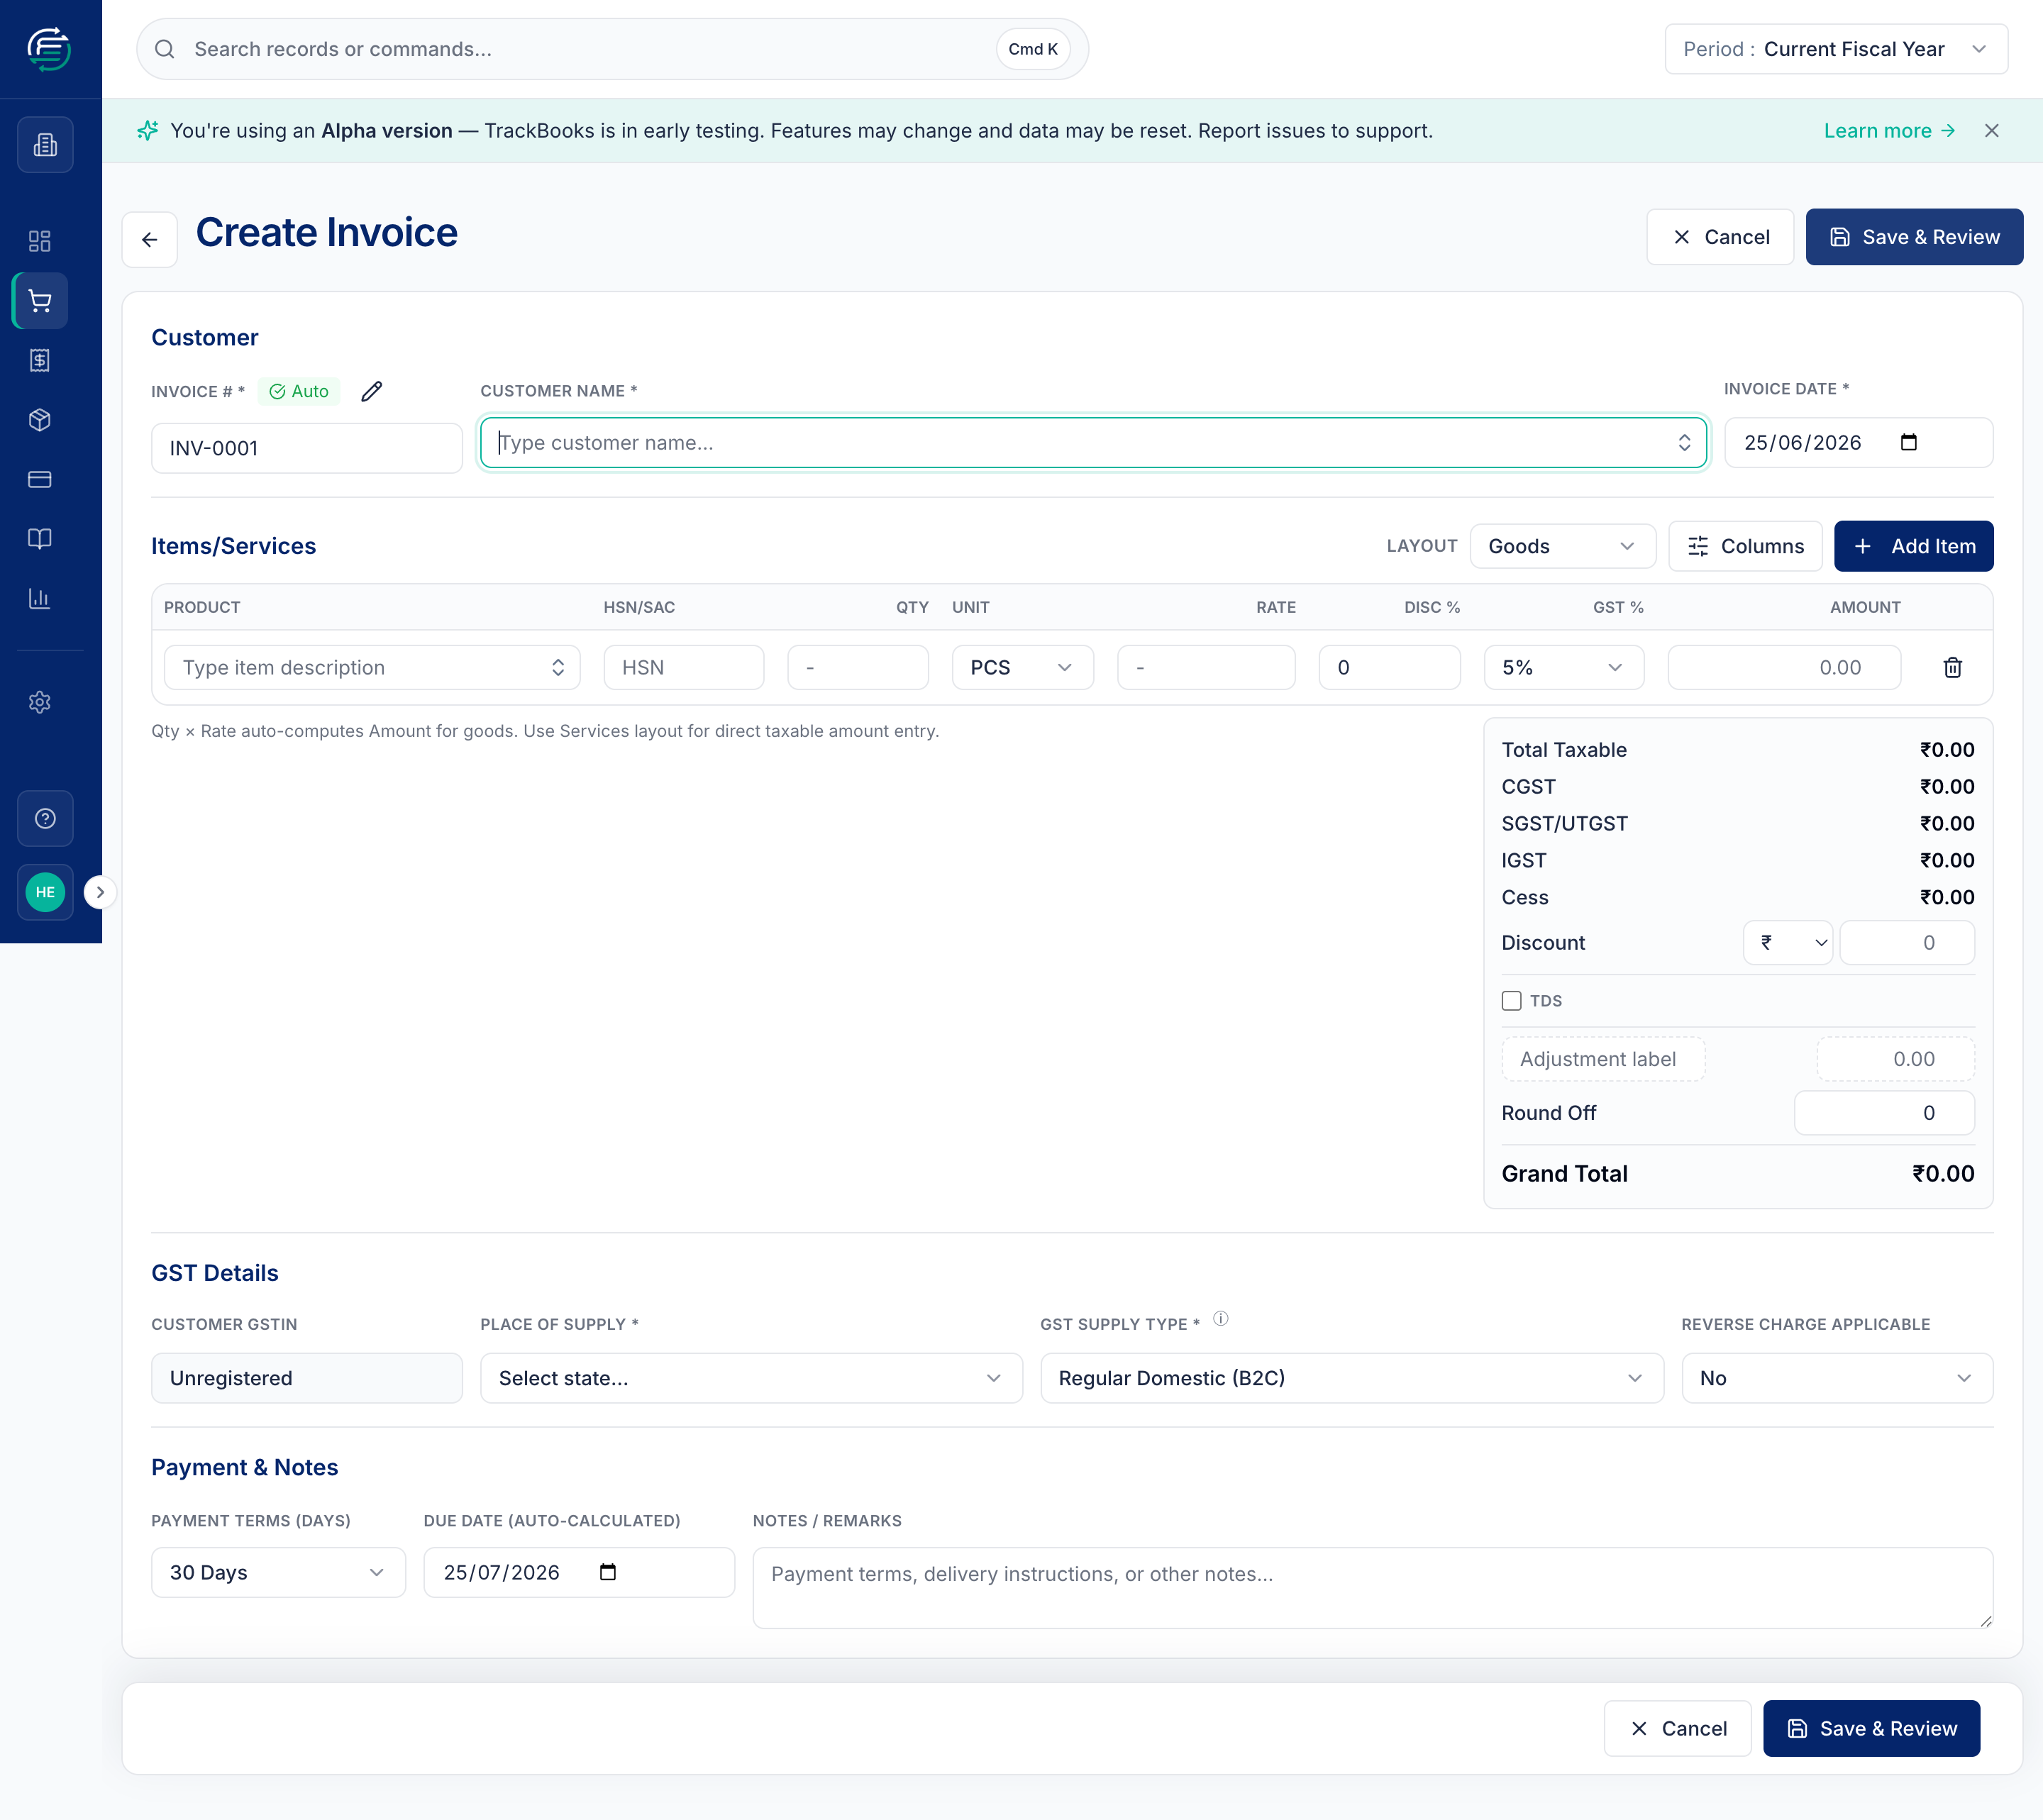
Invoice numbering is automatic
The INVOICE # field shows Auto and is read-only — TrackBooks assigns the next number in your series. Use the small settings icon next to it to change your prefix or numbering scheme.
2. Enter the customer
Type the Customer Name. If the name matches an existing customer you can pick them; if it's new, you can create the customer record on the fly. Leaving a customer GSTIN empty marks the sale as Unregistered (a B2C sale).
3. Add line items
In the Items/Services section, fill the row for what you sold:
- Product — a description (e.g. Office Chair).
- HSN/SAC — the tax classification code for the item.
- Qty and Rate — for the Goods layout, Amount auto-calculates as Qty × Rate.
- GST % — pick the rate (0 / 5 / 12 / 18 / 28%).
Use Add Item for more rows. Switch the Layout to Services if you'd rather enter a taxable amount directly instead of Qty × Rate.
4. Set the Place of Supply
Scroll to GST Details and choose the Place of Supply (the customer's state).
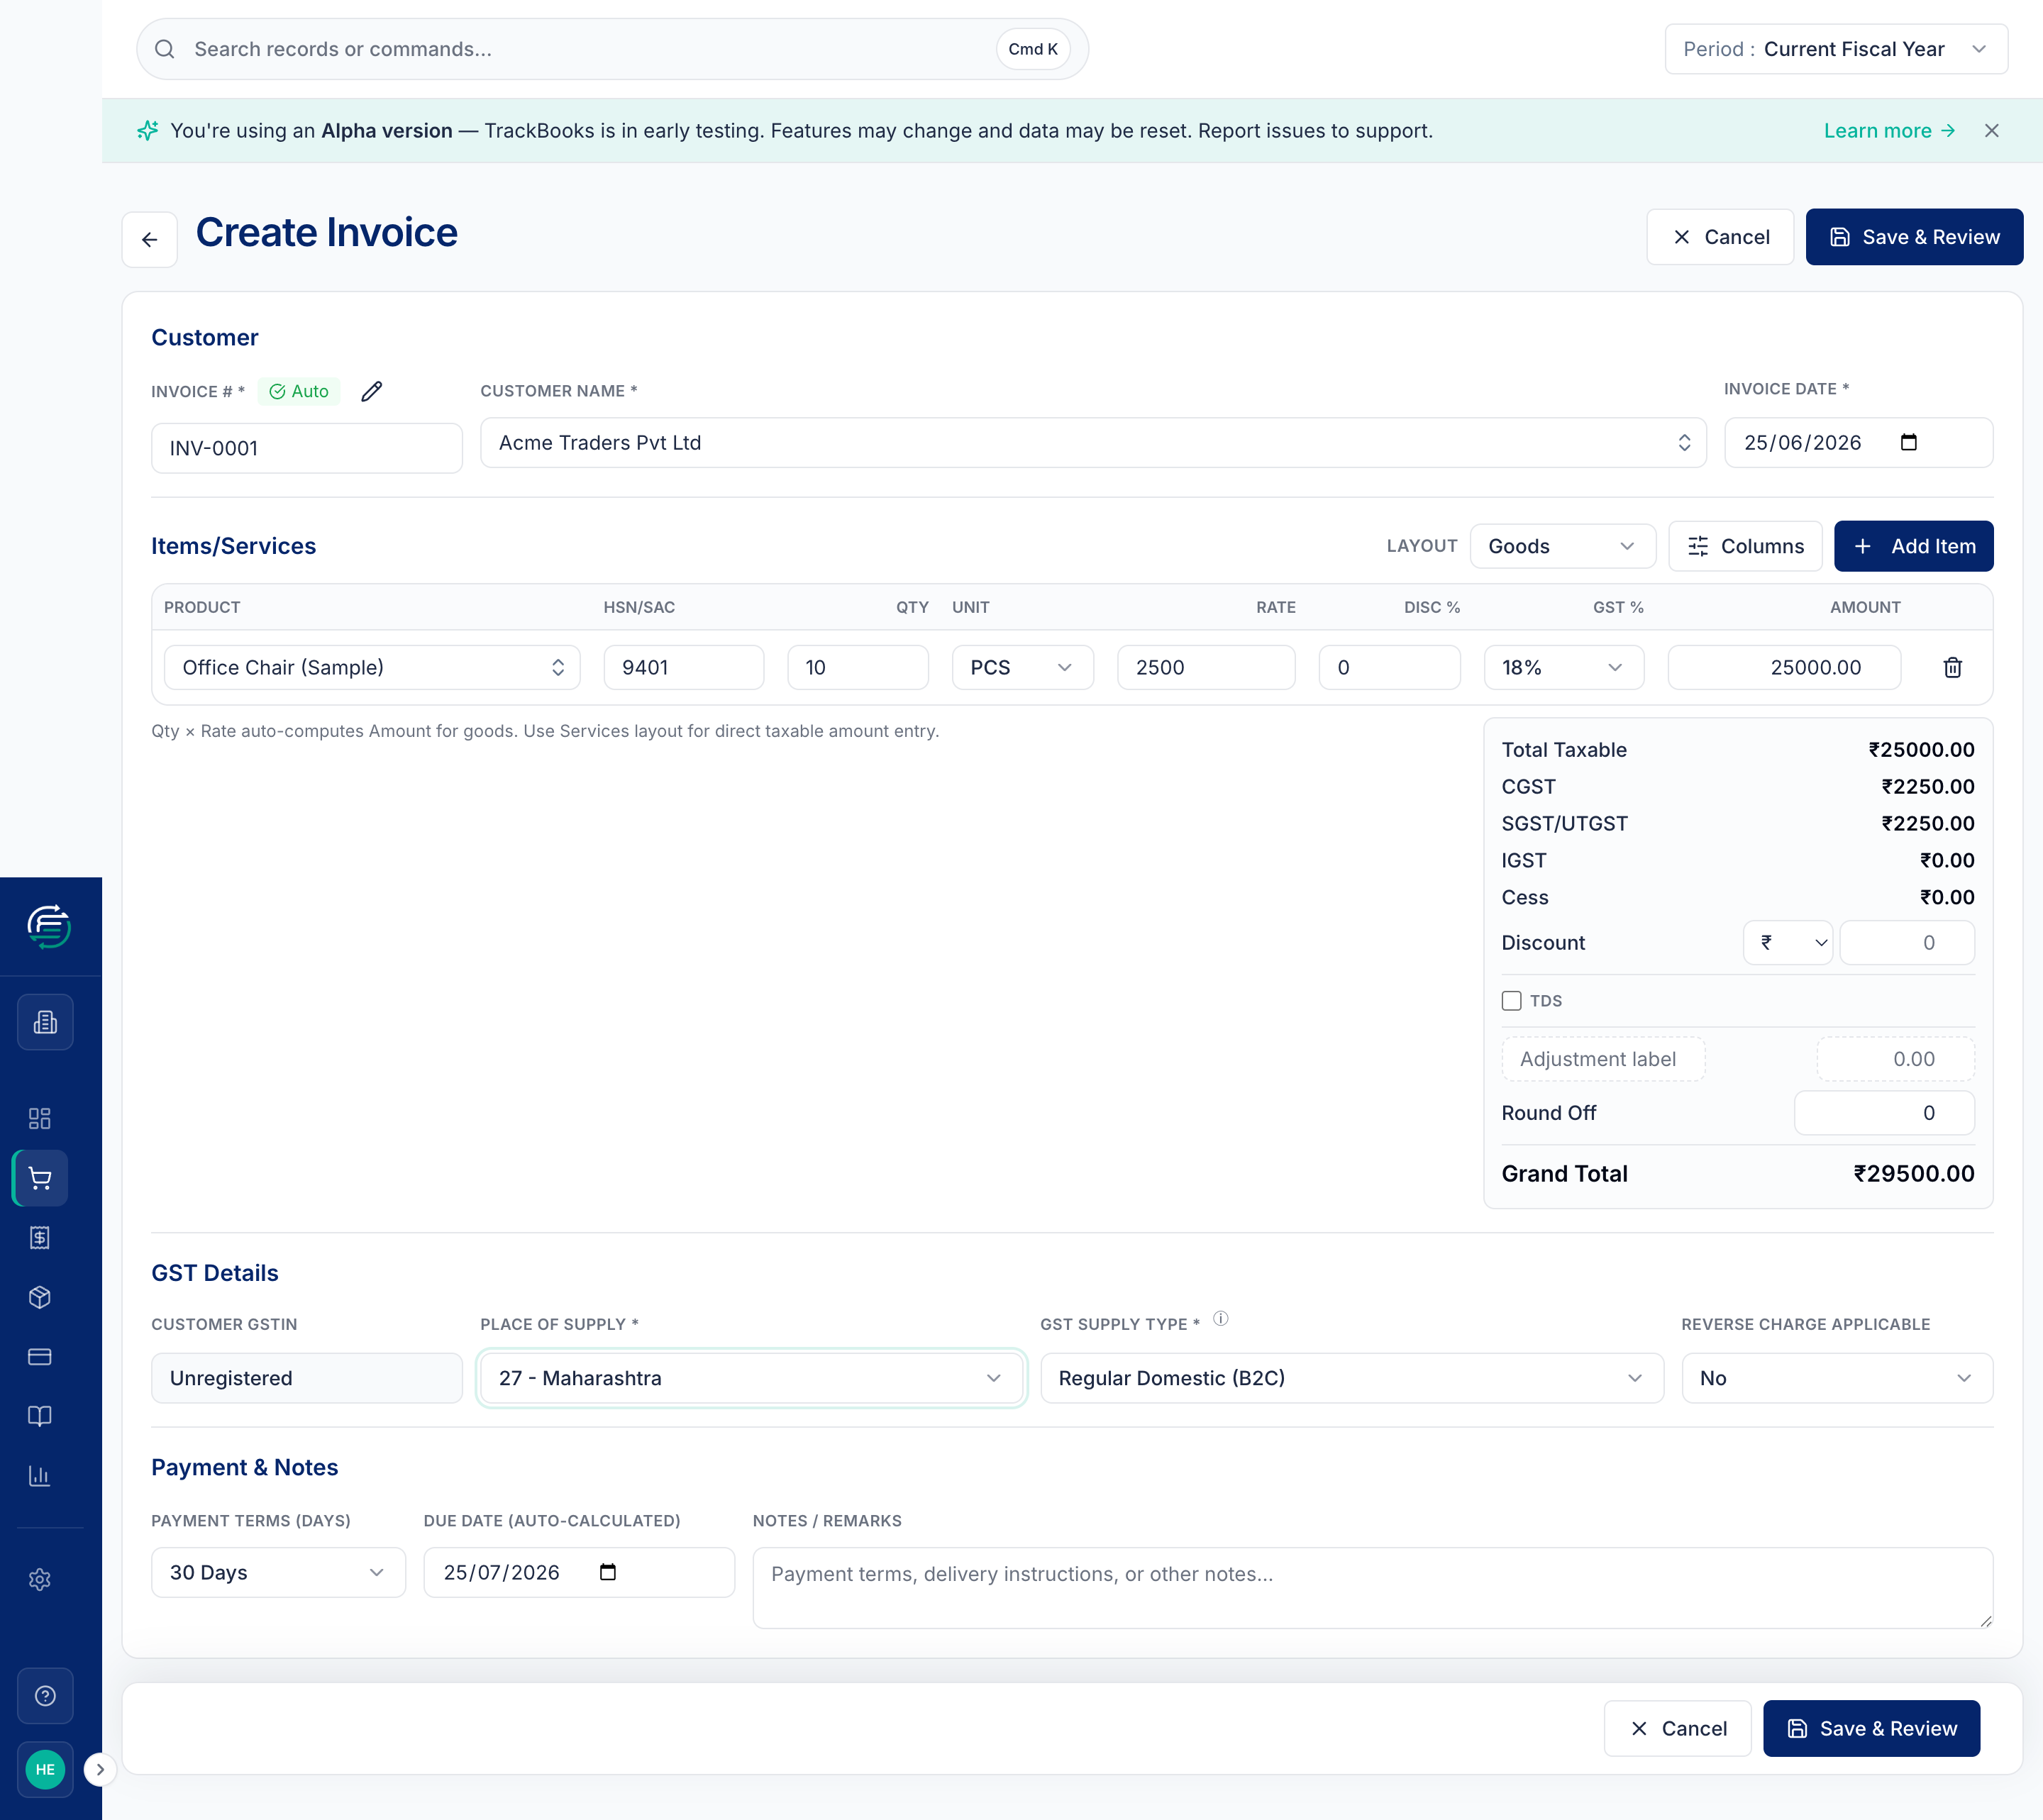
Place of Supply decides your tax split
TrackBooks cannot calculate GST until Place of Supply is set, because that's what determines the tax type:
- Same state as your GSTIN → CGST + SGST (e.g. 18% becomes 9% + 9%).
- Different state → IGST (the full 18% as one line).
In the screenshot above, choosing Maharashtra (the company's home state) produced CGST ₹2,250 + SGST ₹2,250 on a ₹25,000 sale, for a ₹29,500 total.
5. Save & Review
Click Save & Review. The invoice is saved as a Draft and you're taken to the review screen (covered below). Manual invoices are not posted directly — they always pass through review first.
Option B — Upload an invoice for AI extraction
If you already have the invoice as a PDF or image, let AI read it for you.
1. Open the upload screen
Click Upload Invoices (or go to Sales → Invoices → Upload Invoices). Drag your files onto the drop zone, or click to browse.
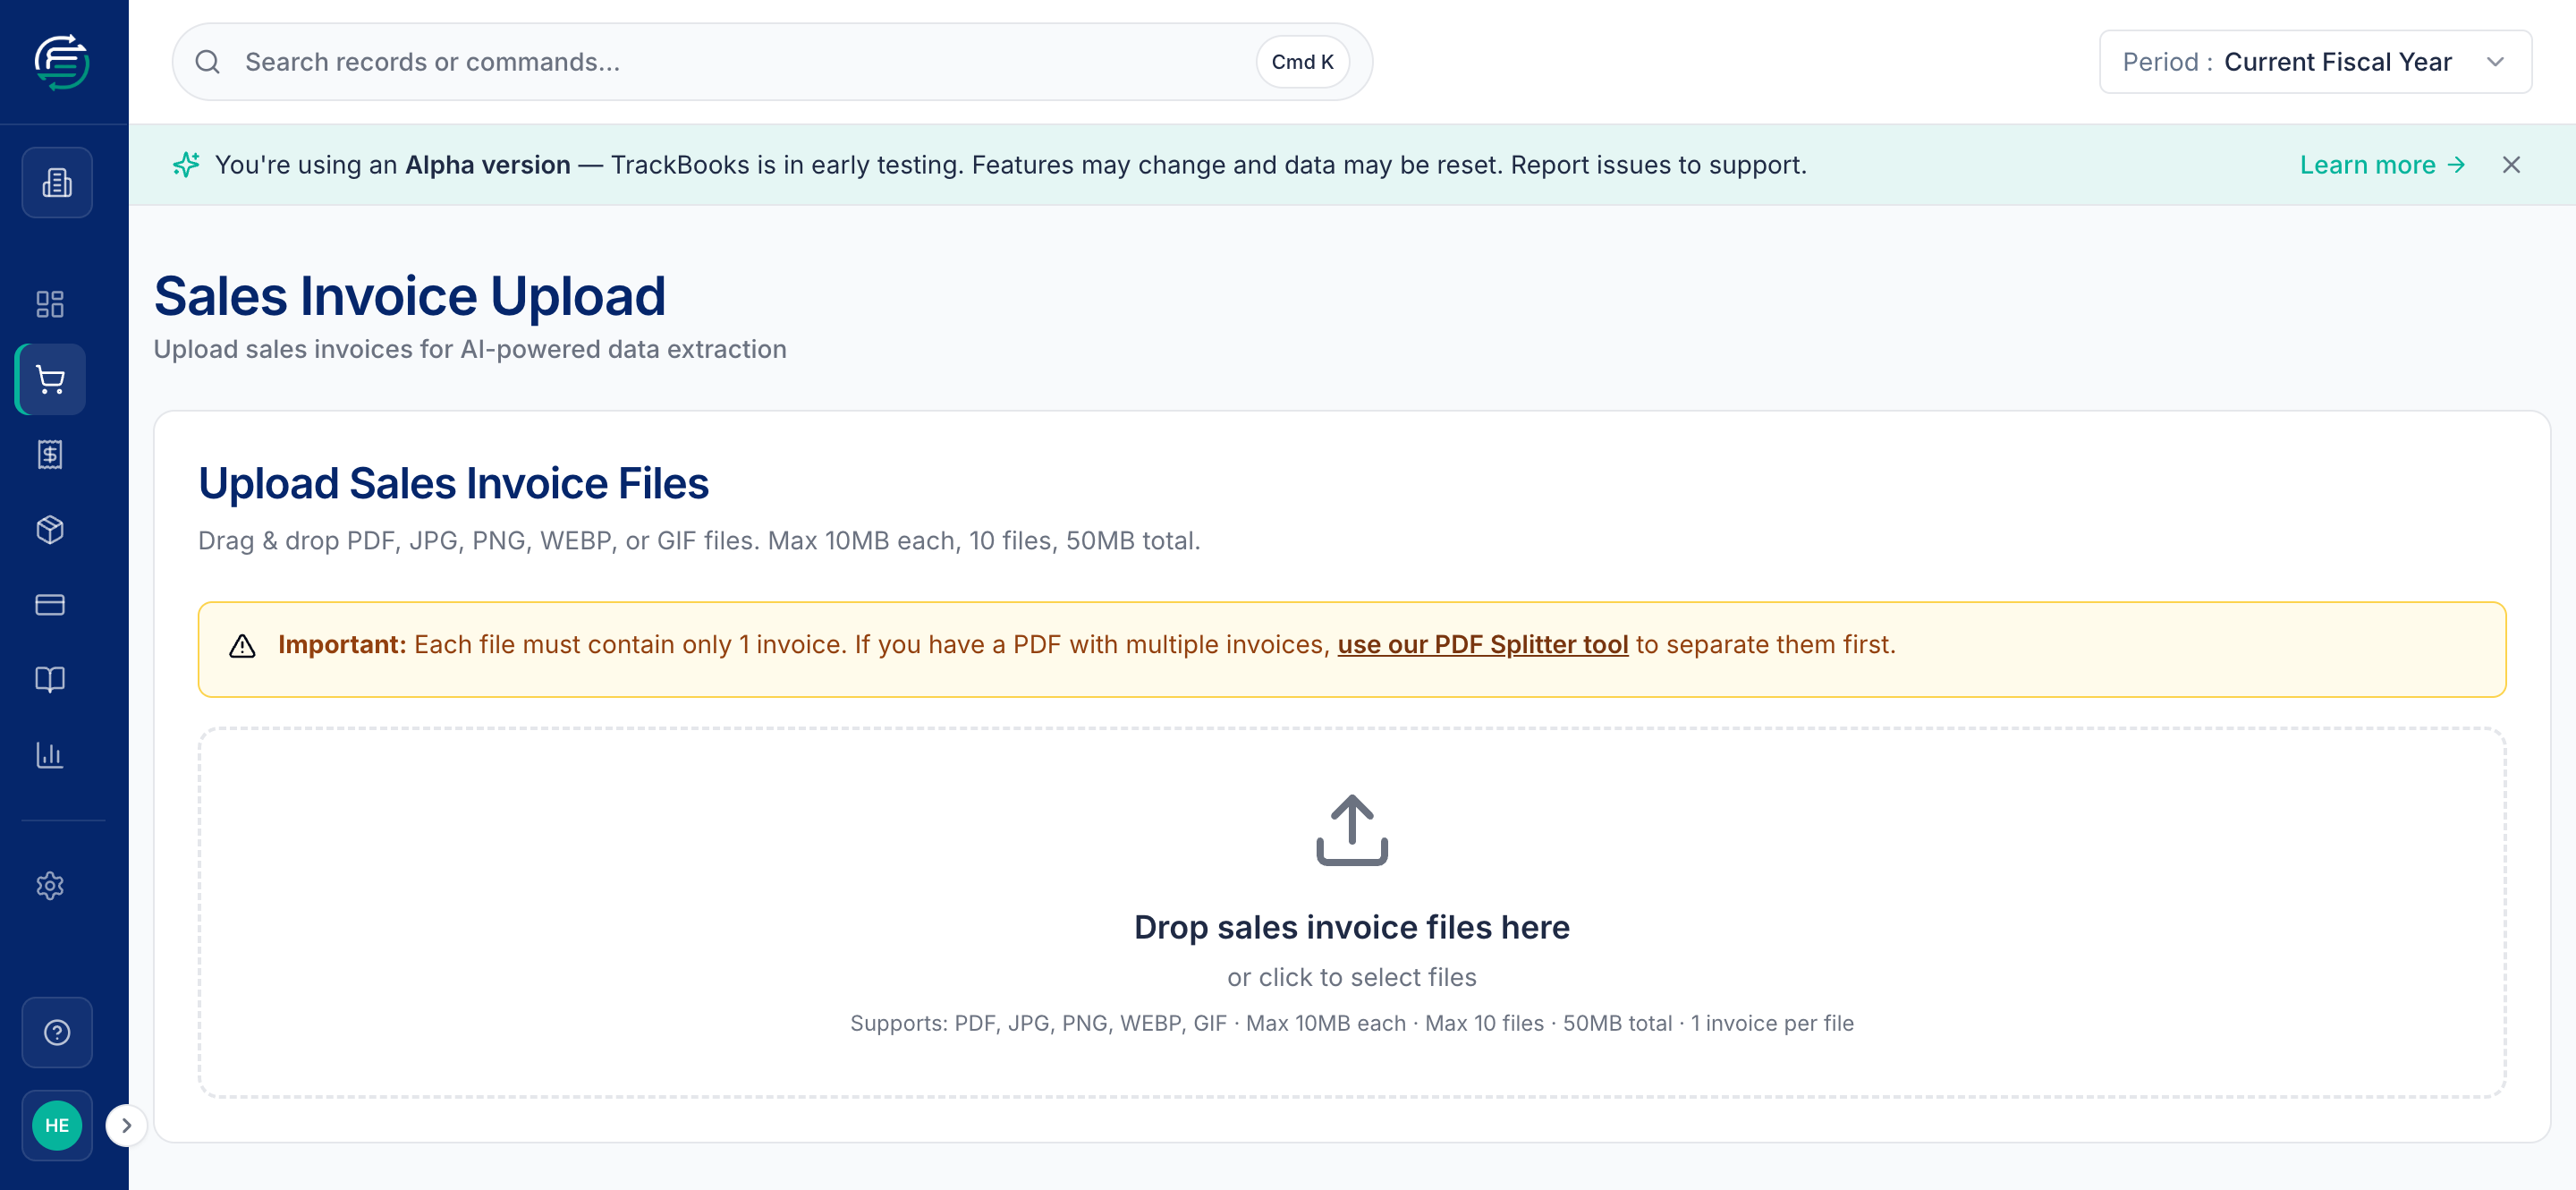
The limits are shown on screen: PDF, JPG, PNG, WEBP, or GIF, up to 10 MB each, 10 files, 50 MB total.
One invoice per file
Each file must contain a single invoice. If you have a PDF with several invoices in it, split it first with the built-in PDF Splitter tool (linked on the upload screen) — otherwise AI will mix the data together.
2. Let AI extract, then open the review queue
After upload, TrackBooks reads each document and creates a Draft invoice marked for review. Open it from the Invoices list to verify the extracted data on the same review screen described next.
AI extracts — you verify
TrackBooks never silently changes financial data. AI fills in what it reads from the document, errors and all, and waits for you to confirm. (A real example from this app: an uploaded invoice came through with the party name "PRECISION EQUIPMENTIEN GINEERING WORKS" — the OCR mangled "ENGINEERING". The review step is exactly where you catch and fix this before it reaches your books.)
Review and post (both paths)
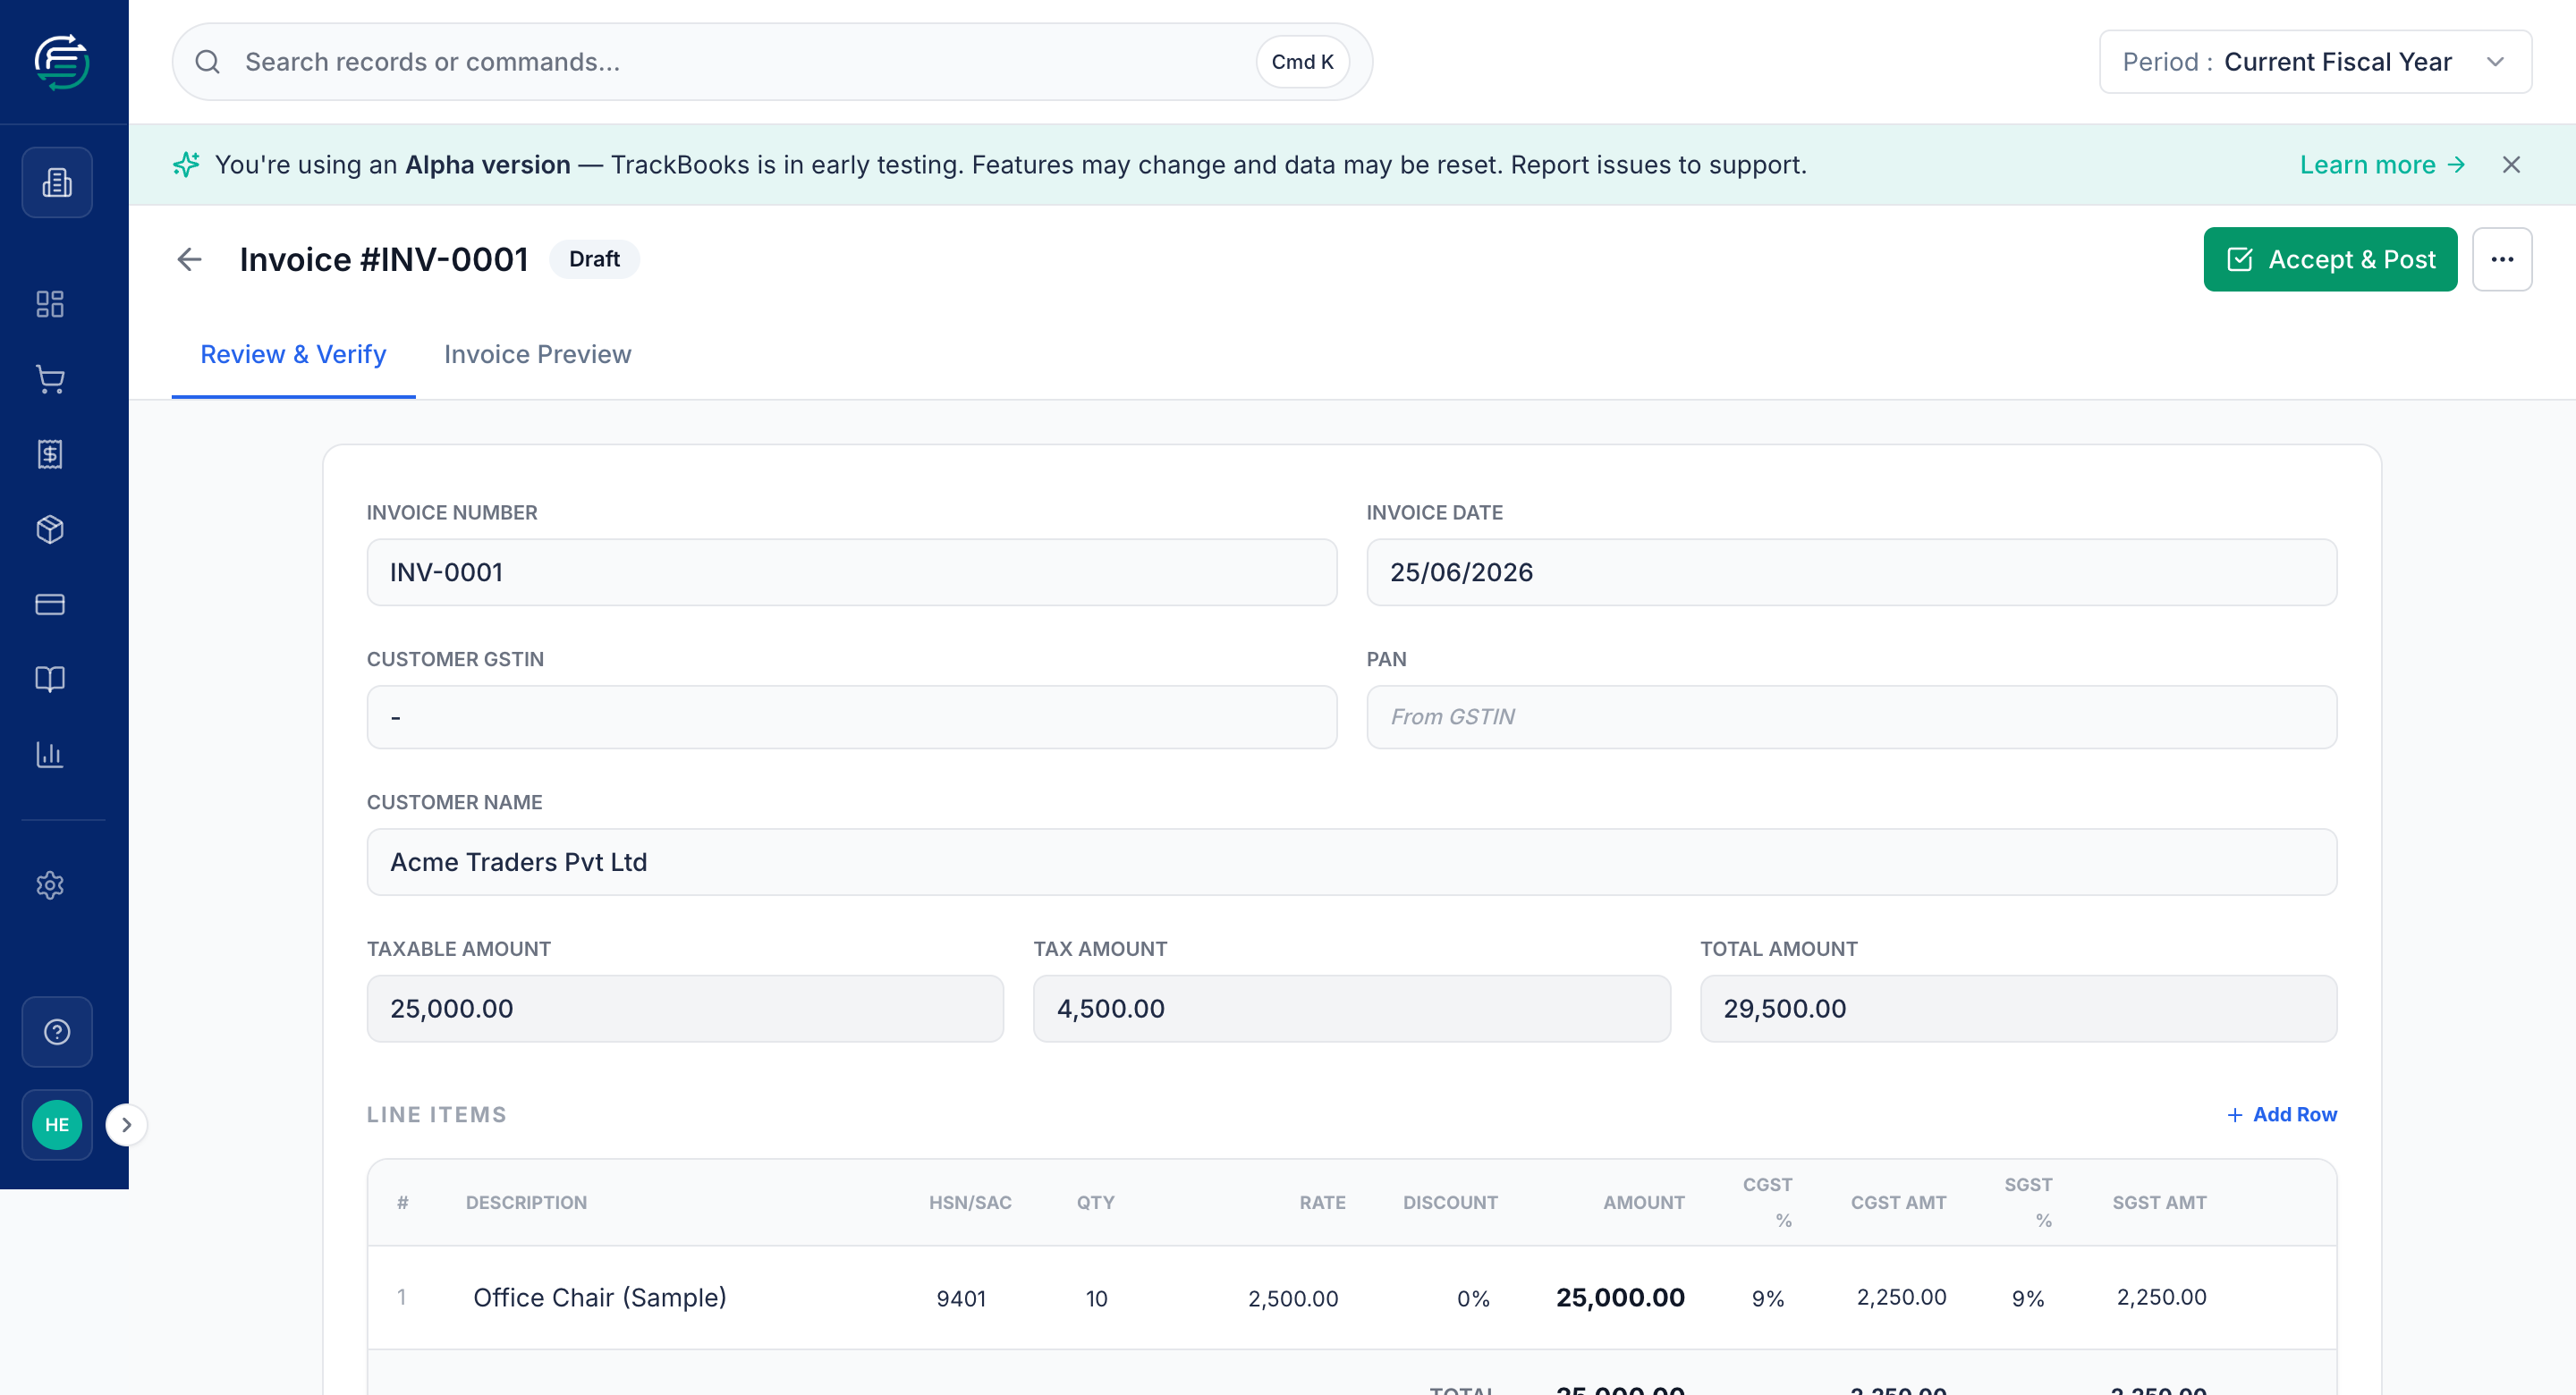
Whether you typed the invoice or uploaded it, you land on the Review & Verify screen.
1. Check the figures
The top summary shows the taxable amount, tax, and total. Below it, the Line Items and HSN Summary break down the tax per line and per HSN code, labelled Intra-State (CGST+SGST) or Inter-State (IGST).
2. Check the Journal preview
The Journal section is the most important part to understand: it's a preview of the double-entry accounting TrackBooks will record when you post. For a sale it reads:
| Account | Debit | Credit |
|---|---|---|
| Customer (Trade Receivables) | ₹29,500 | |
| Sales – Goods | ₹25,000 | |
| CGST Output | ₹2,250 | |
| SGST Output | ₹2,250 |
The preview must say Balanced (debits = credits) before you can post. You can edit the accounts here if needed — changes apply when you approve.
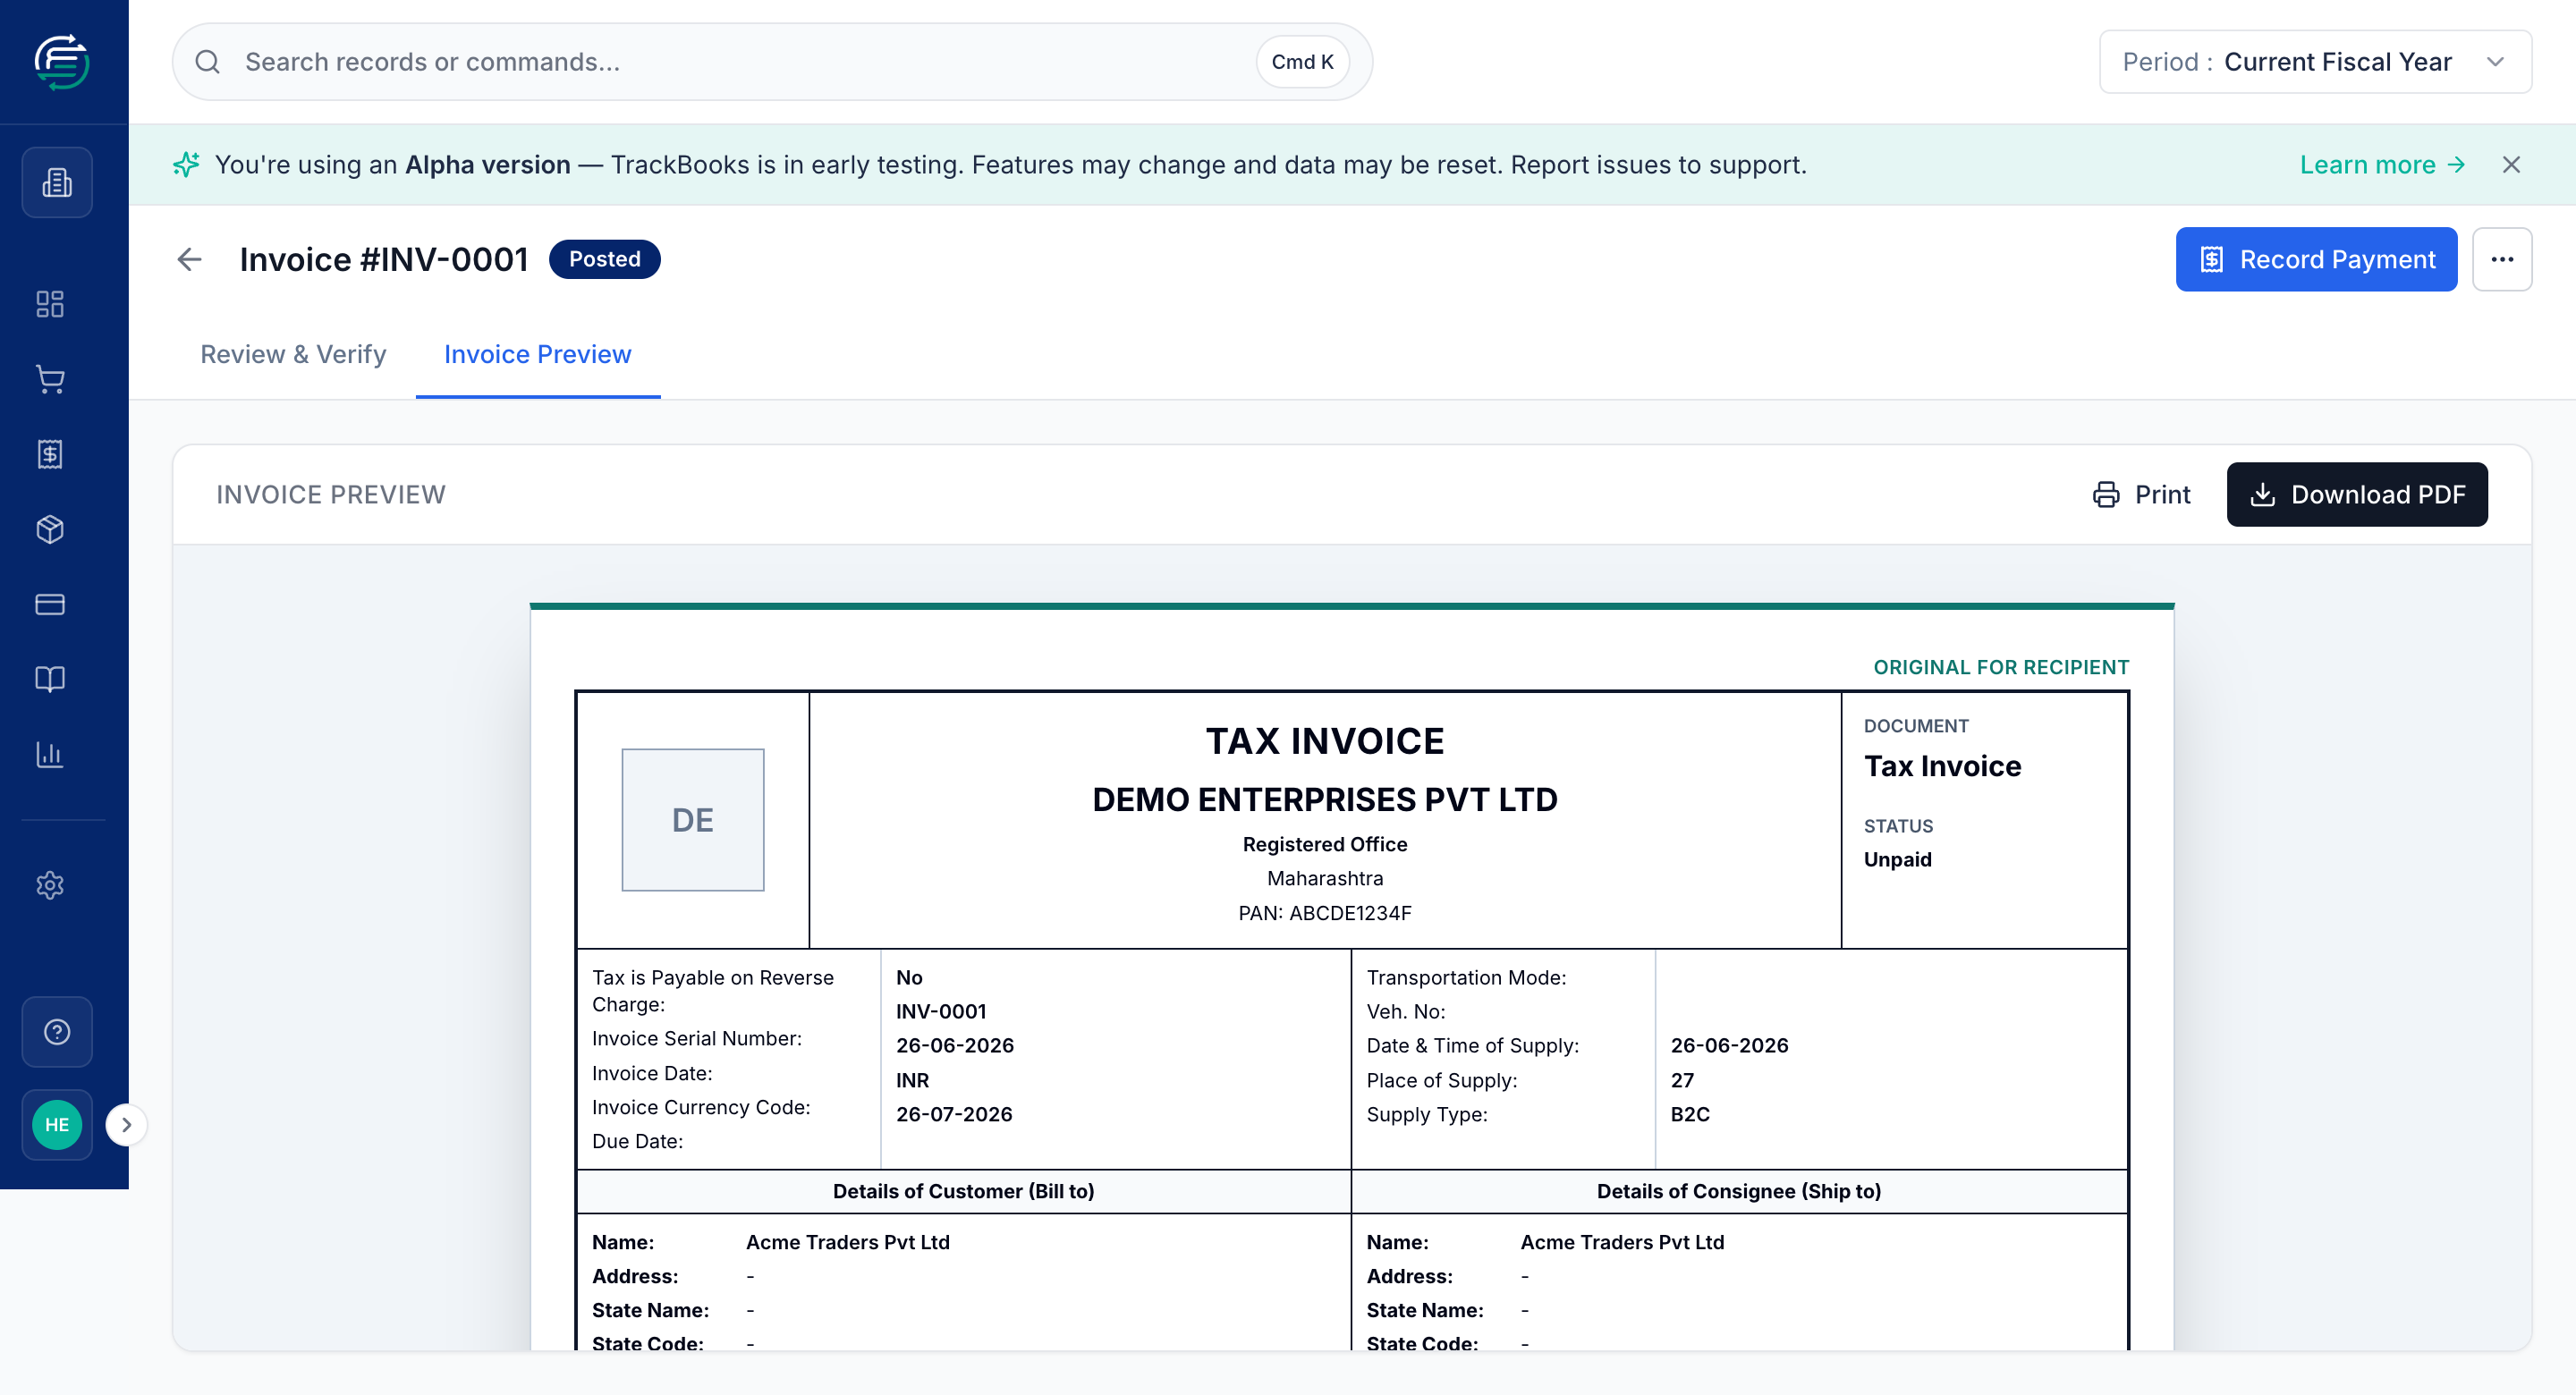
3. (Optional) Check the Invoice Preview
Switch to the Invoice Preview tab to see the finished, print-ready tax invoice — your company header, the GST breakup, and the total in words. From here you can also Print or Download PDF.
4. Accept & Post
When everything looks right, click Accept & Post. TrackBooks creates the journal
entry, updates your ledgers, and the status changes to Posted. The Journal section
now shows the real posted entry number (e.g. JE-20260625-0001) and the action button
becomes Record Payment.
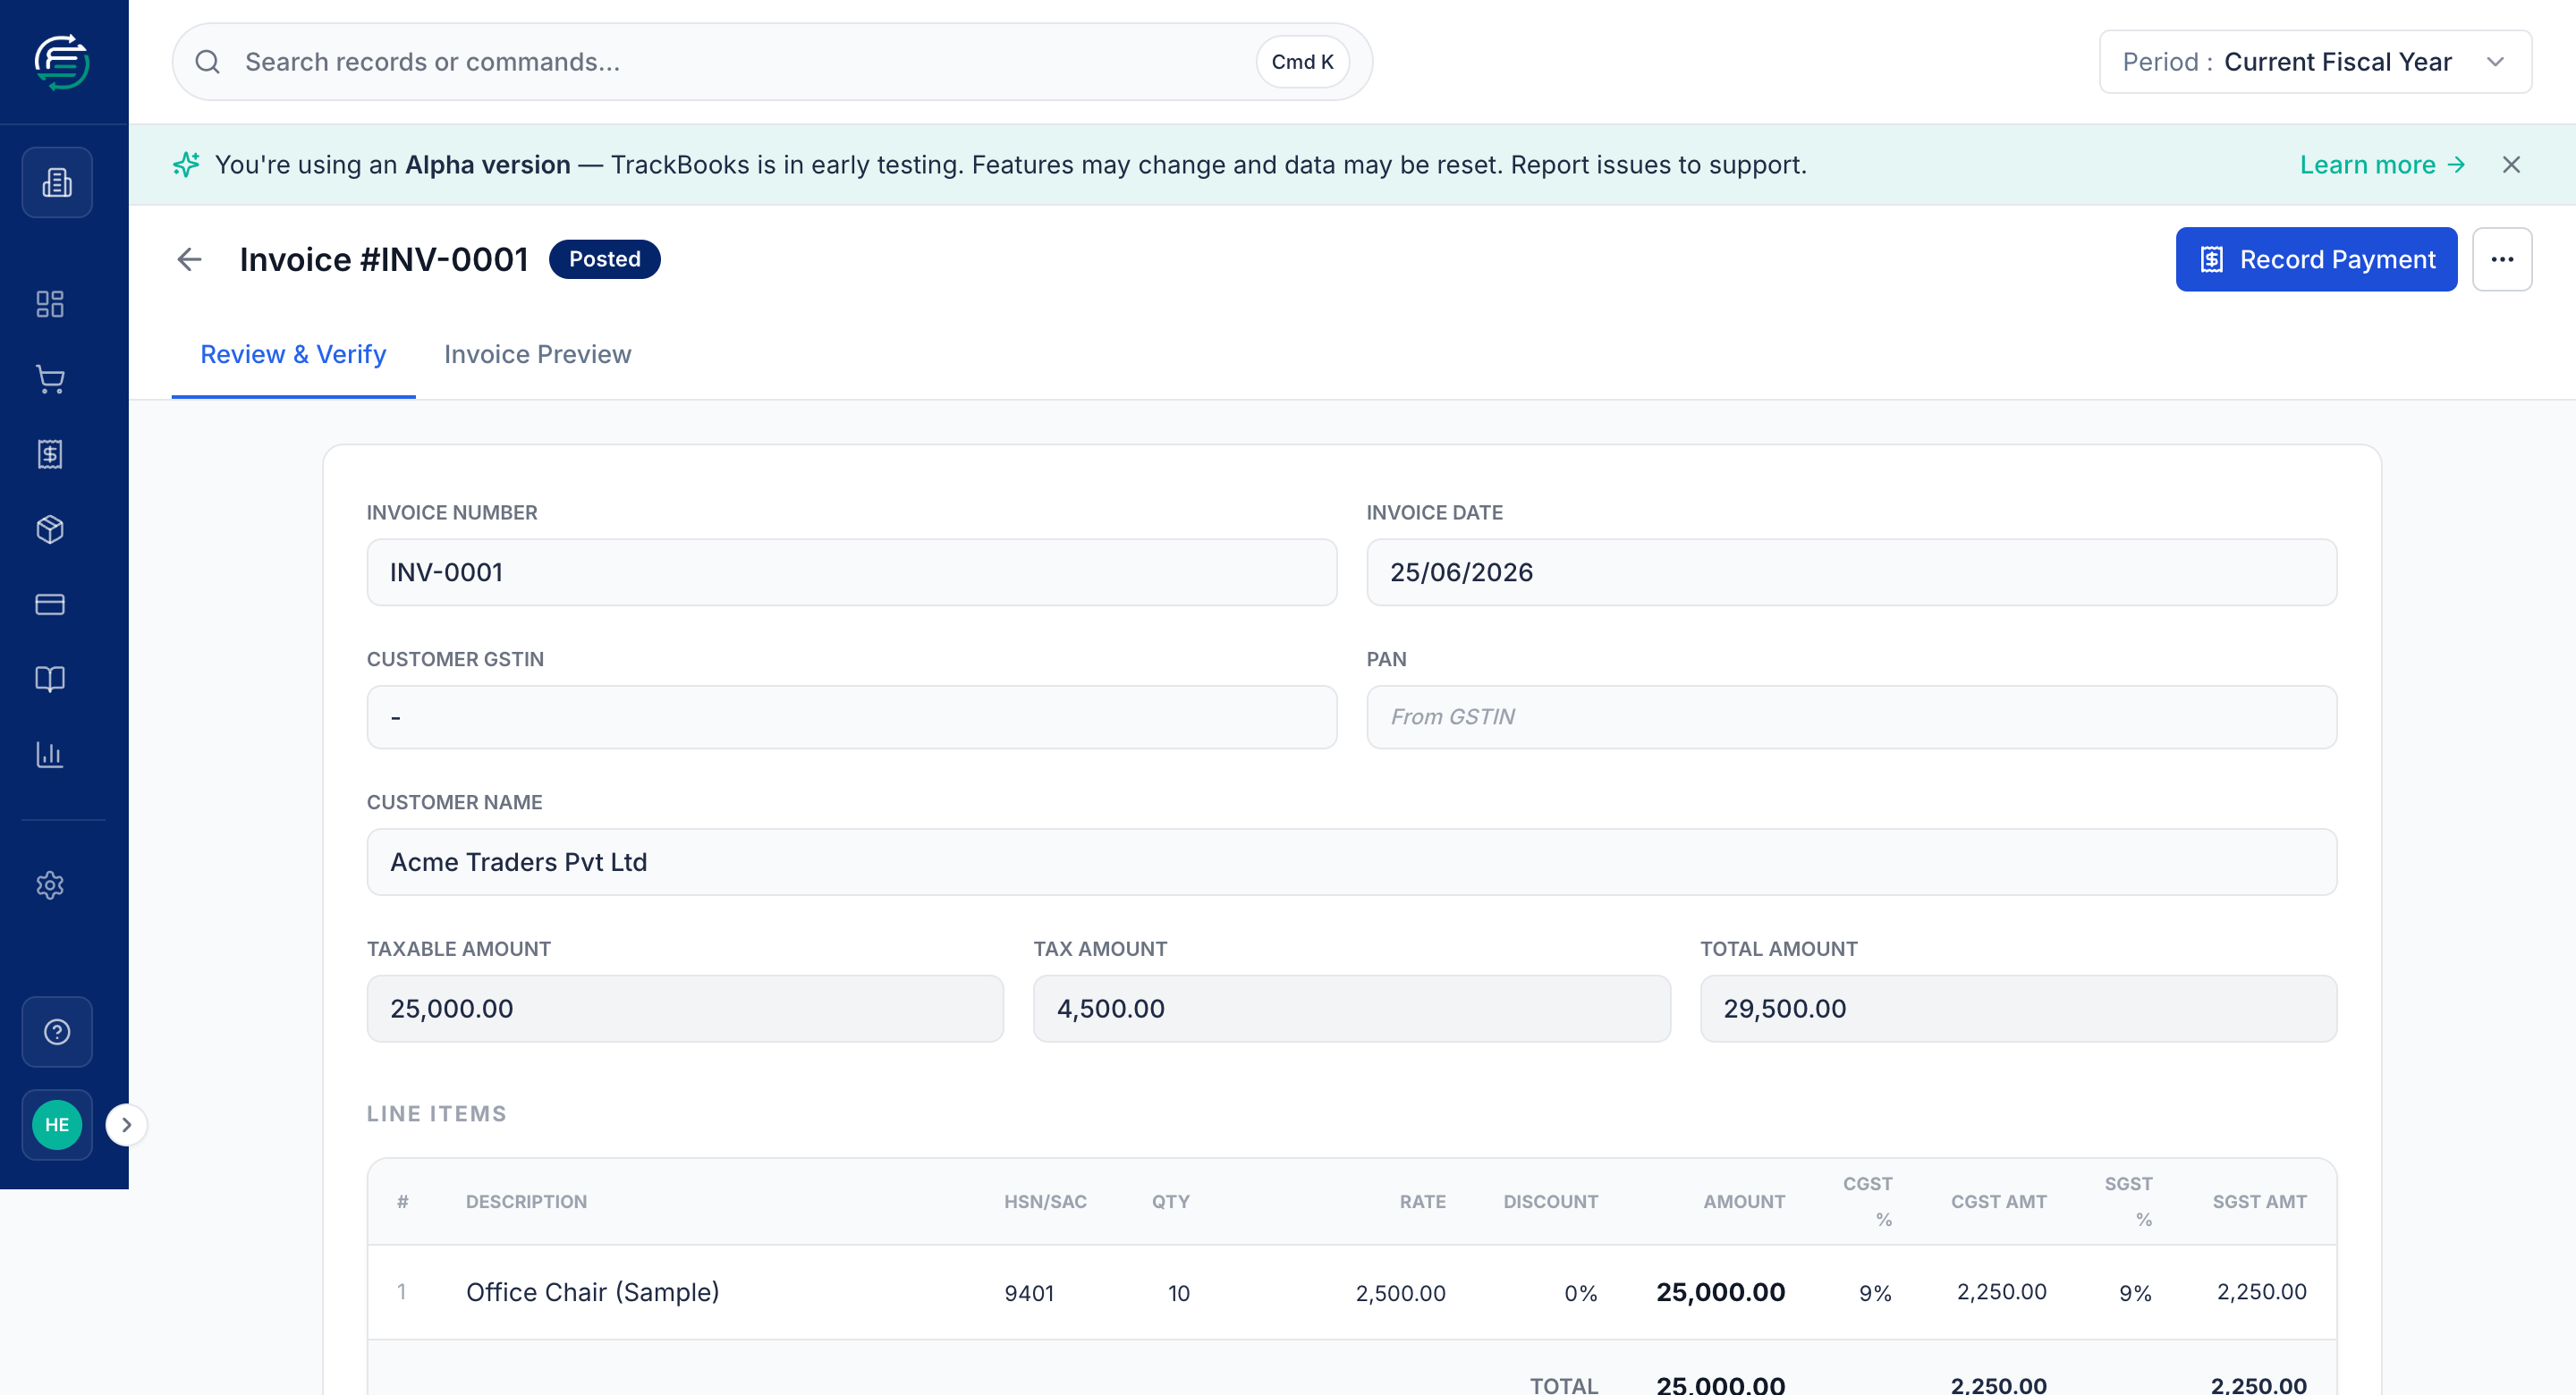
That's it — the invoice is now in your books, your receivables, and your GSTR-1.
Tips & common issues
Record a payment next
Once posted, use Record Payment to mark the invoice paid (fully or partly). That posts a second entry (Dr Bank / Cr the customer) and updates the payment status from Unpaid → Partial → Paid.
Made a mistake on a posted invoice? Void, don't delete
Posted invoices can't be plainly deleted — that would break your audit trail. Instead void the invoice (from its actions menu), which posts a reversing entry and keeps the original on record. Only unposted drafts can be deleted outright.
Common validation blockers
Posting is blocked until these are resolved: a missing Place of Supply, a CGST/SGST vs IGST mismatch for the supply type, or a journal that isn't Balanced. The review screen flags each of these inline.
Related guides
- File GSTR-1 — posted sales invoices flow into this return.
- Reconcile a bank statement — match customer payments against your bank.